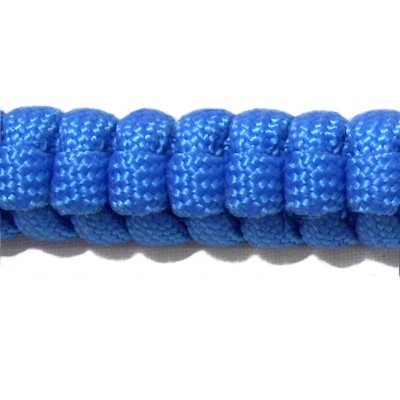
Description: The Stitched
Switchback is a unique sennit with both
horizontal and vertical elements. On the
back the loops are angled toward each other,
similar to other switchback designs. On
the front you see the "stitches" down the center
of the bar.
This decorative knot is easy to tie, and can be
used to create Micro-Macrame bracelets, belts,
purse straps, and other Macrame projects.
In the example shown, Paracord material was
used to make the strap. Be sure to read Cord Preparation
so you know how to get the material ready for
knotting.
Go to the video gallery to
see tutorials for other interesting
knotting techniques and designs.
Preparation: To practice,
you need one cord at least 60 inches long.
Secure one end of it to your board vertically.
When using this technique in a project, the cord
needs to be at
least 12 times the finished length you
plan to make. Cut the cord longer if you are
using the two ends as a closure, such as in a belt
or bracelet.
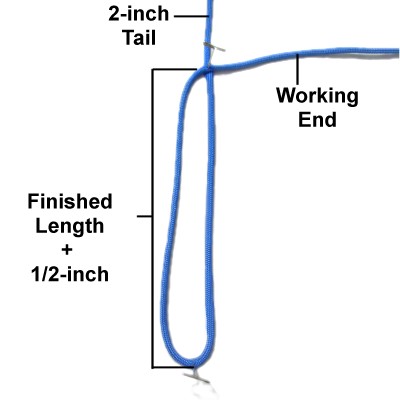
Step
1: Make a clockwise
loop 4 to 6 inches long, so the crossing
point is at least 2 inches from the
secured end of the cord.
When making a project with the Stitched
Switchback, the loop should be the finished
length + 1/2-inch.
See
information below
Important:
The finished length is the size of the area that
will be knotted,
from the crossing point of the loop down to the
fold.
You add an extra 1/2-inch to the length of the
loop because the sennit will compress when
tightened (will shorten).
The secured end (tail) needs to be long enough for
what you plan to use it for. So adjust the
crossing point of the loop to the most appropriate
position for your project. The tail will
become slightly longer when you tighten the bar.
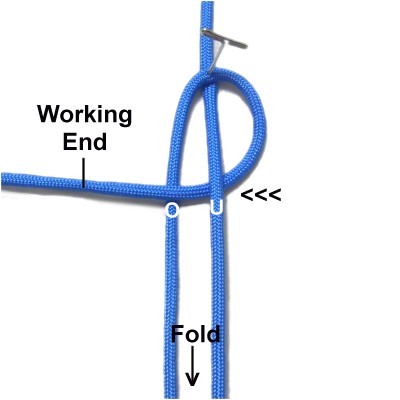
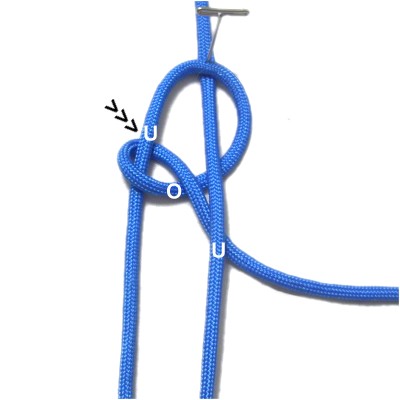
Step 2: Make a counter-clockwise
loop with the working end, passing it over
- under the two sides of the
first loop.
Rotate the working end clockwise,
and pass it through
the second loop under
- over.
Pass it under
the right
side of the first loop.
Tighten the knot firmly.
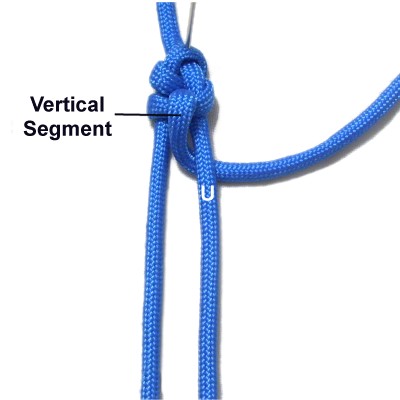
Step 3: Move
the working end horizontally
to the left, passing over
both sides of the first loop.
Rotate the working end clockwise.
Bring it underthe leftside
of the first loop,
and over
the horizontal segment inside
the loop.
Pull it toward you to tighten, keeping
it vertical.
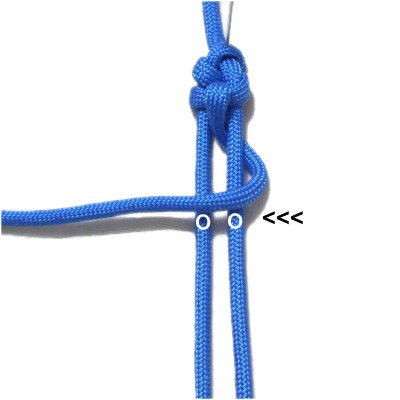
Step 4: Hold
the segment coming out of the previous
knot so it remains vertical.
Move the working end under
the right side of the first loop.
Fold it
carefully, so it doesn't become
kinked.
Step 5:
Move the working end horizontally
to the left, passing over
both sides of the first loop.
Fold it carefully so it doesn't become
kinked.
Rotate the
working end clockwise,
and pass it under
the left side of the first loop.
Pull it forward vertically,
passing over
the horizontal segment.
Tighten the knot firmly.
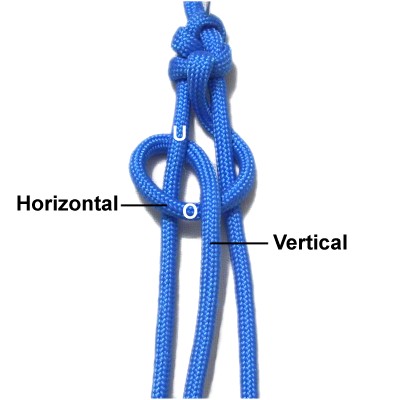
Step
6:Repeat
Step 4.
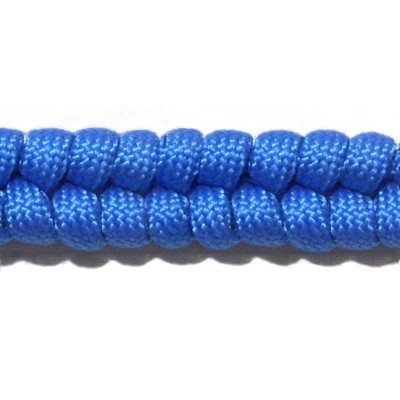
This image shows the vertical segments
that are the primary feature for the
Stitched Switchback design.
Step 7:
Repeat steps 5 and 6 several
times, until the last knot is close to
the fold of the first loop.
When you tighten each knot in the
Stitched Switchback bar, make sure the
vertical segments line up down the
center.
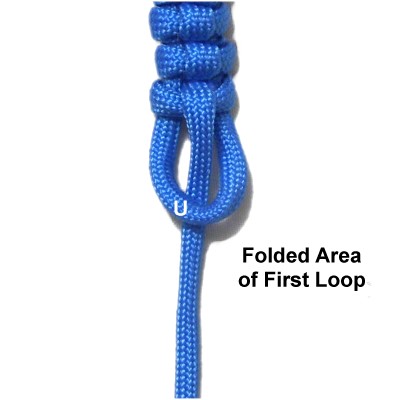
Step 8: Pass the
working end under
the folded area of the first loop.
Pull the secured end gradually
to tighten the strap. The folded
area should rest against the last knot,
so the working end is secured.
By using any
text or images on Free Macrame Patterns, you are
agreeing to ourTerms of Use