Description:
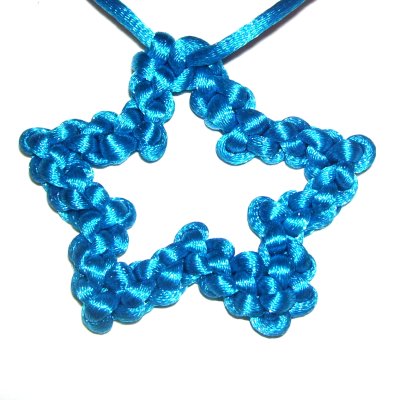
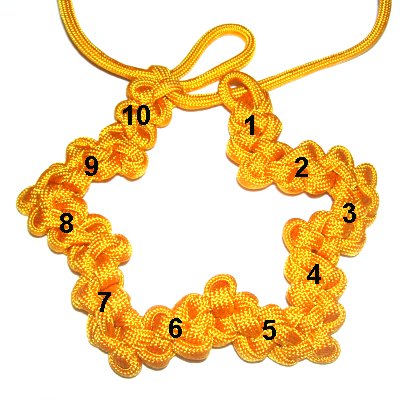
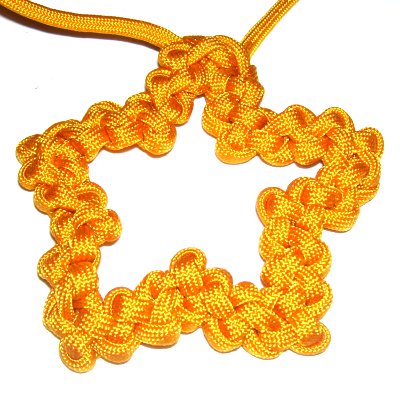
The Star Pendant features the decorative
knot called the Zipper Sennit.
You will tie short chains of zippers, followed by
a transition called an elbow.
This causes the design to change directions, which
forms the angles for the star.
This Micro-Macrame project is easy to make.
The size depends on the thickness of the material
used to construct the design:
Holiday Ornament: Use 4mm
material, as in the example shown below.
Earring Design: Use 1mm
size material.
Pendant: Use 2mm
material, as shown in the image above.
I
found this design on the Fusion
Knots website, under the
name DeAna Star
Sinnet.
Click on the image or link to visit this
site.
The video gallery contains tutorials for a
wide variety of combination knots and
techniques.
First Zipper Sennit
Preparation:
Cut one cord at
least 3 yards long, if using 1mm
-2mm material to make the Star
Pendant.
For 4mm
material, you need at
least 4 yards.
Prepare the ends of the cord using a method most
suitable for the material you are working
with. For Paracord or Satin, melt the tips
with a flame.
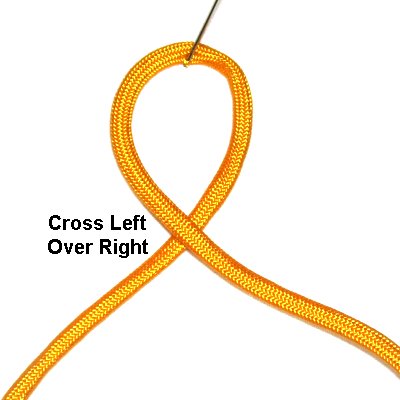
Step 1
<<
Make a loop
in the center of the cord, crossing left
over right.
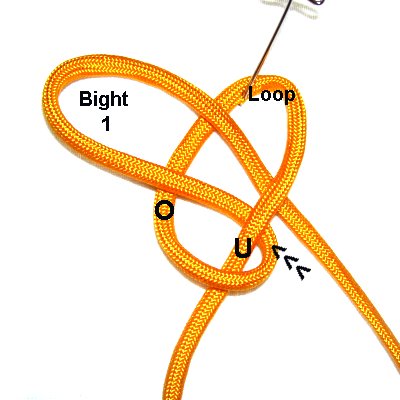
Fold the end resting on the right,
to make bight
1. >>
Push it through the loop from below (under
- over). >>
Step 1,
continued: Pull on the bight
to tighten the loop slightly,
but leave some space for now.
Mentally label the two ends where
they are resting now (right and left).
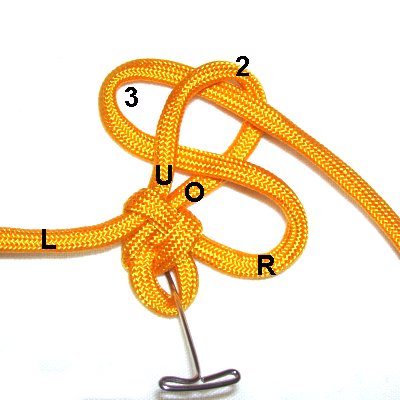
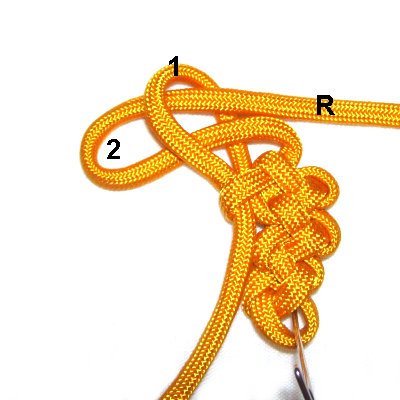
Step
2: Fold the left
end to form bight
2. Pass it through bight 1
from the top, which is over
- under.
Pull on the right
end to tighten bight
1. Leave a small loop at the
bottom as shown, and secure it.
Pull on bight
2 to tighten it, and then the left
end to make it smaller.
Fold the right
end to make bight
3. Pass it through bight 2
over
- under(from the top).
Pull on the left
end to tighten bight
2.
Tighten bight
3 by pulling on it, and then
reduce the size by pulling on the right
end.
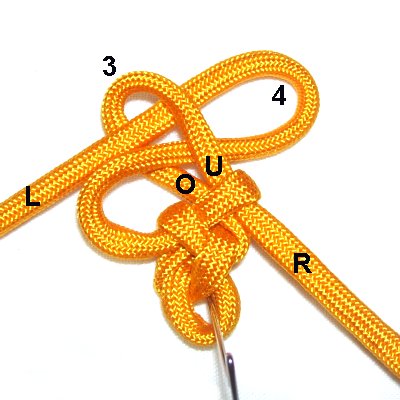
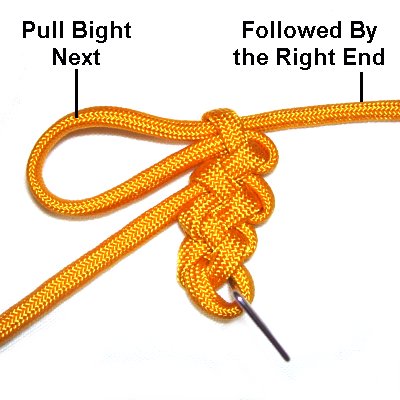
<<
Fold the left
end to make the 4th
bight. Pass it through
bight 3, and tighten it as you did in the
previous steps.
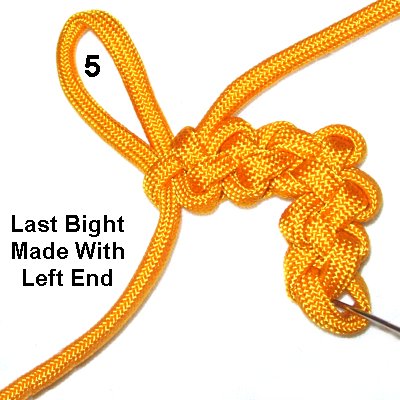
Bight
5 is made with the rightend. Pass it through bight 4
and then tighten it. >>
This completes the first Zipper Sennit for the
Star Pendant. Each time you repeat the
process, you will form a total of 5
bights, similar to what you just
did.
You can change this number if you wish, but make
sure you tie an odd
number of bights, such as 7, 9, 11,
etc. You must also be consistent
all the way through the design.
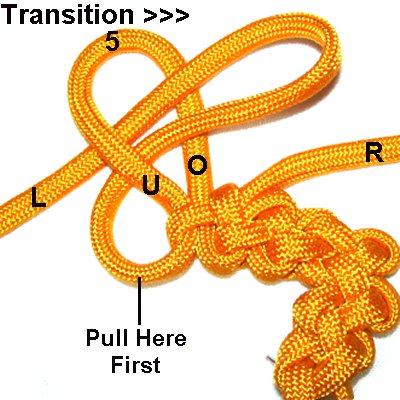
The next step is called a transition.
It's formed with a bight, but is different from
the regular zippers.
A transition is not
counted as part of the zipper sennits.
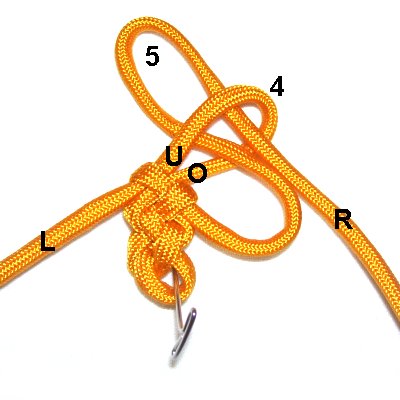
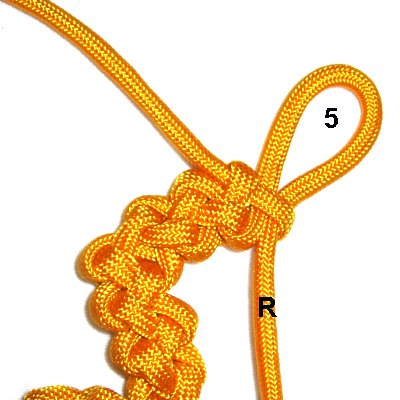
Right to Left Transition
Step
3: Use the right
end again,
and fold it to form another bight.
Pass it through bight
5under
- over
(from below).
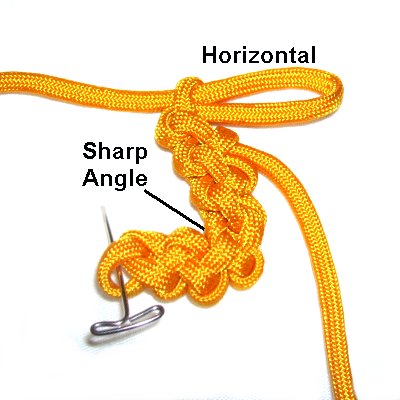
It should be horizontal.
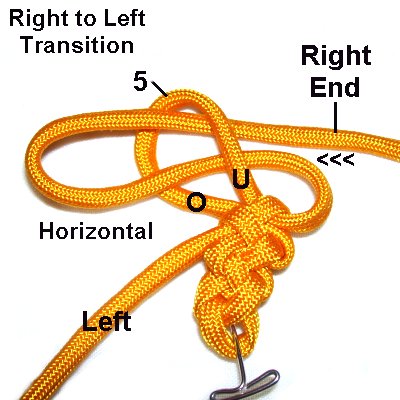
Important:
The only time you pass the bight through under
- over is at the
transitions. When you make the
Zipper sennits, it's always over
- under.
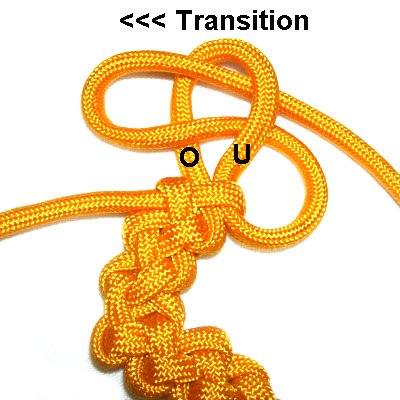
Step 3,
continued: Make sure the right end
is at the top,
and nothing is twisted.
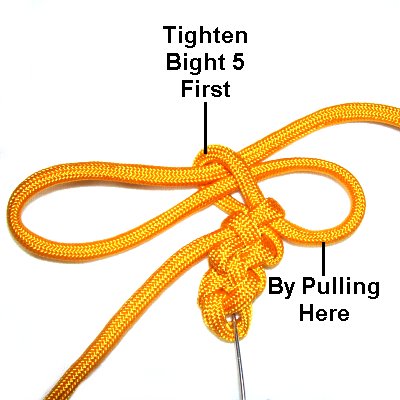
Follow the steps below to tighten
the transition:
<<
Tighten bight
5 first, by pulling on the
segment at the lower
right.
Pull firmly
on the new
bight, and then reduce the size by pulling
on the right end. >>
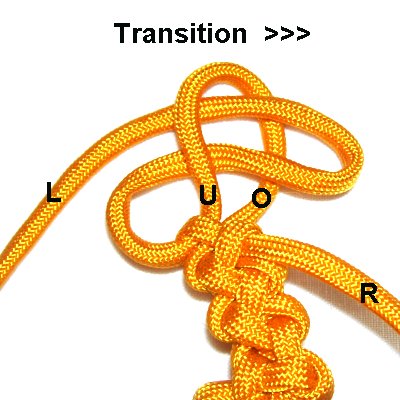
Second Zipper Sennit
Step 4: To start the
second Zipper sennit for the Star Pendant,
fold the left
end to make bight
1.
Pass it through the transition over
- under, heading vertically.
Tighten by pulling on the right end,
followed by bight 1, and then the left
end.
Important:
Start counting the bights afterthe
transition is completed, so you don't include it
in the count.
Remember that you make a total of 5 bightsin each section of the Star Pendant, unless
you have previously decided to change the number.
Bight
2 is made by folding the right
end. Pass it through bight 1 over
- under.
Try to arrange it horizontally,
so the corner is sharp.
Tighten by pulling on the left end,
followed by bight 2, and then the right
end.
Step
4, continued: The next step is to
make bight
3 with the left
end.
Bight 4
is made with the right
end.
The 5th
bight will be made with the left
end.
The transition is then made left
to right, following the
instructions below.
Left to Right
Transition
Step
5: Form the bight for the
next transition in the Star pendant using
the left
end.
Pass it through bight
5under
- over
(from below).
Pull on the area indicated at the lower
left, to tighten bight 5. Pull on
the new bight firmly, and then the left
end.
After you
tighten the transition, make sure the
bight is horizontal.
The previous Zipper sennits for the Star
Pendant should be manipulated to form a
sharp angle.
Design Details
Step 6:
Repeat the same process to make the rest of the
Star Pendant design, alternating directions each
time.
Below are a few details:
You need a total
of 10zipper
sennits to create the star.
The 3rd Zipper sennit starts and ends with
the right
end.
The transition
will be made moving right
to left, with theright
end.
Make sure you pass the bight through under
- over, the same as all the other
transitions.
The 4th
section of Zipper Sennit starts and ends
with the left
end.
The next
transition is made left to right,
using
the left
end.
Step
7: Continue on,
alternating directions, until you have
10
sections of Zippers.
Be sure to count the sennits,
not the angles.
The 10th section should begin and end
with a bight made by the left
end.
Finishing Touches
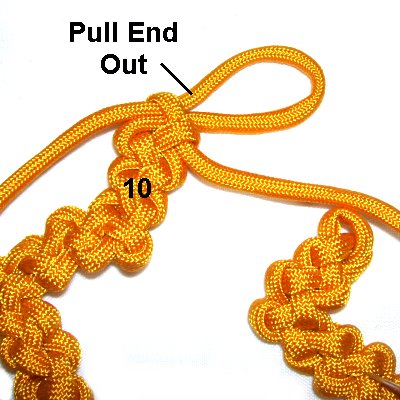
Step
8: Locate bight 4 in the
10th sennit. Pull the end out of the loop,
moving left to right.
Don't
remove the entire bight, just
the part leading to the tip of the
cord.
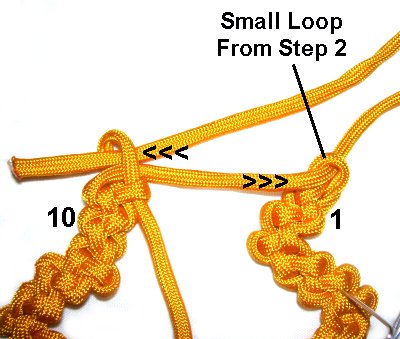
Step
9: Pass the left
end through the small loop you
made in section 1 (step 2).
Enter it from the front.
Bring the end back to the left, and pass
it through bight
4 (section 10), where you pulled
the end out in the last step.
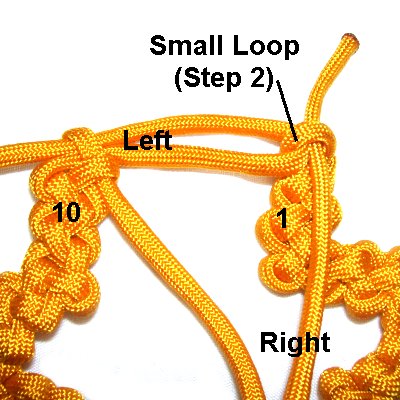
Pass the right
end through the small loop in
section 1 (step 2), from the front.
Pull both
ends to tighten the top of the
Star Pendant.
Step
10: Arrange the various
segments and angles as needed to form the
star shape.
The best way to finish off the ends is to
slide them through the back of the knots
in the upper area.
Another option is to attach other cords to
them, for the necklace. A button
knot in that area looks good, too.
By using any
text or images on Free Macrame Patterns, you are
agreeing to ourTerms of Use