|
|
| |
|
|
<<
Standard Tightening
Tightened
with Loop
>>
|
|

|
|
|
|
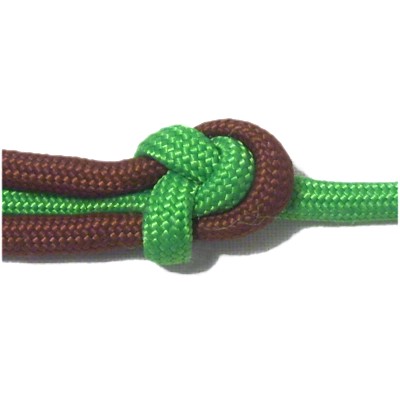
The Sheet Bend is a Figure 8 Knot tied around
another cord. It's similar to the Linked
Overhand knots, and is a great way
to connect two cords.
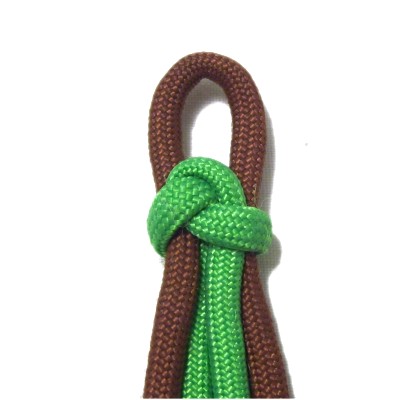
One of the cords forms an adjustable
loop, so this knot can be used for
jewelry, belts, and similar projects that require
a clasp. It can also be used as a mounting
technique using the loop as a picot.
The standard tightening (image above left) will
result in three ends heading one direction and one
in the opposite direction.
When tightening it with a loop (image above
right), you can adjust one end so it rests with
the other three. |
|
| |
|
| |
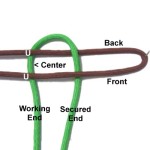
| To practice, you need
two cords at least 18 inches long. It's
helpful if they are different colors. |
| |
| |
| |
|
|
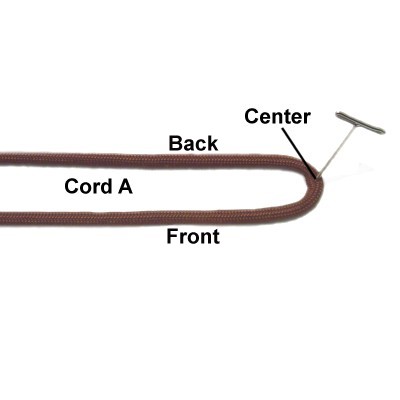
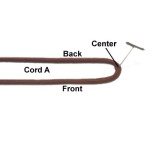
Step
1: Fold one cord in half
and secure it horizontally on your board.
The center fold should be on your right.
Mentally label it cord A. |
|
|
|
|
|
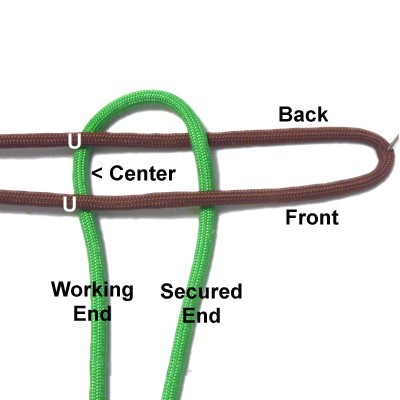
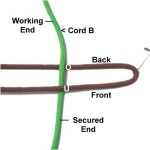
Step
2: Slide the other cord
through cord A vertically, passing under
- over the two segments.
Mentally label it cord
B, and
secure the portion closest to the
front of your board (secured end).
|
|
| |
|
|
|
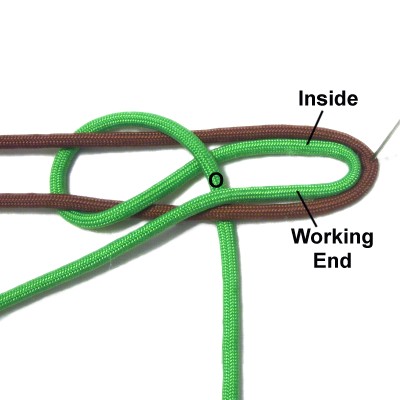
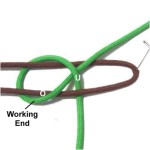
Step
3: Start a counter-clockwise
loop by moving the working end of
cord
B forward (towards you), passing
it under
both halves of cord A.
Adjust cord B so the center
of it rests between
the two halves of cord A.
|
|
| |
|
|
|
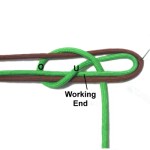
Step
4: Complete the loop
by passing cord
B over
the front half of cord A, and under
cord B.
|
|
| |
|
| |

|
|
Step
5: Curve the working end of
cord
B to the right, then back to the
left.
Follow the shape of the folded area of
cord A, so that cord B nestles inside it.
Pass over
the secured segment of cord B.
|
|
| |
|
| |
|
|
Step
6: Move the working end of
cord
B further to the left, passing under
- over the two parts of the loop.
|
|
| |
|
| |
|
|
Move the secured
end of cord
B horizontally to the right.
Tighten the knot slowly, until it's
firm.
To use the Sheet Bend as a clasp, complete
the next step to make a loop. |
|
| |
|
|
|
|
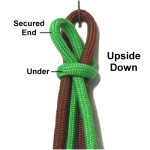
Turn the knot upside down so you can
see the back of it. Pull on cord
A to make a loop, adjusting it
to the size you need.
Pass the secured end of cord
B under
the loop, so it rests vertically with
the other cords.
|
|
| |
|
|
|
|
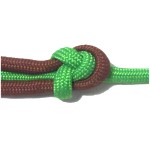
This is what
the completed knot will look like with a
loop at the top.
Remember that it's adjustable, so cord
A will need to be used for other
knots if
you want to prevent it from moving.
|
|
|
|
| |
|
| By using any
text or images on Free Macrame Patterns, you are
agreeing to our Terms of Use |
|
|
|
| Have
any comments about the Sheet Bend? Contact
Me. |
|
|
|

|
|
|