Description:
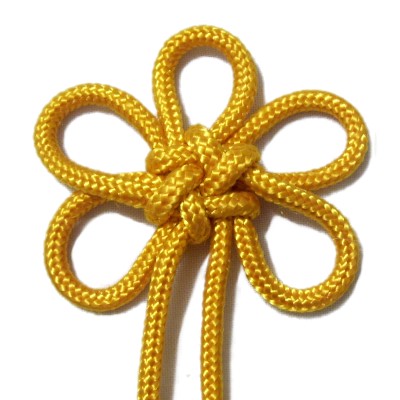
The Round Brocade knot represents the
concept of completeness, balance and good
fortune. In some books it's called the
Chinese Flower knot.
In the center is a round crisscrossed area. On the
outside are five loops, which can be any
size.
This decorative knot is a challenge to
construct. I recommend you make the loops as
large as possible when you first learn it.
After you have practiced the first time, repeat
the same process and make the loops smaller.
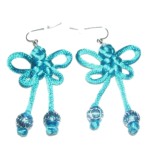
These Butterfly
Earrings feature the Round
Brocade Knot along with a Chinese Button
Knot.
They are challenging to make, but give it
a try after you have practiced both knots
a few times.
Click on the image or link to visit the
page.
Step 1:
Cut one cord at least 72 inches long. Try to
use 2mm to 3mm size material when practicing the
Round Brocade Knot, so there is more room to work.
Mentally label each half (right and left).
Secure every loop and bight after you make them.
Here is the key
to the images and instructions:
LOOPS = Labeled 1 - 5
BIGHTS = Labeled A - D
BACKWARD = Toward the back of the board
FORWARD = Toward the front of the board
ARROWS (>>>) = Show direction and
angle
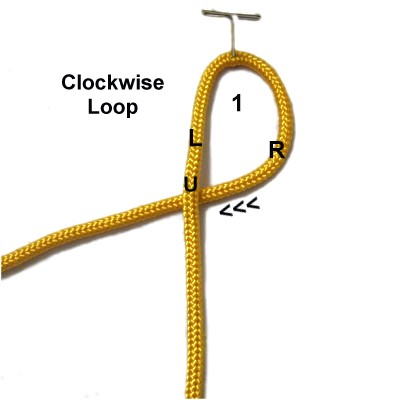
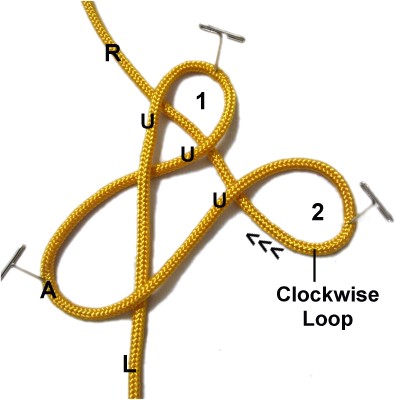
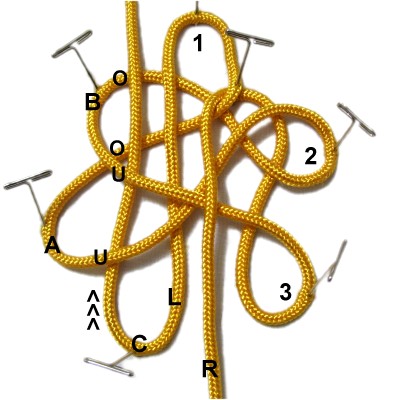
Step
1: Secure the cord at
the center. Secure the left
half closer to the front of your
board.
Make a clockwise
loop with the right
half of the cord, passing it under
the left half. Mentally label it loop
1.
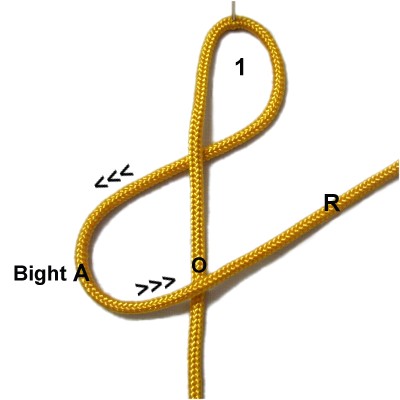
Move the right half
diagonally to the left, then curve it to
form bight
A.
Move it backward diagonally
to the right, passing it over
the left half of the cord.
Step
2: Rotate the right
half of the cord clockwise
to form loop
2, passing it under
at the crossing point.
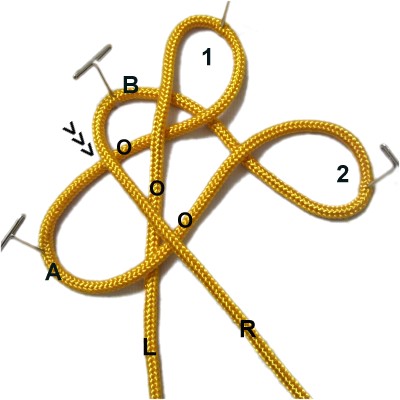
Move the cord under
loop 1.
Curve the right half of
the cord to the left, forming bight
B.
Move it forward and to the right diagonally,
passing it over
everything in it's path.
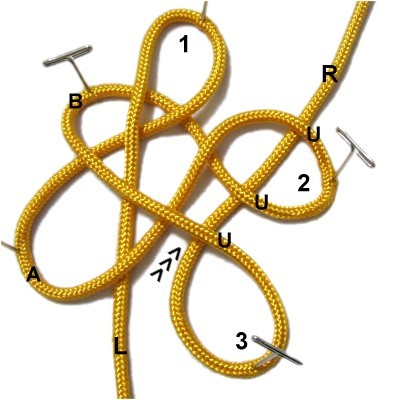
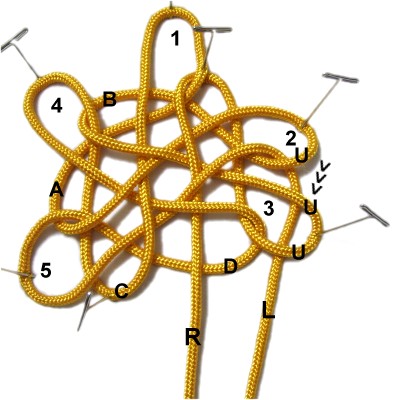
Step
3: Rotate the right
half of the cord clockwise
to make loop
3on the right.
Pass it underat
the crossing point and underloop
2.
Move the right half
of the cord throughloop 1,
passing under
the right side of it (from below).
Move it forward,
passing it overeverything in
it's path. It should rest to
the right of the left half.
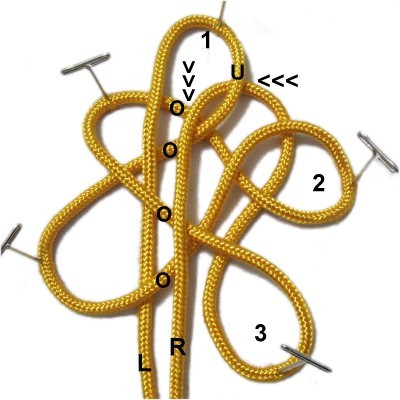
Designer's Tip:
Before moving on, make sure you can clearly see
the loops and bights.
The second half of the Round Brocade knot is where
all the weaving takes place, and you will need to
identify different parts of the knot.
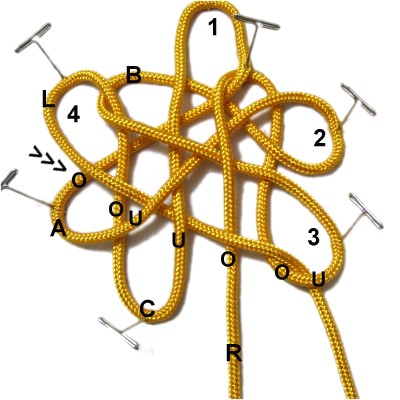
Step
4: Move the left
half of the cord backward vertically,
passing it under
- under - over - overbights
Aand B.
Mentally label it bight
C.
Step
5: Rotate the left
halfcounter-clockwiseto make loop
4 on the
left.
Weave it to the right through bights A and
C, passing it over
- over - under - under the four
segments.
Bring it over
the right half of the cord and over
- underloop
3.
Move the left half
of the cord back to the left, passing it under
the right half of the cord. Mentally
label it as bight D.
Weave it through bights
A and C, passing it through the
four segments under
- under - over - over.
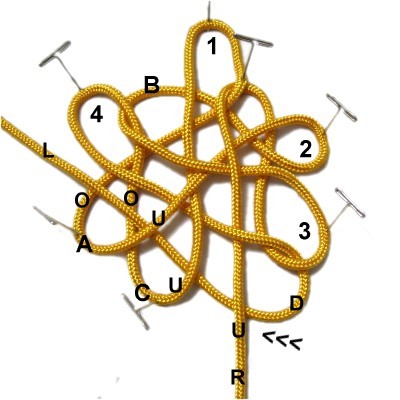
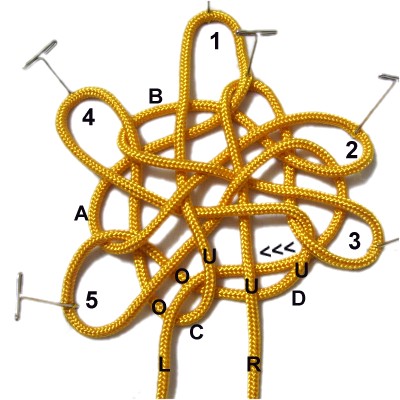
Step
6: Rotate the left
halfcounter-clockwise
to make loop
5.
Move it through the knot diagonally,
by passing
it over
- over - under - underthe first four segments (bights C
and D).
Pass itoverthe next four
segments and under
the last one (loop 2).
Pass the left half
of the cord underloops
2 and 3, heading forward.
Pass the left half under
the next three segments, heading left
horizontally.
Then curve it slightly so it's more
vertical, and pass it over
the last two segments. Make sure
this takes place to
the right of
loop 5, not through it.
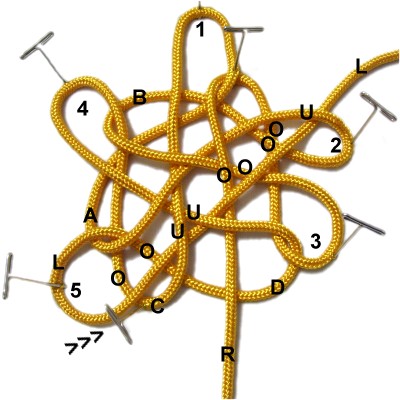
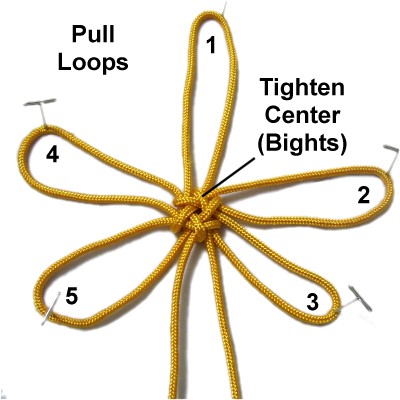
Step
7: Identify and secure the
crook of loops
1 - 5.
Remove the pins from all the bights.
Pull all five loops and both ends to
tighten the bights, which form the center
of the Round Brocade knot.
Reduce the
size of each loop in the order they were
made.
This Round Brocade Knot usually looks like
a flower, but you can increase the size of
two loops if you want a butterfly shape.
By
using any text or images on Free Macrame
Patterns, you are agreeing to ourTerms
of Use