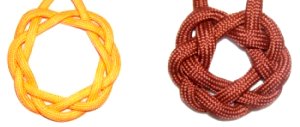
Description: These two Ring
Knots are fun and easy to make, so they can be
used in children's projects. They are both very
similar, but the process for tying them is
different.
Ring shaped knots can be used to make coasters,
rugs and pot holders, if you make them large.
You can make rings and pendants if you use fine
material to make them small.
In the images, I used 4mm Paracord, which
resulted in a pendant-size design.
The Keyhole
Knot starts with a small variation of a
Panel knot,
called a Postage Stamp. The
bottom is changed to create an opening in the
center.
The Celtic
Ring Knot is a type of circular
braiding. You can use a separate piece of
material, or the end of the same cord, to
thicken the design.
I
found the Keyhole Knot on the Fusion
Knots website.
Click on the image or link to visit the
site, and be sure to check out the video
gallery. It contains free
tutorials for a variety of unique knot
designs.
Celtic Ring Knot
The Celtic Ring knot is made with several angles,
which need to be secured. Make sure you
use a project board and sturdy pins.
You need one piece of material, at least 36
inches long.
To double the knot with the same
cord, make sure it's at least 72 inches
long.
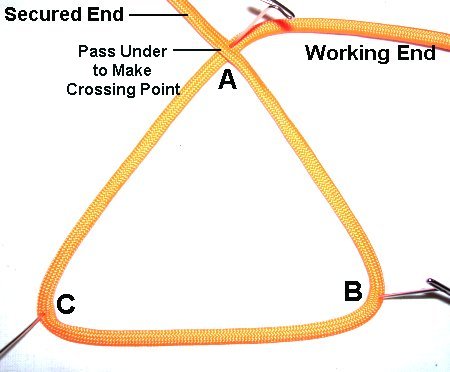
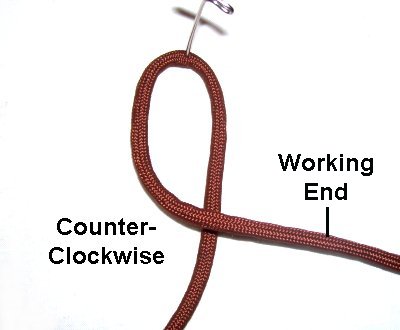
Step 1: Secure one end
to your board. Use the working end to
make a triangle, moving in a counter-clockwise
direction.
Mentally label the three angles A - B -
C, as shown.
At the top, pass the working end under
the secured end to make the crossing
point.
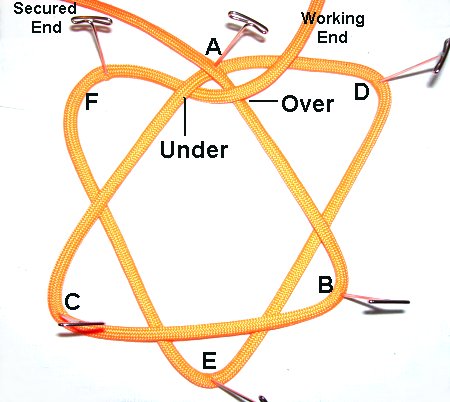
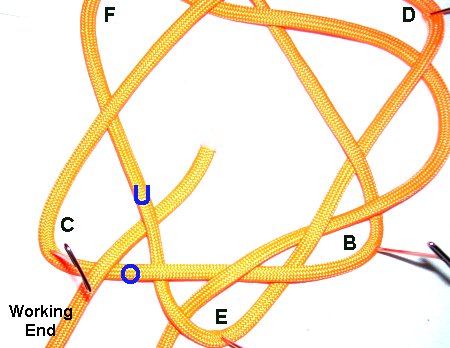
Step 2: Use the
working end to make an inverted
triangle, moving counter-clockwise. The
working end needs to pass under
angles B and C.
At the top, pass the end under
- over the two segments at angle A.
Mentally label the new angles D - E - F
as shown.
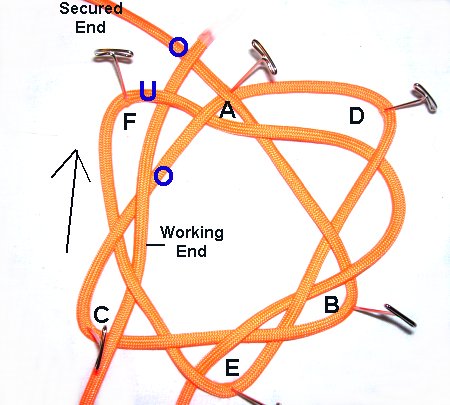
Step 3: Move the
working end left
to right, passingunderangle D,
located in the upper right
area of the Celtic Ring Knot.
Step 4: Bring the
working end down to angle
B,at the
lower right.
Pass the end over
- under the two segments
heading right
to left.
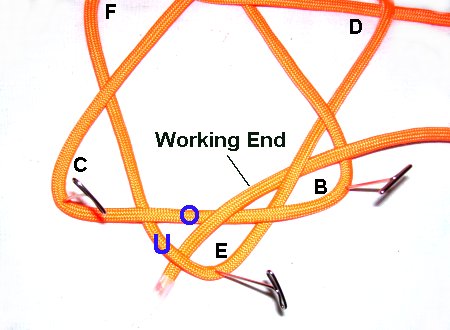
Step 5: Bring the
working end down to angle
E at the bottom center area of
the knot.
Pass it over
- under the two segments,
moving right to
lefton a downward
angle.
Step 6: Bring the end
to angle
C, which is on the lower
left.
Pass it over
- under the two segments,
movingleft to
righton an upward
diagonal slant.
Step 7: Bring the end
up to angle
F on the left.
Pass it over
- under the two segments,
heading vertically.
Bring it over
the secured end.
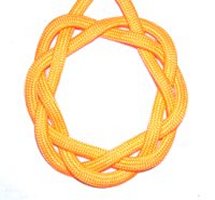
Step 8: Tighten the
design so it forms a round shape.
For a pendant, you can use the two ends
to make a necklace.
Or you can weave them through the top
of the knot and finish them off, for an
item like a coaster.
To thicken the Celtic
Ring knot, use either a separate cord, or the
working end.
Follow the path of the first knot, starting at thesecured end.
Keyhole Knot
This is the most challenging of the two Ring
Knots. You'll start off by making a Postage
Stamp Panel knot.
Cut one cord, at
least 36 inches long. You can double
this knot by cutting a second cord (optional).
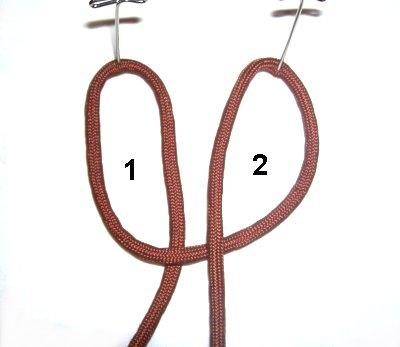
Step 1: Secure the left
end to your board.
Make a counter-clockwise
loop with the working
end.
Secure the loop at the crook (rounded
portion).
Step 2: Make a second
loop in the same manner, using the
working end. It should rest to the right
of the first one.
Make sure both loops are long and oval
shaped.
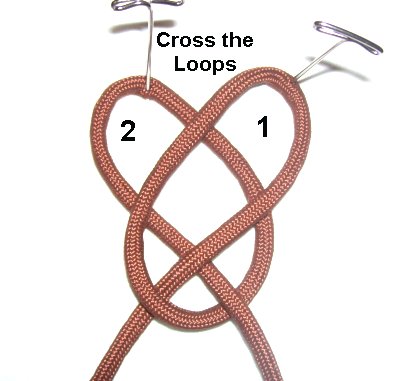
Step 3: Move Loop
1 to the right, so it rests
on top of Loop 2.
Move Loop
2 to the left,
so the center area is crossed as shown.
Re-secure both loops, and make sure
they are wide and open.
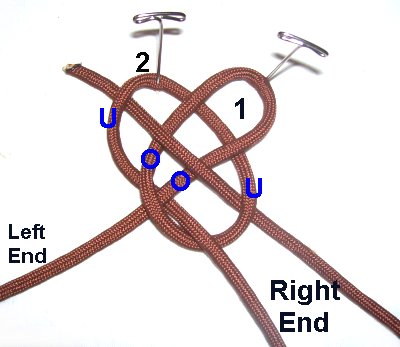
Step 4: Weave
the right
end through Loop
2, heading right
to left diagonally.
Pass under
the segment at the bottom,and over
the two
segments of Loop 1.
Pass it under
the crook of loop 2 at the top.
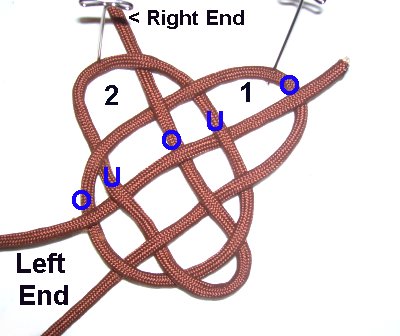
Step 5: Weave the left
end through
Loop 1, movingleft to
right.
Weave over
- under - over - under - over
the segments as shown.
Rotate
the knot so the ends are at the bottom.
Do
not flip it upside down.
Adjust the loops and tighten the knot
slightly.
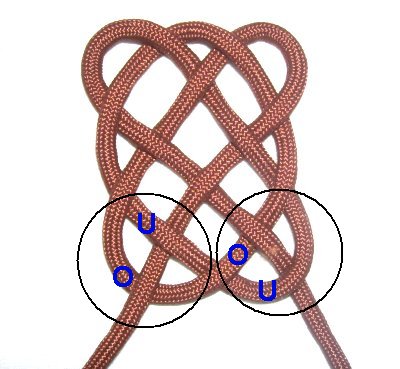
Note the areas circled at the bottom in the
image above. On the left,
the end comes out of the knot under
- over.
On the right,
the end comes out over
- under.
The next few steps will focus on re-positioning
the two ends, changing where they come out at
the bottom.
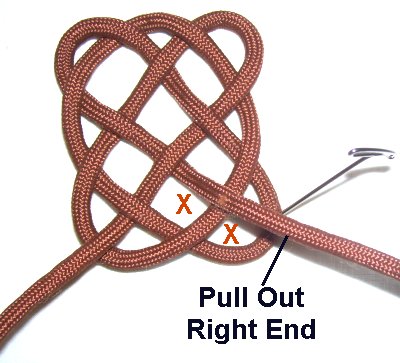
Step 6: Pull the right
end
out of the 2 segments at the lower right
area of the knot.
The areas are marked with an X.
Step 7: Move the
right end to the left
side of the knot for now, and secure it.
Secure the lower curved area where you
are working, to make sure it stays in
place.
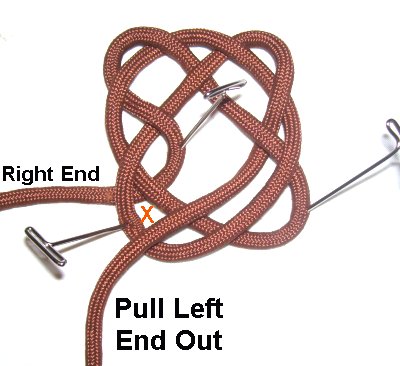
Step 8: Pull the left
end out from the under the
segment on the lower left.
The area is marked with an X.
Step 9: The ends
now switch places. Position the left
end so it goes over
- underthe
two segments on the lower
right.
Move the right
end(now on the left), under
- over the two segments at the
lower
left.
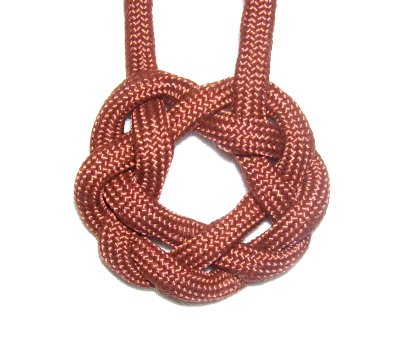
Tighten the Keyhole knot gradually,
starting at one end and removing the
slack a little at a time.
Ring Knots can be a challenge to
tighten, so take your time to form a
round shape.
By
using any text or images on Free Macrame
Patterns, you are agreeing to ourTerms
of Use