Description: The Rattlesnake
Bar is a very unique variation of the Switchback
design. It has three segments, and the one
in the center is raised. So it looks just
like a rattlesnake's tail if you make it around
a loop.
This is a thick, sturdy design that makes a
great decoration for a key ring. With flexible
material you can make a bracelet, belt or
strap.
The advantage to tying this design around a
loop is so you have part of that loop available
for a clasp, or to attach a key ring. This
pattern can be made with four cords, too.
Be sure to view the video
gallery, which contains
tutorials for many unique decorative
knots.
Preparation:
Cut one cord 9
x the finished length of the item you
wish to make. When practicing, the cord
should be at least 60 inches.
Read the bottom section of Cord Preparation
to learn how to prepare the tips if you plan to
use Paracord.
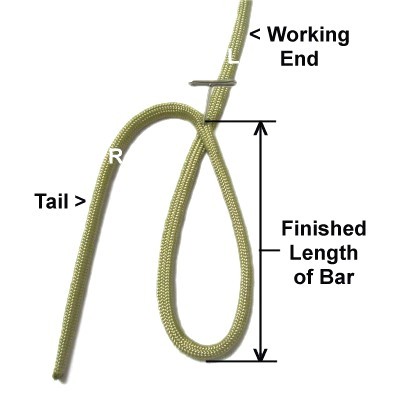
Step
1: Start from one end of
the cord and measure it 2
x the finished length. Fold
it at that point to form a loop, crossing
right over left. Make sure the short
tail is the RIGHT portion.
Adjust the loop so it's the finished
length you want to make. The short
tail should be 1-inch
longer than the loop.
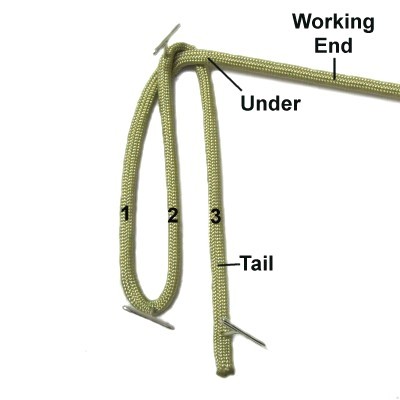
Bring the short
tail to the right,
passing under
the working end of the cord.
Arrange it vertically next to the loop.
Secure the crossing point of the loop
and the center fold, pulling the loop
taut as you do so. The tail should
be secured with tension, too.
Step 1,
continued: Mentally label the three
vertical segments:
Segments 1 and 2 are the loop, and segment 3 is
the tail.
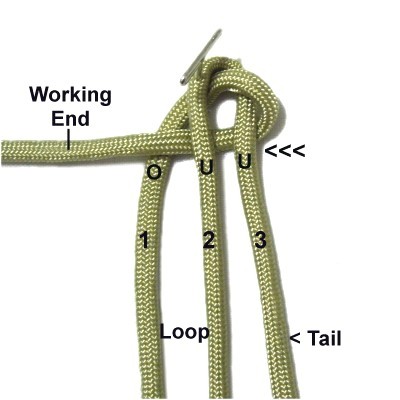
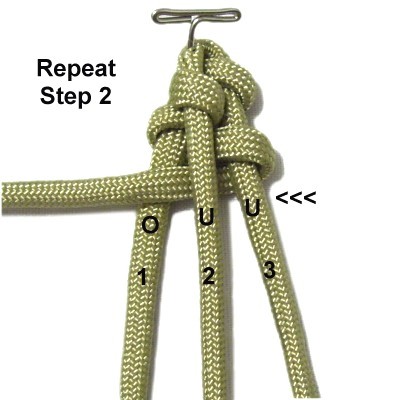
Step 2: Fold
the working end under
segments 2 - 3, and over
segment 1, heading right to left.
Tighten the area where it curves around
segment 3.
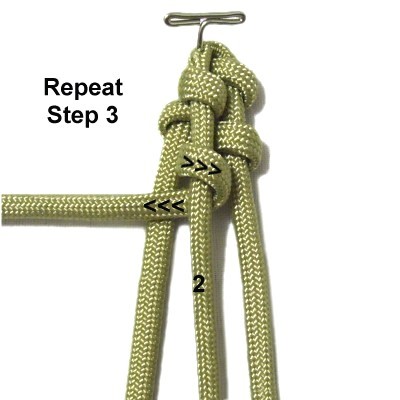
Step 3: Wrap the
working end aroundsegment
2. The arrows show the
direction.
Tighten it firmly and push it close to
the crossing point of the loop.
Make sure the working end rests over
segment 1 when you are done.
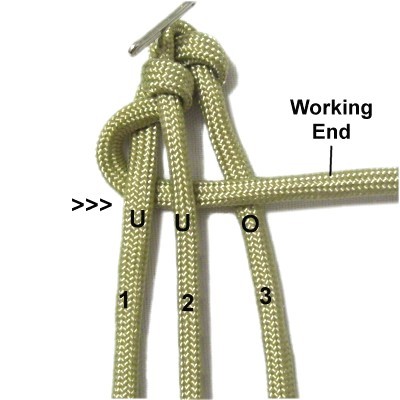
Step 4: Fold
the working end under
segments 1 - 2 and over
segment 3, heading left to right.
Pull the cord firmly to tighten the
area where it curves around segment 1.
Designer's
Tip: It's better to tighten each
area of the Rattlesnake Bar as you progress,
especially when you wrap around the middle segment
in step 3.
You should push everything close together to
eliminate any gaps.
Step
5: Repeat
Step 2.
Step
6: Repeat
Step 3.
Step
7: Repeat
Step 4.
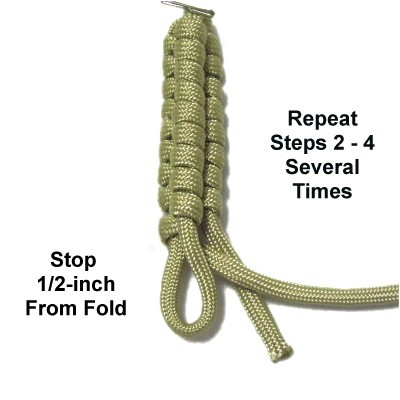
Step
8:Repeat
steps 2 - 4 several times.
Stop when the last knot is approximately 1/2-inch
from the folded area of the large
loop.
Make sure you stop after completingstep 4.
This will give you a 1-inch
loop for a clasp. Stop sooner if
you need a larger loop.
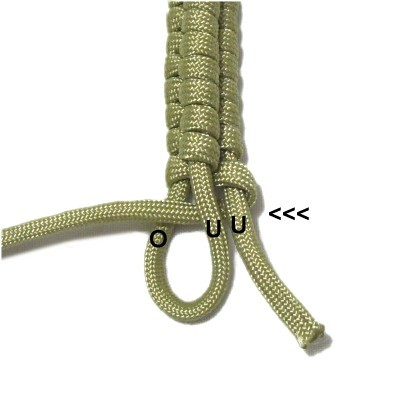
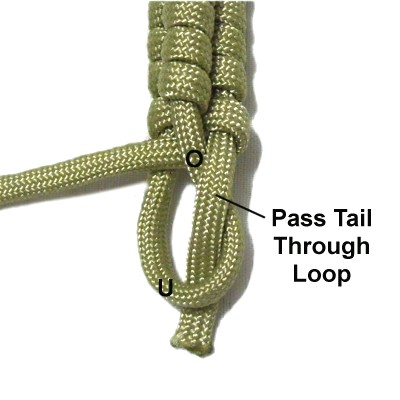
Fold the working
end to the left, passing under
the tail and through the loop under
- over.
This is the same as step 2.
Pass the tail
through the loop over
- under.
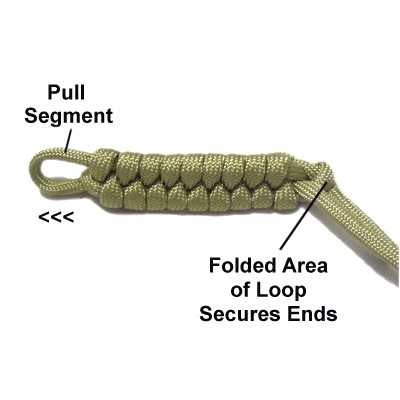
Step 9: Go back
to the crossing point of the large loop,
which is considered the top.
Pull one segment of the LOOP firmly,
until the folded area of the loop is
tight, which secures the ends.
Be sure you don't pull the tail.
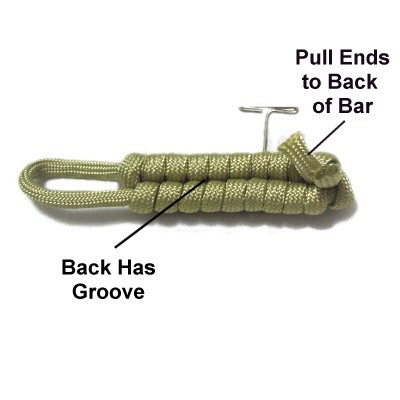
Turn the
Rattlesnake Bar so you can see the BACK,
which has a groove between the two
segments.
Pull the ends through spaces to the
back. This is optional
if you need the ends to form a clasp, or
want to decorate them.
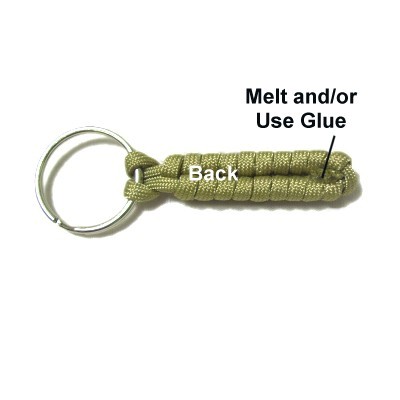
Complete any
final steps, such as adding a ring if
making a key chain.
Finish off the ends by melting and/or
using glue, depending on the type of
material.
By
using any text or images on Free Macrame
Patterns, you are agreeing to ourTerms of Use