Description:
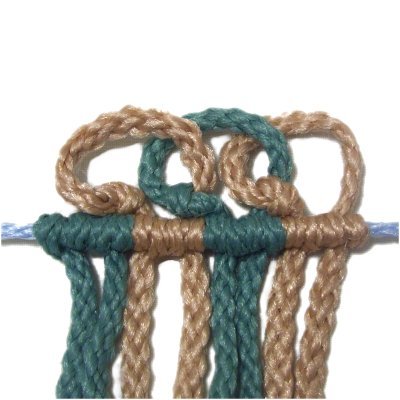
The Linked Loop Mount is a combination of
loops, Overhand knots, and Double Half Hitches.
Each cord is linked to the one next to
it.
This mounting technique can be used when attaching
cords to dowels and holding cords. It's not
as easy to do on a ring, since you need room to
move the knots. Once the ring is almost covered,
it's harder to make the loops.
Preparation:
You need 4 working cords to practice the
Linked Loop Mount, as well as one holding cord.
Secure the holding cord horizontally on your
board. Stretch it so it has tension.
Step 1:
Place the first working cord under
the holding cord vertically. Match the ends
so the center point is against the top edge of the
holding cord. Secure it at the center.
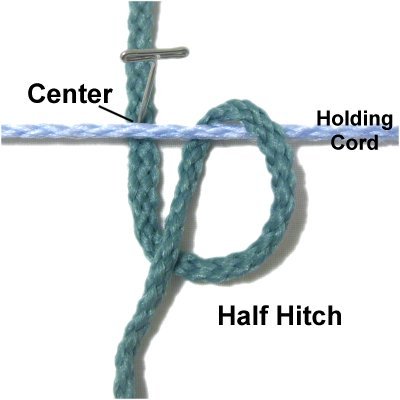
Attach the
lower portion to the holding cord with a
Double Half Hitch (DHH).
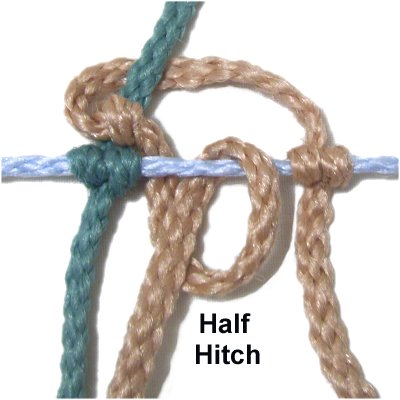
This image shows a single Half
Hitch. Make sure you tie two.
Repeat the same process with another cord,
placing it to the right of the first one.
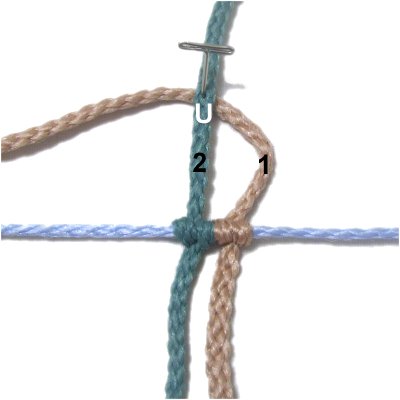
Step
2: Mentally number the two
cords as shown. Arrange cord
2 so it's vertical.
Approximately 1.5 to 2 inches from the
holding cord, pass the top portion of cord
1under
cord 2, heading left.
Secure both cords together where they
cross.
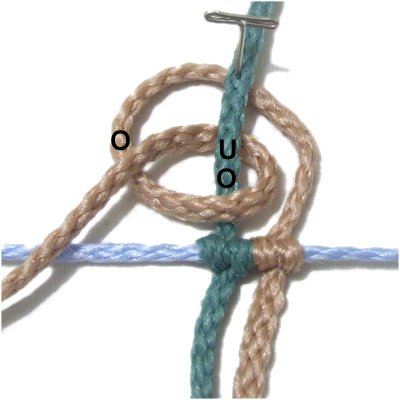
Step
3: Make a counter-clockwise
loop with cord
1, passing over
- under cord 2.
As you pull it left, pass over
cord 1 to complete the loop.
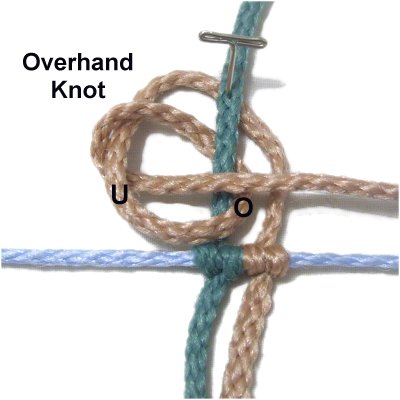
Step
4: Pass cord
1 through the loop from below,
which is under
- over. (Overhand knot)
It
should be horizontal, heading left to
right.
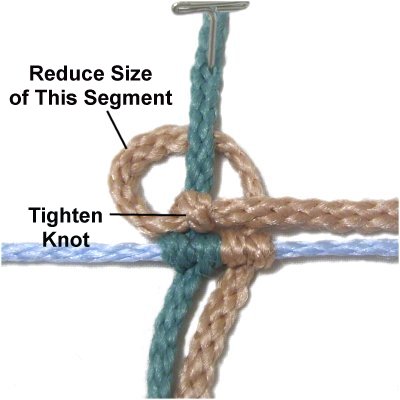
Step
5: Reduce the size of cord
1 in the area where it crosses under cord
2.
It should be no more than 1-inch above the
holding cord.
Tighten the Overhand knot by pulling on
cord 1. It should rest against
the DHH on the holding cord.
Designer's
Tip: When using the Linked Loop
Mount in a Macrame project, the loops need to be
visible, but not excessively large.
For 4mm to 6mm material, the loops should be no
taller than 1-inch.
For 2mm - 3mm material, reduce the size to
3/4-inch or less.
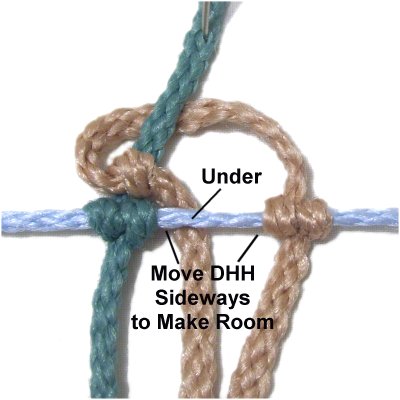
Step
6: Move the DHH on the
holding cord sideways to make some room.
Pass the top half of cord
1underthe
holding cord, in the area between the two
DHH.
Step
7: Attach the top half of cord
1 to the holding cord with a
Double Half Hitch.
It's less awkward to tie it left to right.
Push all three DHH close together before
attaching the next cord for the Linked
Loop Mount.
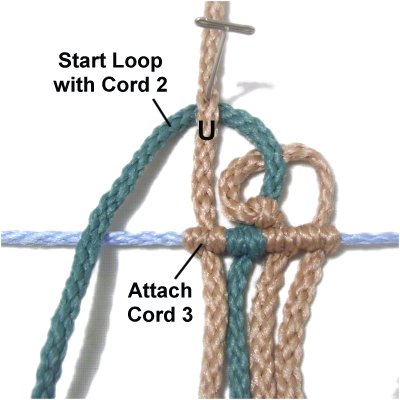
Step
8: Repeat
step 1, attaching cord
3 to the holding cord
vertically. It should rest to the
left of cord 2.
Repeat
step 2using cord
2 to start the next loop.
Step
9:Repeat
steps 3 - 5, to complete the loop
with cord 2.
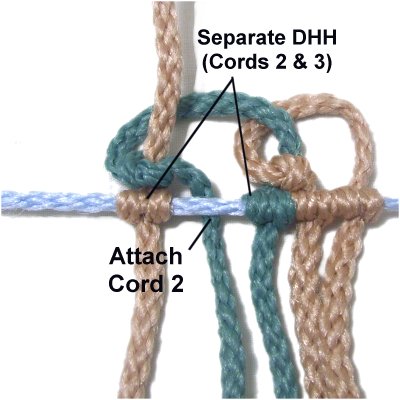
Step
10: Separate the DHH made
by cords 2 and 3 to make room.
Repeat
steps 6 - 7 to attach cord 2 to
the holding cord (top portion).
Step 11:Repeat
step 1, attaching the lower portion of cord
4 to the holding cord with DHH.
Repeat
steps 2 - 7 to make the next loop with cord
3.
You can continue on, adding more cords and
repeating the same steps. Or you can stop
here and finish the Linked Loop Mount by
completing the next step.
Step
12: You can't make a loop
with the last cord, since there is nothing
to attach it to.
Pass it behind the Overhand knot made by
the previous cord, then bring it under
the holding cord and attach it with a DHH.
By using any text
or images on Free Macrame Patterns, you are
agreeing to ourTerms of Use