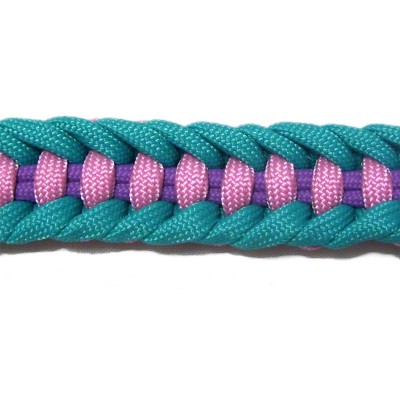
Description: The Jagged Ladder
Bar features horizontal segments resembling a
ladder, and diagonal loops on the sides made
with a second color. The third color is
optional, if you prefer just two.
Try to use one light and two dark colors for
the best contrast.
This decorative knot is wide and relatively
flat, so it makes a great Paracord bracelet. You
can also use it for key rings, belts, pet
collars, leashes and similar projects.
It's easy to tie and is a great way for
beginners and children to become familiar with
knotting and Macrame.
The video gallery contains
tutorials for this and other interesting
knotting techniques and designs.
Step 1: You need three 60-inch
cords to practice the Jagged Ladder Bar.
Holding cord A
-- Should be the darkest color, since it's
behind the horizontal segments. (Purple
cord in the images)
Holding cord B
-- Should be the lightest color, since
it will form the steps of the ladder. (Pink
cord in the images).
Working cord
-- Should either be the same as holding
cord A, or you can use a different dark
color. (Turquoise
cord in the images).
When using this technique for a Macrame
project, the working cord needs to be at least 12
x the finished length you plan to
make.
The holding cords should be 2
x the finished length + 12 inches.
Cut one of them longer if you plan to make a
button knot for a clasp.
When using Paracord, be sure to read Cord
Preparation, which tells you how
to prepare it properly for knotting.
Specific instructions for this material are near
the bottom of that page.
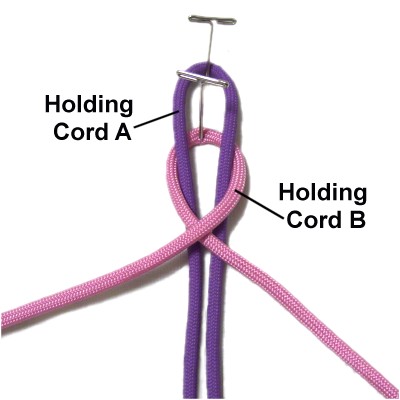
Step
1: Secure holding
cord A to your board vertically
after folding it in half.
Secure holding
cord B under it, so the centers
line up. Bring both halves on
top of cord A, then cross them
right over left.
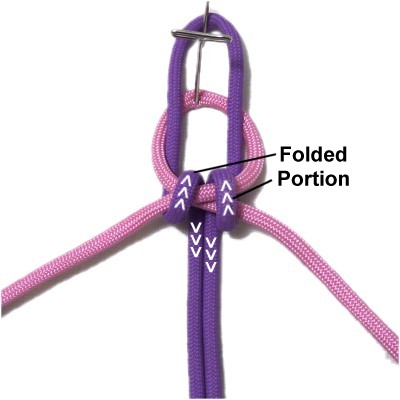
Fold both halves
of holding
cord A backward, passing over
the crossing point of cord B.
Pull them under
the crossing point, then toward you.
The two halves should rest between
the folded portion when you are through.
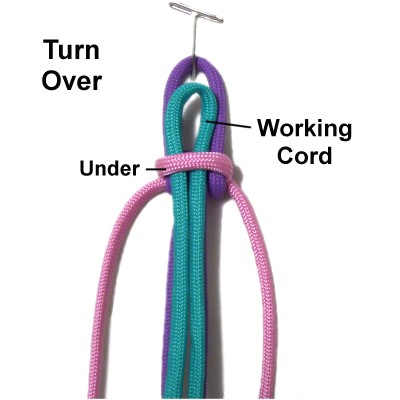
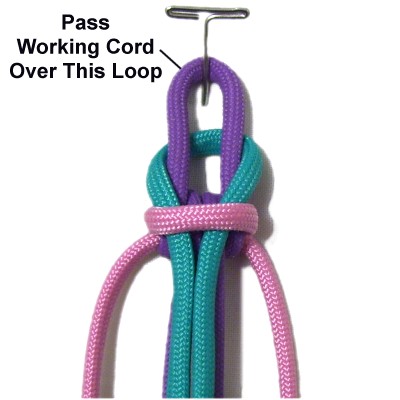
Step
2: Tighten the two holding
cords, then turn the knot over so you can
see the horizontal segment of holding
cord B.
Pass the working
cordunder
that segment after folding it in half.
Pass the
folded area of the working cord over the
loop at the top (holding
cord A). It will rest
underneath it when you are done.
Tighten all three cords FIRMLY, adjusting
the size of the loop. It should be at
least 3/4-inch if you plan to make a
button knot for a clasp.
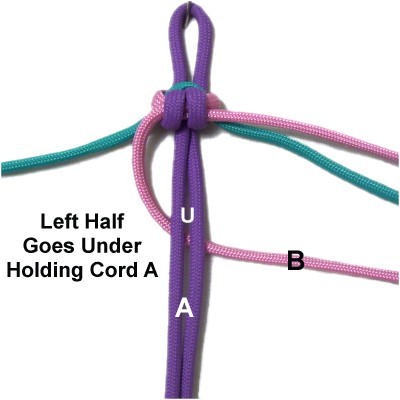
Step
3: Arrange both halves of
holding
cord A vertically.
Pass the left
half of holding
cord Bunder
cord A, heading right.
Pass the right half
of holding
cord Bover
cord A, heading left.
Enlarge the loop so there is plenty of
space to the right and left of cord A.
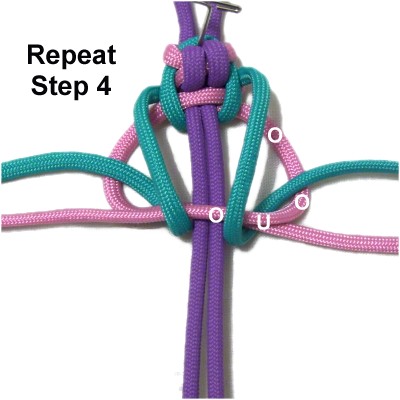
Step
4: Move the right
half of the working
cordover
the loop made by holding
cord B at both the top and
bottom.
Fold it under
both halves of holding cord B in the area
where they cross. Pull it out
through the space on the right,
passing over
cord B again as you do so.
Step
4 continued: Move the left
half of the working cord over the loop,
then fold it under
the crossed area.
Pull it out through the space on the left,
passing over cord B again.
Tighten holding
cord B first, then tighten each half of
the working cord. The Jagged Ladder Bar will
look better if all the knots are tightened firmly,
so each one is the same.
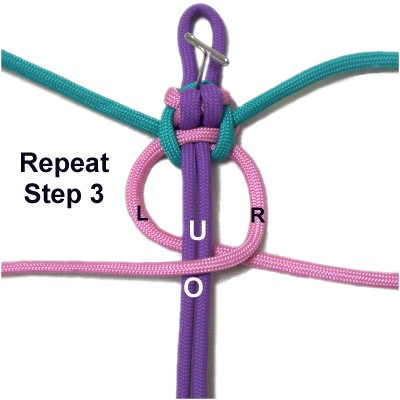
Step 5:
Mentally
re-label the two halves of holding
cord B where they rest now.
Repeat
step 3.
Step
6: Repeat
step 4.
Step
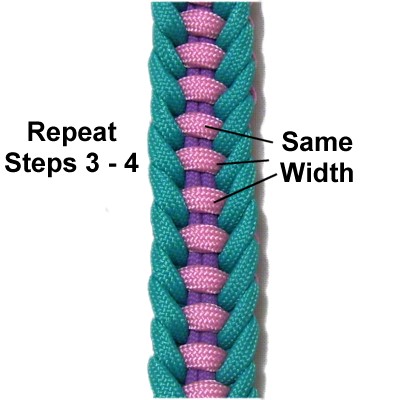
7: Repeat
steps 3 and 4 several
times, until the Jagged Ladder Bar is the
size appropriate for your project.
The horizontal segments of holding
cord B form the "ladder", which
should be the same width. Tighten
each knot carefully and consistently.
Designer's
Tip: The best way to ensure the "ladder"
is the same width all the way down the sennit is
to push the right and left edges of the sennit
inward as you tighten each knot.
The stitches made by the working cord should
almost form a V-shape.
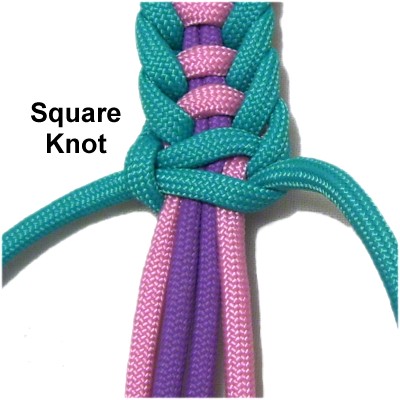
Step
8: Secure the sennit by
tying a Square Knot with the working cord
around the other cords.
Finish off the cords in the most
appropriate method for your project.
By using any text
or images on Free Macrame Patterns, you are
agreeing to ourTerms of Use