Description:
The Icelandic Dream Bar is a unique
knotting technique that forms a wide band suitable
for bracelets, belts, pet collars, and similar
Macrame projects.
Two colors form a crisscross pattern (blue and
purple in images). They are surrounded by a
third color (turquoise) that is folded to create
stitching along the edges.
The most challenging part of this design is
tightening consistently, which is important if you
want the bar to be even along the edges.
I've provided you with some tips and extra photos
for that phase of the design.
The loop at the top can be used as a clasp for a
bracelet or belt. You just add a button,
bead, or button knot at the other end.
550 Paracord was used in the example shown. It
must be prepared by melting the tips. Read the
bottom section of Cord Preparation
if you plan to use this material.
This
knot design is listed on the Fusion
Knots website. Be sure
visit the site by clicking on this image
or link.
The video
gallery contains tutorials for a
variety of decorative knots and
techniques.
Preparation:
To practice, cut 3 cords, each at least 60 inches
long.
When using the Icelandic Dream Bar for a project,
cut the cords as follows:
Cords B
and C should be at least 7 x the finished
lengthyou plan to
make.
Cord A
should be at least 12
x the finished length.
Prepare the cords in the manner most appropriate
for the type of material you are using.
Cord A is light blue,cord B is blueandcord C is purplein the
example shown.
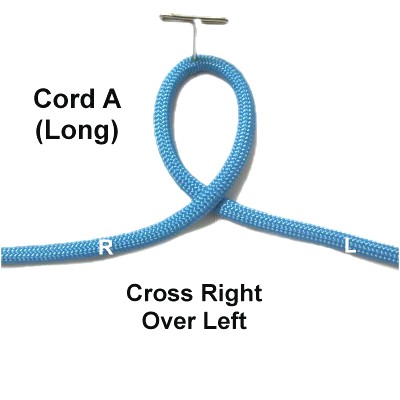
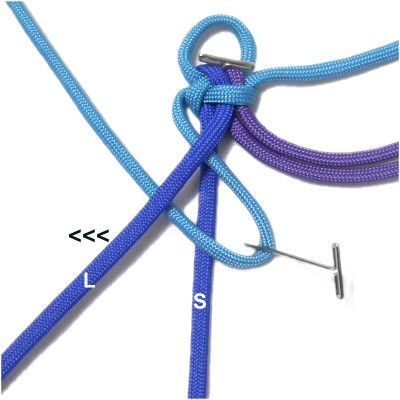
Step
1: Make a loop with cord
A, crossing right
over left.
This cord creates the stitching along the
edges, and should be the longest of the
three.
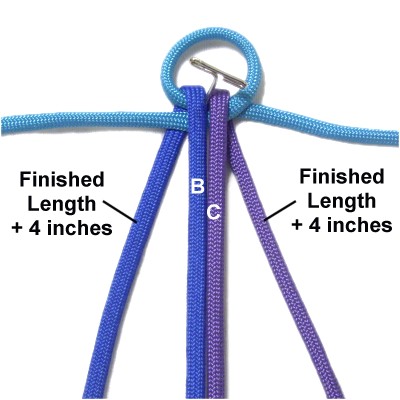
Measure from
one end of cords
B and C the finished
length + 4 inches. Fold the
cords at that point.
Place them through the loop vertically
so the short segments are under
the crossing point
of the loop, with the remainder of the
material over
the crossed area.
Cord C should be on the right.
Designer's
Tip: When practicing
the Icelandic Dream Bar, the short segment can be
around 10 inches, since you don't need to be
precise.
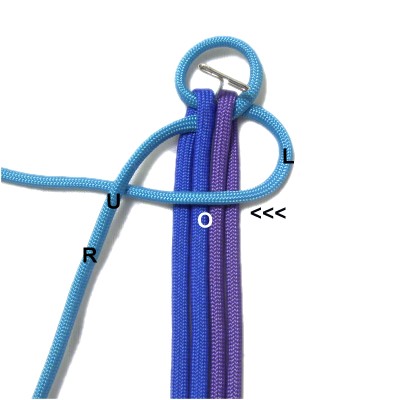
Step
2: Curve the left
half of cord
A to the left, passing over
both parts of cords B and C.
Bring it under
the right half of cord A.
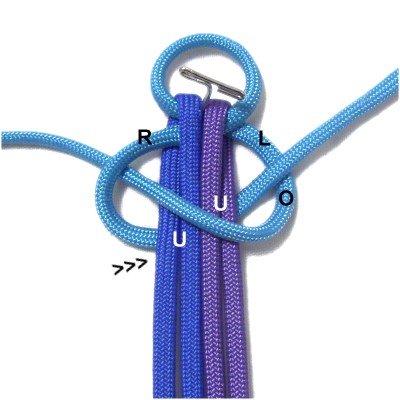
Curve the right half
of cord
A to the right, passing under
both parts of cords B and C.
Pass over
the left half of the cord.
Tighten the Half knot firmly, adjusting
the loop so it's the appropriate size for
your project.
Important:
You must be able to recognize the short and long
segments of cords B and C, even if their positions
change.
Apply tape to the long
segment of both cords so you can easily
identify them.
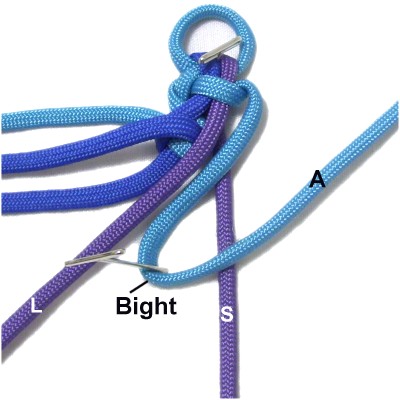
In the images, the short segment is labeled as
"S". The long segment is labeled as "L".
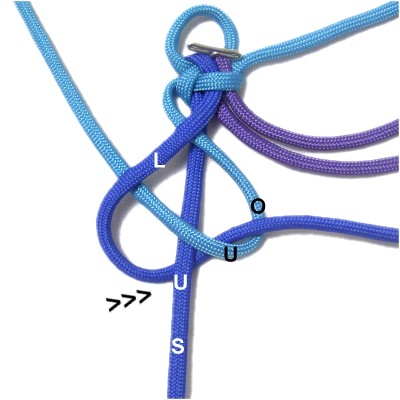
Step
3: Arrange the short
segment of cord
B so it's vertical. The
long segment should be to the right of it.
Form a bight with cord
A and place it on
top of the short segment,
arranged diagonally.
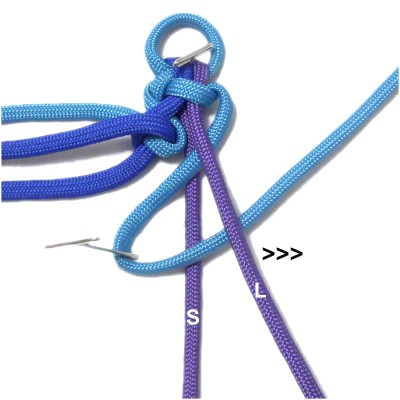
Move the longsegment
of cord
B to the left, crossing it over
the bight and the short segment.
Move the long segment
of cord
Bto the right
diagonally, passing it under
the short segment and through the bight under
- over (from below).
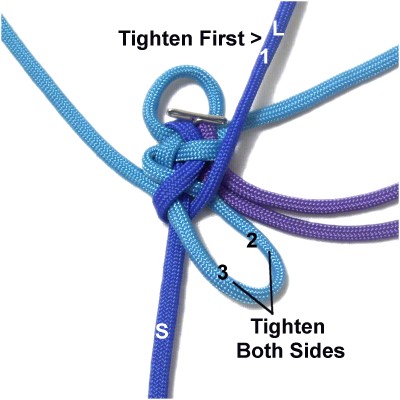
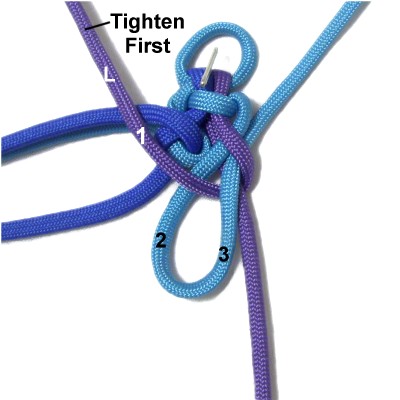
Step
4: Tighten the long segment of cord
B (1), removing all the
slack.
Then tighten both sides of the bight.
Start with the right side (2), followed by
the left side (3).
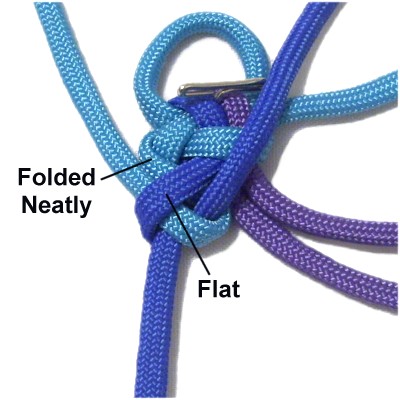
This image
shows how the the first knot should look
after tightening.
Cord
A should be folded neatly without
twisting.
Cord
B should be flat.
Step
5: Arrange the short
segment of cord
C so it's vertical.
Form a bight with cord Aand place it on top of the short
segment, arranged diagonally.
Move the long segment
of cord
C to the right, crossing it over
the bight as well as the short segment.
Move the long segment
of cord
Cto the left
diagonally, passing it under
the short segment and through the bight under
- over (from below).
Step
6: Tighten the long segment
of cord
C (1),removing all the slack.
Tighten the left side of the bight (2),
followed by the right side (3).
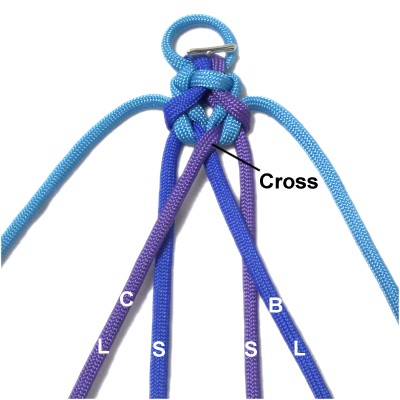
Cord
A should be folded neatly and
cord C should be flat.
Cross the long
segments so cord
C is on the left and cord
B is on the right.
Step 7:
Repeat
Steps 3and
4 for the next knot on the
left.
Make the
bight with cord
A.
The
long
segment is cord
C.
The short
segment is cord
B.
Repeat
steps 5 and 6 to make
the next knot on the right.
Make the bight with cord
A.
The long segment is cord
B.
The short segment is cord C.
Step
8:
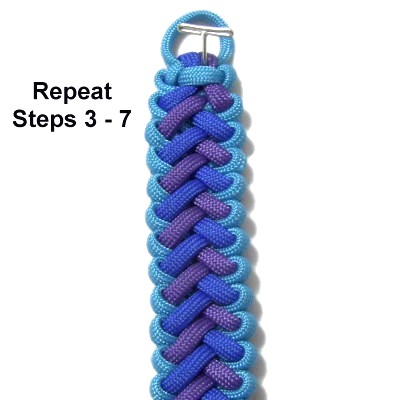
Repeat steps 3 - 7
several more times if you are practicing
the Icelandic Dream Bar.
When making a project, continue until the
bar is the size you need.
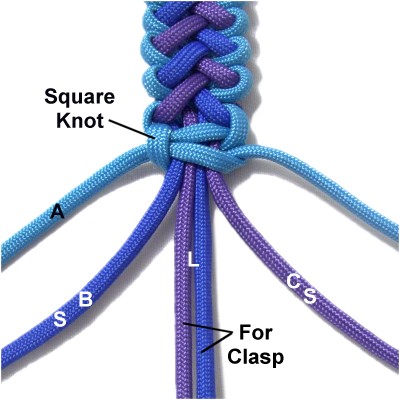
Step
9: Finish the bar by tying
a Square
Knot with cord
A around the other 4 segments.
Use the long
segments of cords B and C if you
need a button, bead, or button knot to
make a clasp.
Finish off the remaining cords by adhering
them to the back of the Icelandic Dream
Bar with glue.
By
using any text or images on Free Macrame
Patterns, you are agreeing to ourTerms
of Use