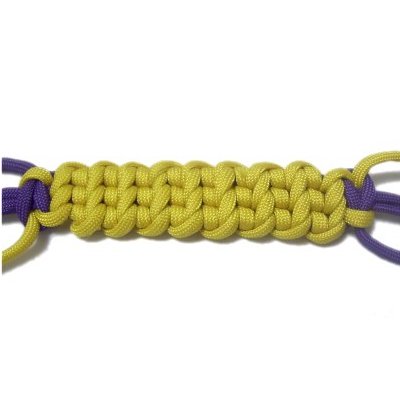
Description: The Guitar Bar is
a very unique way to use Half Hitches. They are
arranged in horizontal rows, and are attached to
vertical holding cords.
You turn over the sennit every other row, which
alters the appearance of the knots. The design
will resemble the frets of a guitar.
This interesting Macrame design can be used for
bracelets, belts, key chains, and other similar
projects where you need a thick sturdy band.
Important:
When using materials
less than 4mm wide, the band will have
a tendency to twist
as you make it. Bend and flex the bar to
eliminate the twisting if you can. Try to
tighten all the knots the same amount, and keep
the holding cords taut.
I found the
Guitar Bar on the Fusion
Knots website.
Click on
the link or image to visit.
The video
gallerycontains tutorials for a large
variety of interesting combination
knots.
I highly
recommend the books!
To practice,
you need at least three 20-inch holding cords,
and one 72-inch working cord.
Two colors were used for instruction
only. It's better to use only one
color for this design.
Important:
These instructions show you how to start the
design is the center,
since that's usually the best option for
projects like Paracord bracelets.
When cutting the cords, use this
formula:
Holding Cords: Finished size x 1.5
Working Cord: Finished size x 12
Be sure to add
more length to all the cords if you
need to make a clasp.
For projects where you mount the cords to
something like a ring or buckle, you will need
to double
the length if you FOLD
the cords.
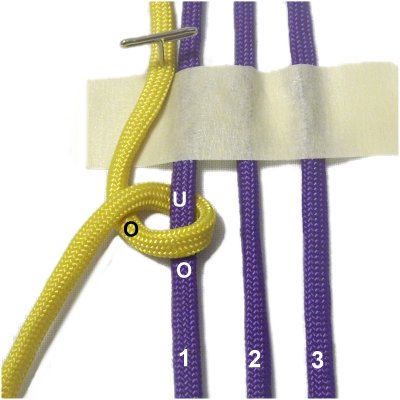
Preparation:
Secure all the cords vertically
on your board, with the working cord to the left
of the three holding cords. Mentally number the
holding cords.
The holding cords should be stretched, so they
have tension.
This helps to eliminate the twisting that
sometimes occurs as you construct the Guitar
Bar.
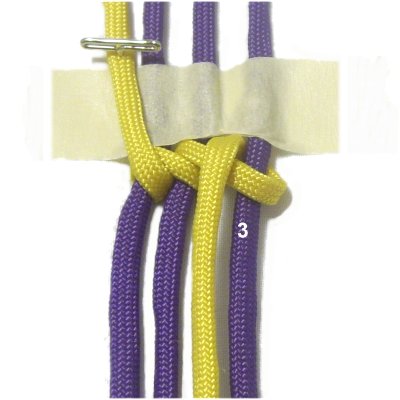
Place a piece of masking tape across the cords
at the center to mark it, and to help you form a
straight row.
Step
1: Tie a counter-clockwise
Half Hitch with the working cord, onto
holding cord 1.
A Half Hitch is tied by passing over
- under the holding cord.
As you pull it left, pass over
the working
cord.
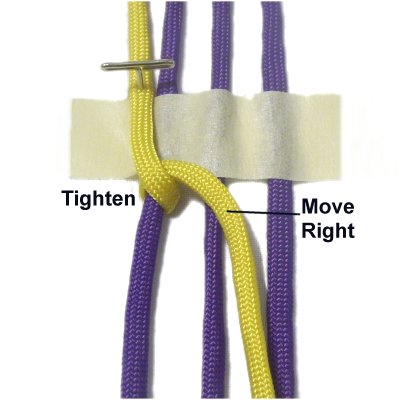
Step
2: Tighten the knot
carefully, so that it rests against the
tape.
Move the working cord to the right
before tying the next knot.
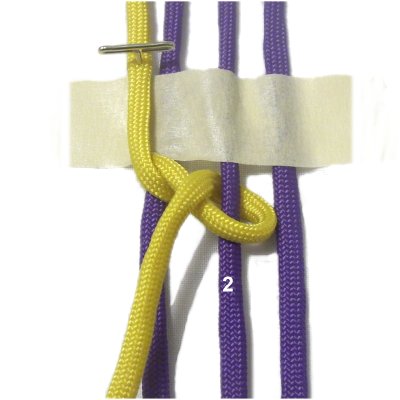
Step 3: Use the
working cord to tie the next Half Hitch
onto holding cord 2.
Tighten carefully, and pull the cord to
the right prior to tying the next knot.
Step 4: Tie the final
Half Hitch for this row ontoholding cord 3.
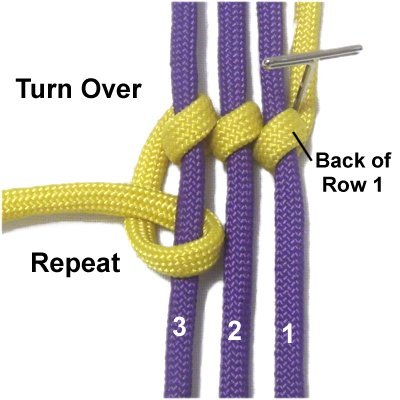
Step 5:Turn overtheGuitar
Bar (upside down), so
the working cord is once again on the left.
Repeat
steps 1 - 4, tying the Half
Hitches onto cords 3 - 1 (in that
order).
Step 6: After
the second row is completed, turn over
the design again.
Repeat
steps 1 - 4.
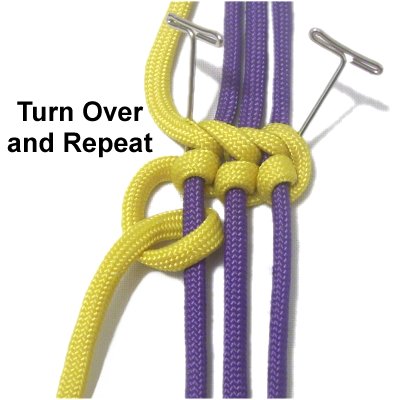
Step
7:Repeat
steps 5 and 6 several times, until the
Guitar Bar is 1/2 thelengthyou plan to make.
Push the knots close together as you progress.
Step 7, continued:
Turn the design around (or the entire
board), and go back to the center.
Make sure the BACK is face up for the
next row (step 5).
Repeat
steps 5 - 7 with the other half
of the cords, until the Guitar Bar is the
size you want.
Step
8: The best way to finish
the bar is to tie a TIGHT Square
Knotat each end.
You can then use the ends to make a clasp,
or tie additional knots. Finish off
any cords you don't need.
By
using any text or images on Free Macrame
Patterns, you are agreeing to ourTerms
of Use