Description:
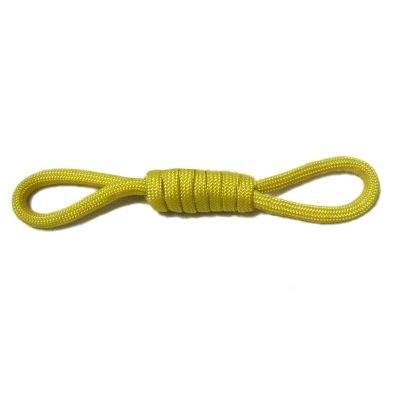
The Double Loop Wrap is basically a Wrapped
knot tied around two loops, which
are adjustable. When you enlarge one loop,
the other becomes smaller.
It works out better if you finish off the two ends
of the cord rather than use them for other
knots.
This knot design can be used for items like
Macrame earrings, where you need two loops to
attach hooks and beads. It's also a
good way to suspend plant hangers and hanging
tables if you don't want a ring at the top.
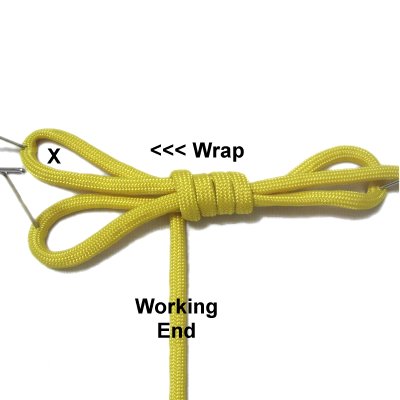
Step
1: Secure a 36-inch cord
on your left.
Move it right, then fold it 10 inches from
the secured end. Secure it at the
fold, which is area
A.
Move it left, and fold it 4 inches from
area A. Then bring it back to the
right. Secure area
B.
Designer's
Tip: The measurements stated in the
instructions are for 4mm
size material. The entire wrap will
end up close to 4 inches.
You can change the measurements to better suit the
material you are using, or if you want to make the
Double Loop Wrap a different size.
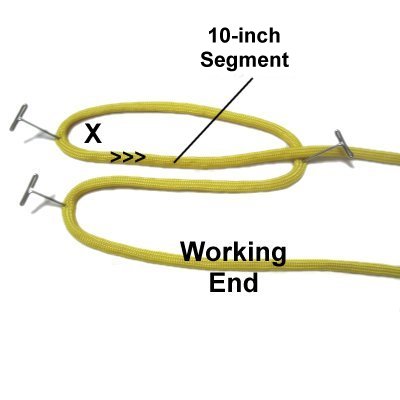
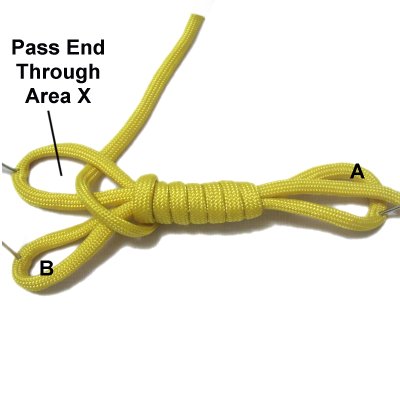
Step
2: Move the 10-inch
segment to the right, passing it between
areas
A and B.
This forms a loop, which is part of the
Wrapped knot. It will disappear during the
tightening process.
Secure it on the left, where it's
folded. Mentally label it area
X.
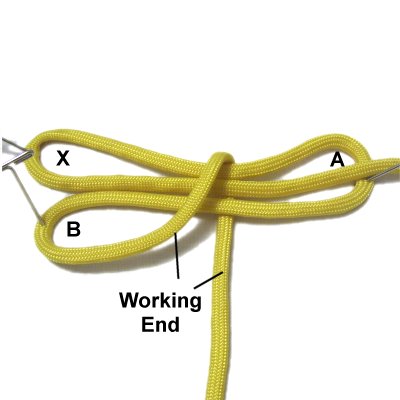
Step
3: Begin the Wrapped knot
by moving the working end vertically,
passing over
the three horizontal segments.
Move it under
those segments, pulling it slightly to the
right as you bring it forward.
Wrap the
working end around again, but move the
cord on an angle to the left, so you cross
over the first loop.
This way the cord is in position for the
rest of the Wrapped knot.
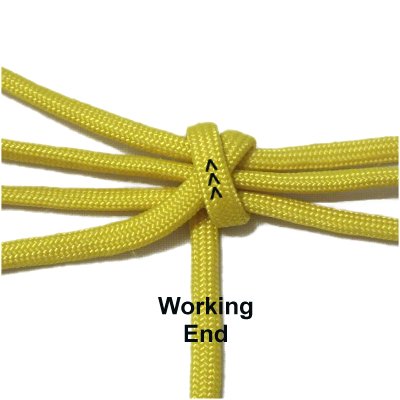
Step 4:
Wrap several more times, moving left
towards area X.
Make sure the coils are snug and do not
overlap.
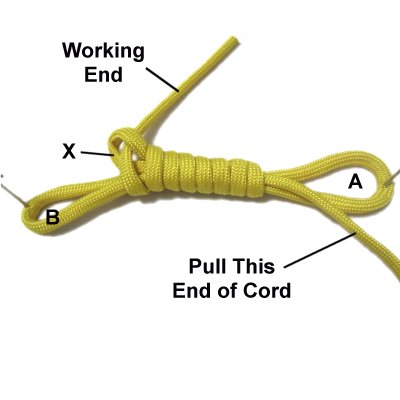
Step
5: Pass the working end
through area
X from the top.
Step
6: Pull the opposite end
of the cord, which was the 10-inch
segment.
Area
X will moveinside
the wrapped portion, securing the working
end.
Pull it until you can't see the loop (X).
Step
7: Cut off the excess
material flush with the ends of the
wrapped portion.
Tuck the stubs inside the wrapped area.
Should you decide to keep one end intact,
make sure it's NOT the working end.
By
using any text or images on Free Macrame
Patterns, you are agreeing to ourTerms
of Use