Description:
These Double Coin Patterns both start out with the
Josephine knot,
also called the Double Coin Knot.
This decorative knot can be used as a starting
point to form other shapes and knot designs, like
the ones shown.
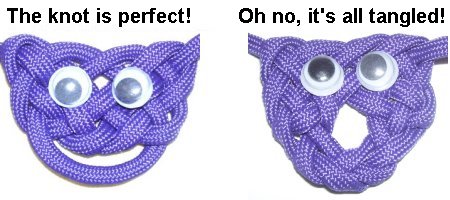
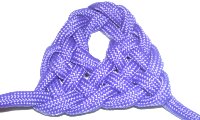
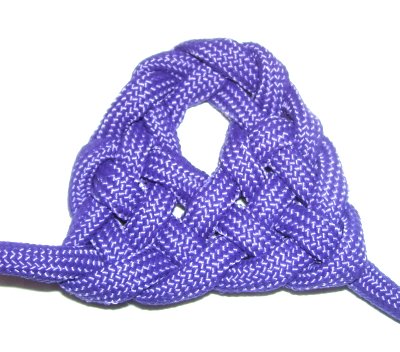
I had a little fun while I was tying the knots, as
you can see in the image above.Children
can make a project of tying decorative knots to
make interesting shapes, so encourage them to
practice.
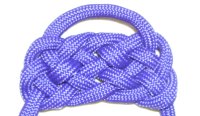
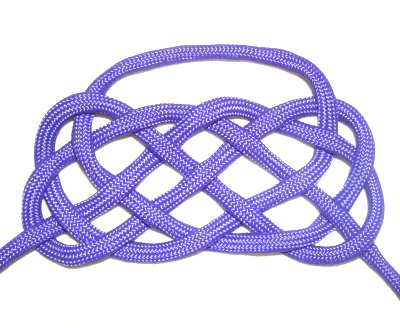
The Wide
Lanyard knot has a rectangular shape,
with a wide loop at the top.
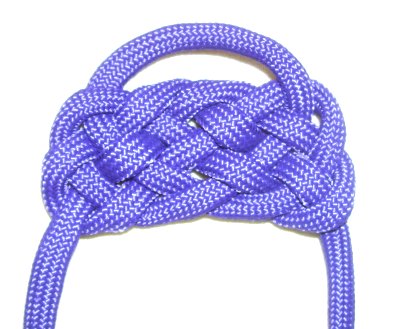
The Mayan
temple knot has a rounded triangular
shape, with an opening near the center.
Both of these knot designs are suitable for
pendants or focal points for Macrame
bracelets.
The material used in the example is Paracord,
which needs to be prepared and finished by melting
the ends with a flame.
Be sure to click on the link or image
to visit the Fusion Knots website, which
has a large video gallery of interesting
combination and historical knots.
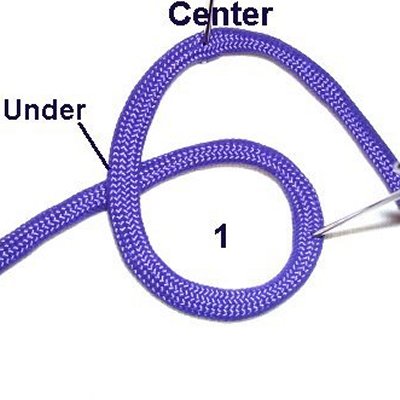
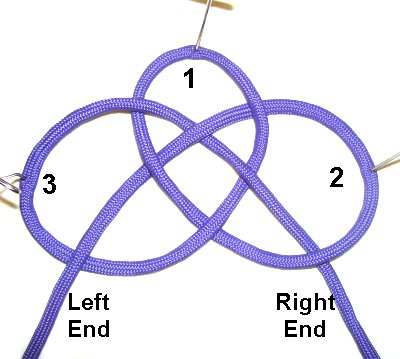
Double Coin Knot Instructions
Step
1: Secure the center
of the cord to your board.
Make loop 1 with the left
half of the cord, rotating counter-clockwise.
Pass the end under
to form the crossing point on the left.
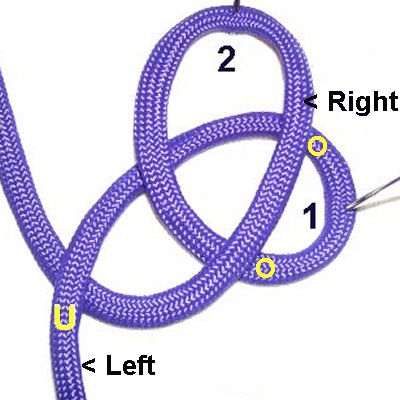
Step
2: Move the right
halfover
loop 1.
Moving clockwise,
bring it under
the left end towards the top.
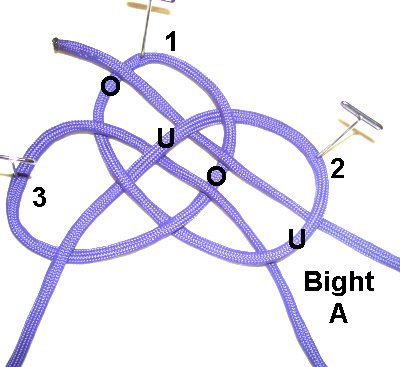
Step
3: Weave the right
half through loops 2 and 1,
heading down and to the right.
Pass over
- under - over - under the four
segments.
Wide Lanyard Knot
Step 1:
Tie a large
Double Coin Knot in the center of a
60-inch cord, following the
instructions above.
Mentally label the loops as shown, and the
ends where they are resting now.
Design Tip:
The weaving sequences in each step of both Double
Coin Patterns is very important, so be sure to
look at the images closely.
You can click on
each image to see a larger view.
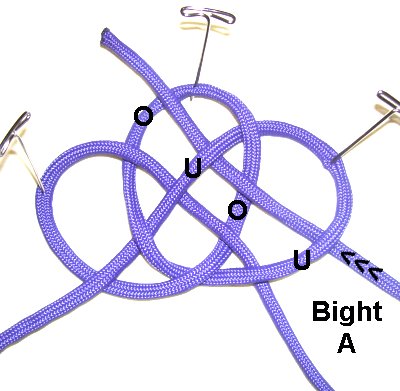
Step 2: Fold the right
end to form Bight A,
moving counter-
clockwise.
Weave under
- over - under - over the four
segments, as you bring it to the upper
left.
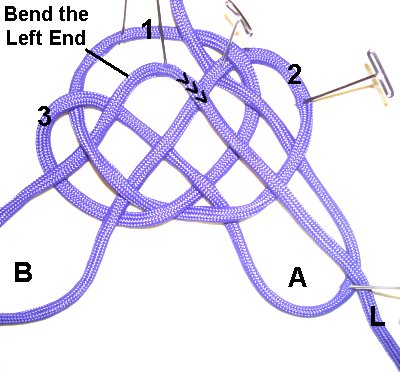
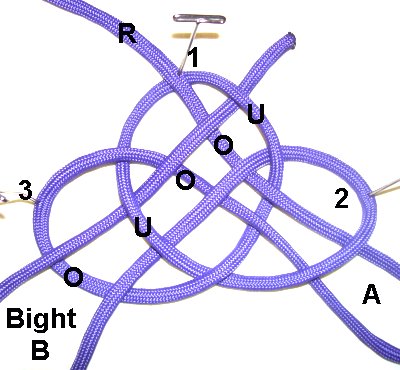
Step 3: Fold the left
end to create Bight
B, moving clockwise.
Weave over
- under - over the three
segments.
Before you move on, spread everything
out, so the bights
are as wide as possible.
Step 4:Bendthe
left end down and to
the right, through the middle of bight
A.
It should just rest on top for now (no
weaving).
Secure the end to your board, where it
was bent and lower down.
Step 5: Rotate the
right end counter-clockwise.
Pass it over
loop 1 at the top of the
knot, and over
the left
end where it bends.
Bring it under
- over - under - over the next
four segments down the middle of Bight B.
Step 6: Use the left
end again, which is resting on
top of Bight A at the moment.
Weave it under
- over - under the three
segments closest to the bottom of the
bight.
Step
7: Tighten and balance the
knot, but leave some space.
You could now use a second cord to double
the knot and make it thicker (optional).
Step
8: Tighten the knot
further, progressing slowly
from one end to the other.
Double
Coin Patterns should be tightened all the
way to form the desired shape.
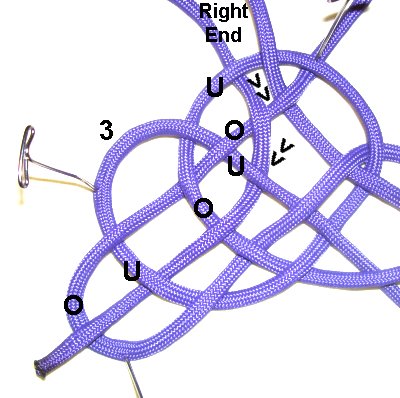
Mayan Temple Knot
Step 1: Both
Double Coin Patterns start the same way,
with a Josephine/Double Coin knot.
Use the instructions further up on the
page.
Mentally label the three loops as
shown, and the ends where they are
resting now.
Step 2:
Create
bight A with the right
end, moving counter-clockwise.
Weave under
- over - under - over the four
segments, as you bring the end to the upper
left.
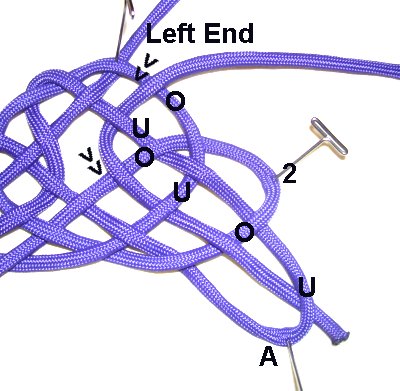
Step 3: Create bight
B using the left
end, moving clockwise.
Pass over
- under - over the segments of
Loop 3.
Bring it over
the right end, and under
the upper portion of Loop
1.
Design
Tip: Double Coin Patterns have
very specific weaving styles, so pay close
attention to the following details.
Spread the loops and bights so you have plenty of
room to work.
Step 4: Bring the right
end (now on the upper left) under
the top of Loop
1.
Weaveover
- under - over - under - overthe remaining segments,curving
it so it goes downthrough the middle of bight
B.
Step 5: Bring
the left
endover
the top of Loop
1, on the right side of the
knot.
Weave it under
- over - under - over - under
the remaining segments, as you curve
it down through the middle of bight
A.
Step 6: Tighten the
Mayan Temple knot carefully,
removing the slack from the loops, from
one end to the other.
By
using any text or images on Free Macrame
Patterns, you are agreeing to ourTerms
of Use