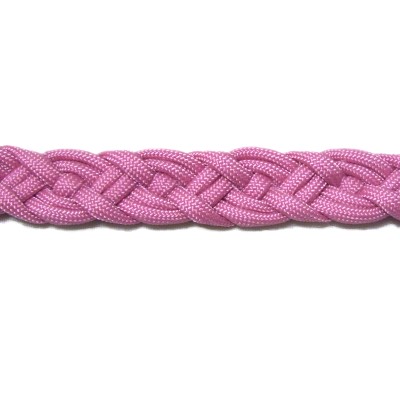
Description: The Celtic Bar is
very similar to theSnake
Braid, where
you cross and weave the cords to create the woven
appearance.
Two folded areas
are combined with the working ends to form the
braid, so there are a total of six segments. You
can use six separate cords to make this design, if
you prefer not to fold the cords.
This design can also be started at the center
working in both directions towards the ends.
You can use this knotting technique for straps,
bracelets, choker necklaces, dog collars and
leashes, belts, and more.
The video
gallery contains a wide variety
of tutorials for combination knots and
techniques.
Preparation:
To practice, you need one cord at least 60 inches
long.
The cord should be at least 9
x the finished length you plan to make if
you are using the Celtic Bar for a Macrame
project. Increase the length if you are
making a clasp.
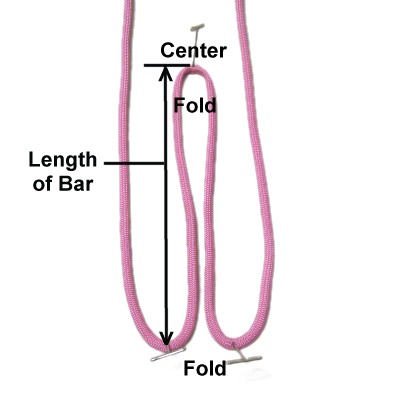
Step 1: Fold the cord
in half and secure the center of it to
your board. Measure from the
center (forward) to the finished length
you plan to make.
Fold both halves at that point, then
bring them back towards the center of
the cord.
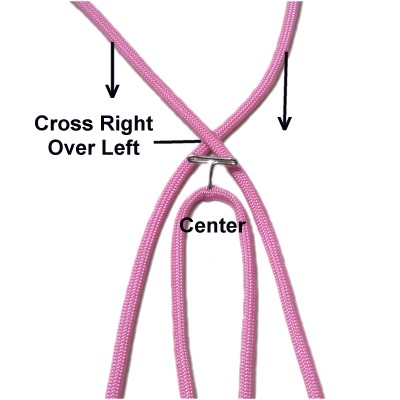
Cross the two
halves right
over left, close to the center of
the cord.
Then bring them forward on either side of
the folded portion. You should now
have six segments to make the Celtic Bar.
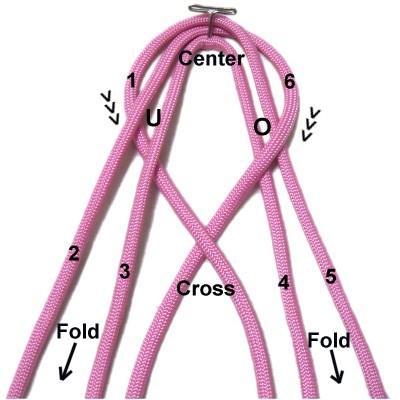
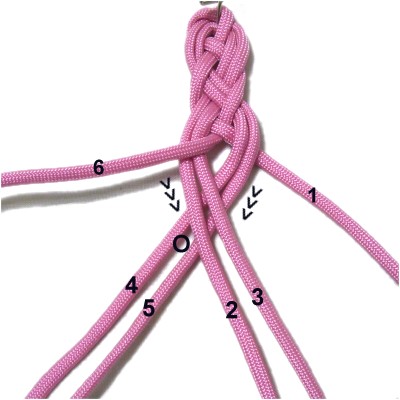
Step 1,
continued: Mentally number the six
segments starting on the left.
Segments 2 and 3 work together, as do segments 4
and 5. They lead to the folds in this
design, which makes them easy to identify.
When using six separate cords, it's helpful to
keep the two pairs together with tape.
Segments 1 and 6 lead to the ends of the cord.
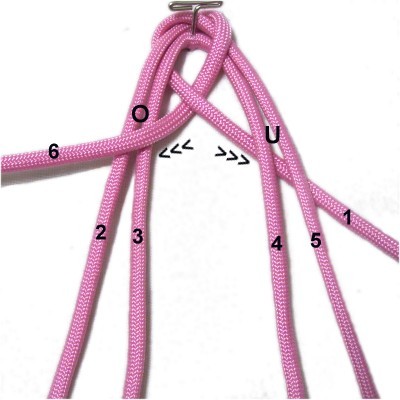
Step
2A: Move segment
6over
segments 4 and 5 diagonally,
heading left (inward).
Move segment
1under
segments 2 and 3 diagonally, heading
right.
Cross segment 1 over 6.
Step
2B: Move segment
6over
segments 2 and 3, heading left (outward).
Move segment
1under
segments 4 and 5, heading right.
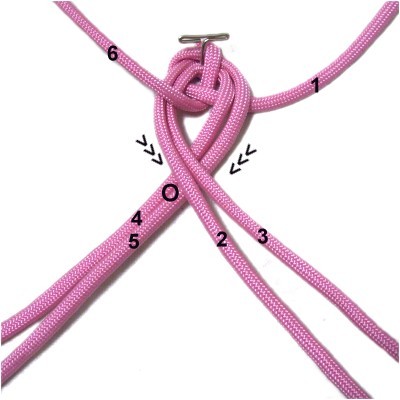
Step 2C:
Cross segments 2 - 3over
segments 4 - 5.
Arrange both pairs diagonally as shown.
Tighten this area so it rests close to
segments 1 and 6.
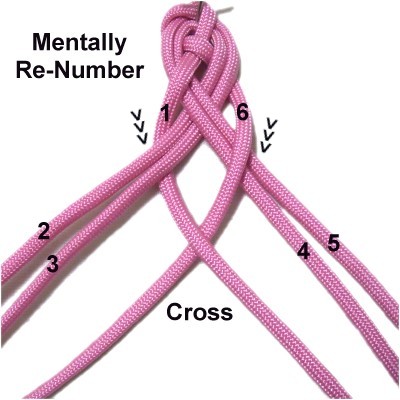
Step
3: Mentally re-number the
six segments. The portions that lead to
the ends are segments 1 and 6.
Repeat
step 2A.
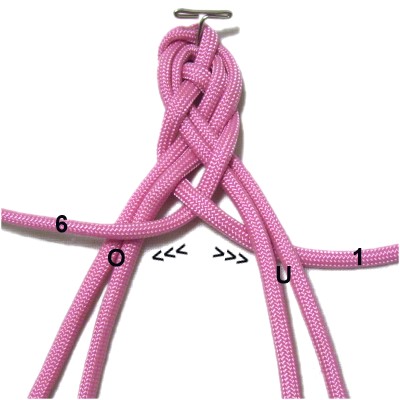
Step
4: Repeat
step 2B.
Step
5: Repeat
step 2C.
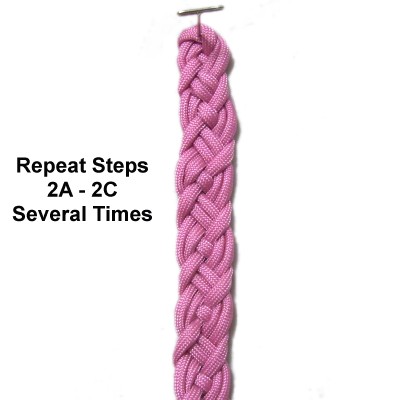
Step
6: Repeat
steps 2A - 2C several
times, tightening as you progress.
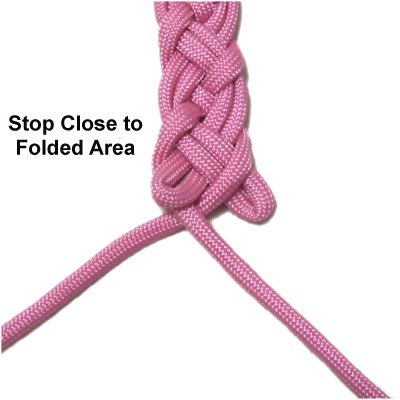
Step
7: Stop on step
2A, making sure you are very
close to the folded areas of the cord.
Try tightening the Celtic Bar a bit more
if you are finding it difficult to stop on
that step.
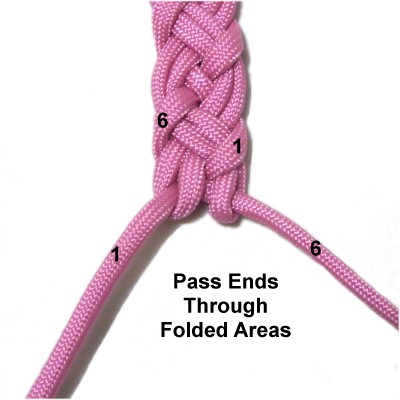
Step
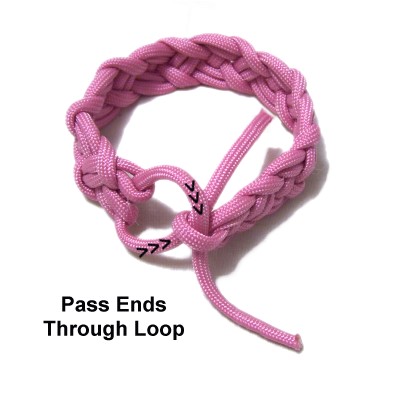
8: Pass the ends through
the folded area, which look like two
loops.
Make sure segment 6 passes through the
right loop and segment 1 through the left
(both from below).
Step
9:This
step is optional.
Go back to the starting point and pull one
segment to create a loop if you need a
clasp.
To form a
closure or clasp for your Celtic Bar, pass
the ends through the loop in opposite
directions.
Tie finishing knots and/or apply beads at
the tips to prevent the ends from slidingout
of the loop.
By
using any text or images on Free Macrame
Patterns, you are agreeing to ourTerms
of Use