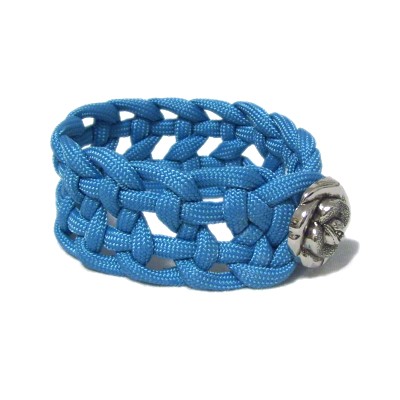
Description: The Bush Bar
Bracelet is a very easy Macrame project suitable
for beginners and kids.
The knots can be arranged in two ways, with an
open weave as shown above, or with a close weave
as shown in preparation.
550 size Paracord was used to make the Macrame
bracelet shown, but you can use just about any
type of material.
Please read the bottom section of Cord
Preparation if you plan to use
Paracord. It tells you how to prepare it
for knotting.
Supplies
Needed:
2mm to 4mm cord material
One shank style button
Project Board and Pins
Fabric glue
that dries clear
Preparation:
You need one cord 65 inches long for a
bracelet up to 6 inches, if you plan to make the open weave
shown at the top of the page.
For other sizes, the cord should be at least 10 x
the finished length you plan to make.
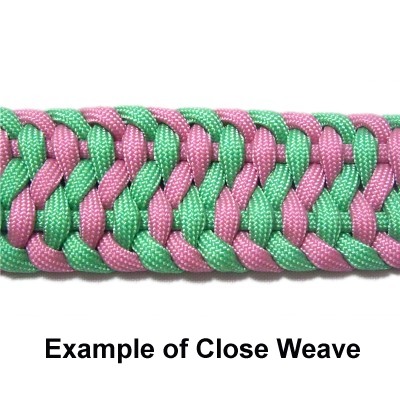
This is an
example of a close
weave made with the Bush
Bar.
The cord should be at least 15
x the finished length you plan
to make, if you prefer a close weave.
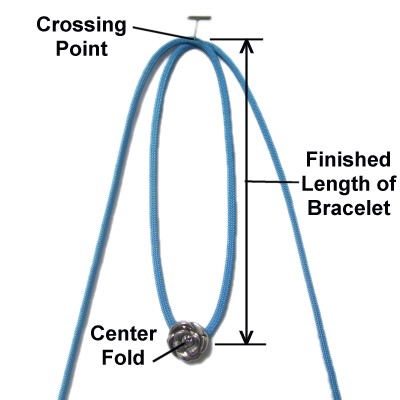
Step 1:
Slide the button onto the cord, then fold the
cord in half at the center.
The button should rest at the fold for now.
Make a large
loop, crossing right
over left. Secure the
crossing point.
Adjust the loop until it's the finished
length you want to make the Bush Bar
Bracelet. Measure from the crossing
point to the center fold.
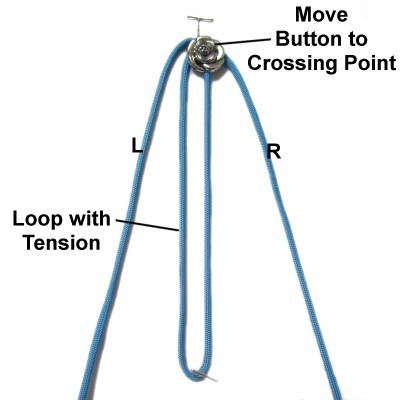
Slide the button to the crossed area at
the top. Keep
the pin in place for now.
Secure the center fold, pulling the
loop so there is tension.
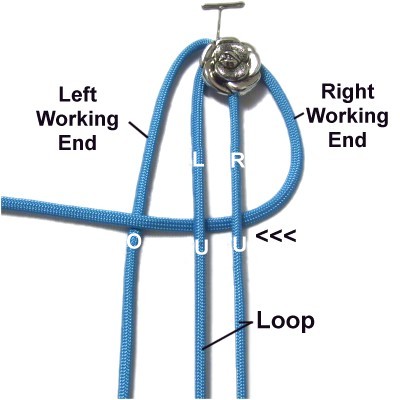
Mentally label the working ends where
they are currently resting, left or
right.
Step 2: Curve the right
working end to the left,
passing under
the loop and over
the left working end.
It should be arranged horizontally
(arrows).
Mentally label the two sides of the
loop left and right.
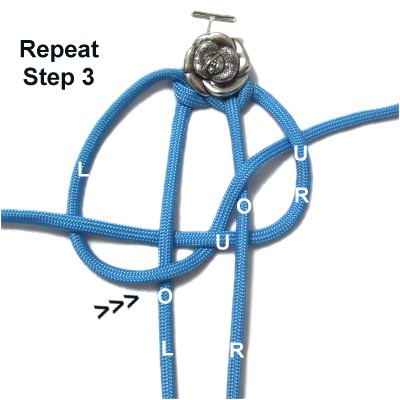
Step 3: Move the left
working end to the right diagonally,
passing it over
the left side of the loop.
Pass it under
the right working end inside the loop,
then over
the right side of the loop.
Pass it under
the right working end where it curves.
Designer's
Tip: Here is another way to look at
the weaving process for the Bush Bar Bracelet:
Pass the right working end under
the left working end in the center and on the
right.
Pass it over
both sides of the loop.
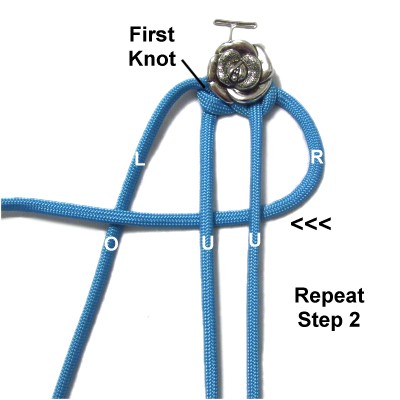
Step 4: Tighten the
first knot firmly,
so it's the same width as the button.
Mentally re-label the working ends
where they rest now.
Repeat
step 2.
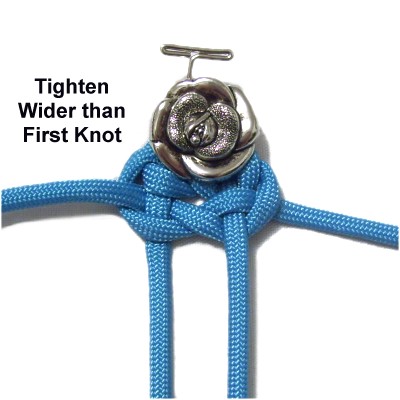
Step
4, continued:
Repeat step 3.
Tighten the
second knot a bit more loosely than the
first, so it's wider than the button.
Step
5: Repeat
steps 2 - 4 several times.
Al the knots in the Bush Bar Bracelet
shoud be tightened the same amount.
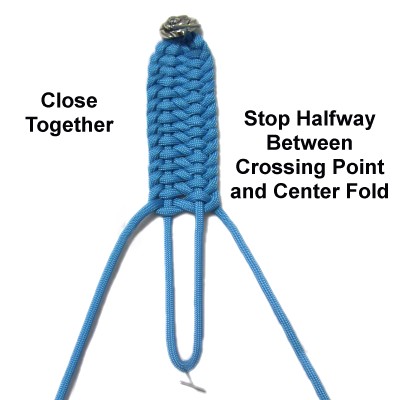
Important:
Arrange the knots close
together even if you have decided
to make an open weave.
Continued
below
Step 5,
continued: Stop when the last knot
is halfway between the crossing point and the
center fold, if
you are making the open weave.
Should you decide to keep the knots close together
for your Bush Bar Bracelet (close weave), continue
tying the knots until you are near the center
fold.
Make sure you leave enough space for the button to
fit through the loop.
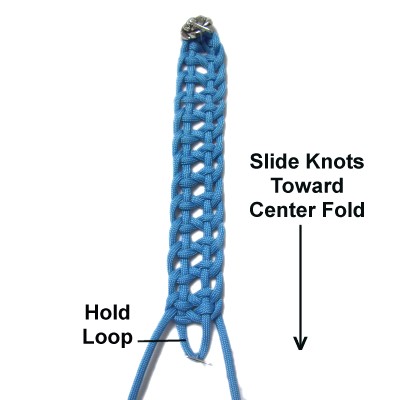
Step
6: Hold the folded area of
the loop firmly.
Slide the knots toward the center fold,
separating them as much as possible (open
weave).
Designer's
Tip: Don't be surprised if the
knots are not evenly spaced.
In that case, tighten some of the knots as needed,
until the spacing is the same.
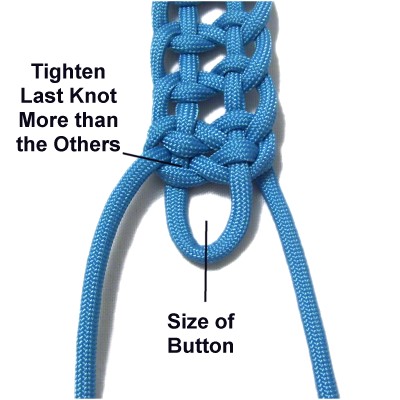
Step
7: Verify that what's left of the
loop is the same size as the button. Add
or remove knots if necessary.
Tighten the last knot more than the
others, and arrange it close to the
previous one.
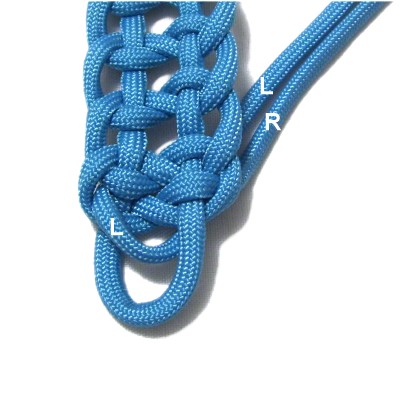
Step
8: Move the left working
end through the loop toward the BACK of
the Bush Bar Bracelet.
Step
9: Make sure the bracelet
fits, making any adjustments if necessary.
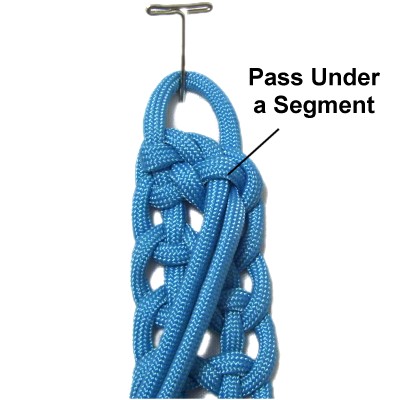
Turn it upside down. Pass both ends
under one segment. Apply glue under
them and use a clip to hold them in place
until it dries.
Continued below
Step 9,
continued: Cut off the excess
material close to the glue.
Paracord needs to be finished by melting the tips,
like you did in preparation.
By
using any text or images on Free Macrame
Patterns, you are agreeing to ourTerms
of Use