|
|
| |
 |
|
| |
|
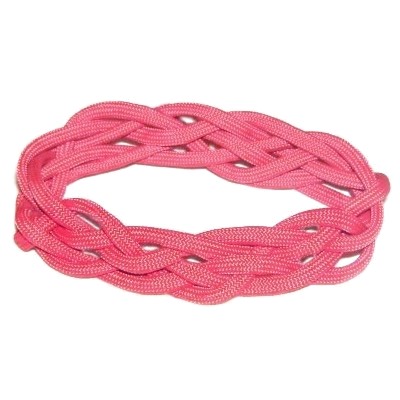
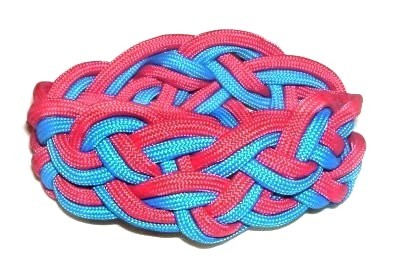
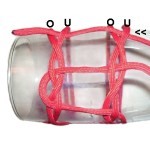
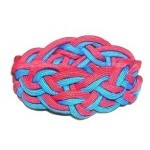
Description: The Bangle
Bracelet features a type of circular braiding
called the Turks Head knot. This
historic decorative knot was a favorite of the
Celtic artists in ancient times. It
represents the concept of "eternity".
The knot is easy to make, so this is a great
Macrame project for beginners as well as
children.
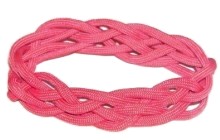
This type of Micro-Macrame bracelet slides over
the wrist without a clasp, so you should make it
with material that stretches slightly. Add
a second cord if you want to make it wider than
what is shown above (see step 10).
Supplies Needed:
- 2 mm 4 mm cord material
- Drinking glass or other cylinder (slightly
larger than your wrist).
- Fabric glue that dries clear
|
| |
| |
|
| |
Preparation:
Cut
one 60-inch cord for a bracelet measuring 5 to 6
inches long. For larger
sizes, the cord should be at least 72 inches long.
Prepare the tips to prevent unraveling.
When using Parachute cord as shown in the example,
melt the tips with a flame to seal the outer
sleeve around the inner core. See Cord
Preparation for more details. |
| |
|
|
|
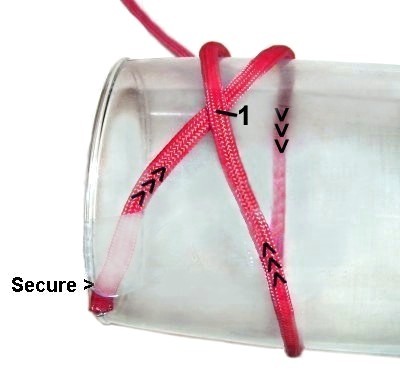
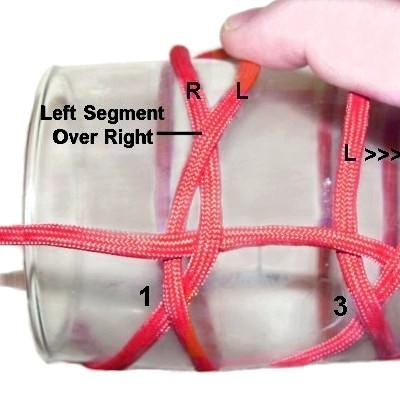
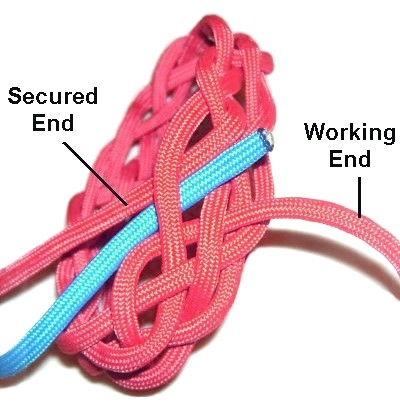
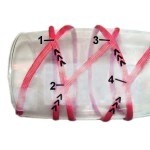
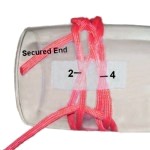
Step 1: Secure
one end of the cord to the glass with tape,
placing it on the left near the rim.
The secured portion is called the "tail" in the
following instructions. The arrows show the
direction of each segment. |
|
| |
| |

|
|
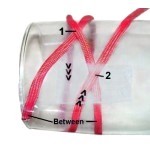
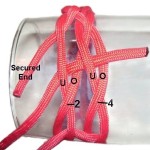
Move the working end across the front
of the glass heading
diagonally
to the right.
Bring it around the back of the glass vertically,
then to the front again. Pass it
over the secured tail heading
left.
Mentally
label the crossing point #1.
|
|
| |
|
| |
|
|
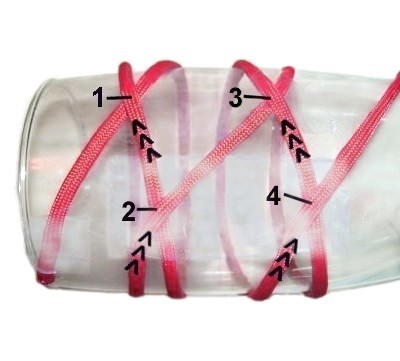
Step 2: Bring the
working end around the back of the glass
vertically,
then to the front again. Arrange
it between
the tail and the segment on the
right.
Move it left to right diagonally,
making the next crossing point (#2).
Secure
it with tape.
|
|
| |
|
| |
|
|
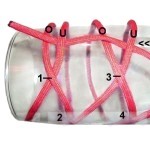
Step 3: Bring the
working end to the right.
Repeat
Step 1 to make crossing point
3.
Repeat
Step 2 to make crossing
point 4.
Secure it with tape.
|
|
| |
|
| |
|
|
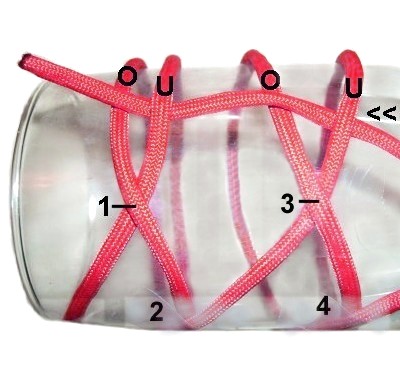
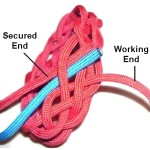
Step
4: Now you will begin
the weaving process for the Bangle
Bracelet.
Move the working end of the cord near
crossing points 1
and 3 by passing it under
- over - under - over the four
segments (right
to left).
|
|
|
| |
| |
|
|
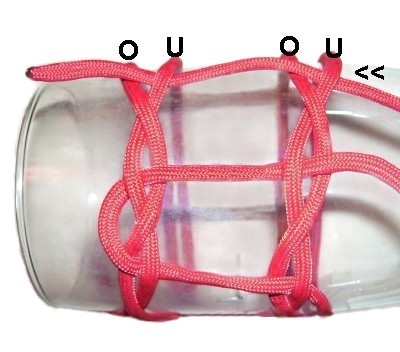
Step 5: Move
back slightly from where you did the
weaving in step 4 by rolling the glass
toward you.
Make 4 more crossing points for the
Bangle Bracelet by moving the segment on
the left over the one on the right (both
areas).
See information below.
|
|
| |
|
|
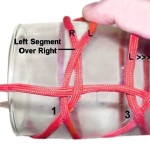
Designer's
Tip: The image above shows the
weaving in the area near crossing point 1. You
need to do the same thing near crossing point 3.
This will produce two additional crossed areas
further back from where you are working. Use
them in step 7.
Always weave the working end through the four
segments in the area close
to the crossing points.
|
|
|
| |
|
|
Step 6: Weave the
working end through the area near the
new set of crossing points.
Weave under
- over - under - over heading
left to right.
|
|
| |
|
| |
|
|
Step 7: Roll the glass
towards you and locate the next two
crossing points.
Weave through the area under
- over - under - over,
moving
right
to left.
|
|
| |
|
|
|
|
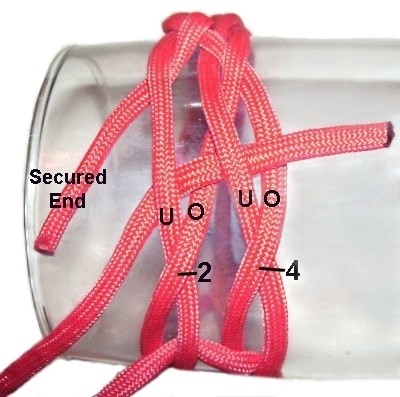
Step
8: Repeat
steps 5 - 7
several more times, until you reach the
area where crossing
points 2 and 4 are secured.
Remove the tape from the secured end as
well as the two crossed areas.
|
|
|
| |
|
|
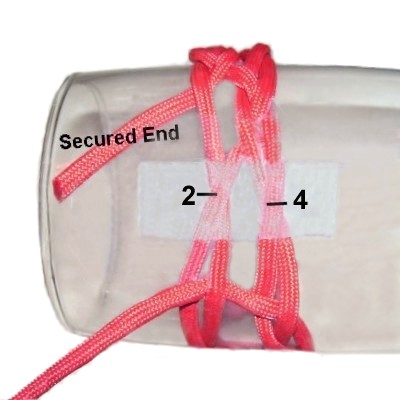
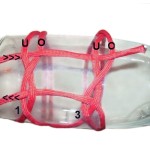
Step
9: Place your finger
next to crossing
points 2 and 4 and slide them
toward you to make some room.
Weave the working end through one more
time. The direction may vary from the
image shown.
Remove
the Bangle Bracelet from the base,
but do
not tighten it yet.
|
|
| |
|
| |
|
|
Step
10 (Optional): To make the
Bangle Bracelet thicker, place a second
cord to the right of the secured
end.
Follow the
path of the first cord all
the way through, until you reach the other
end of the cord.
|
|
|
|
|
|
Check the fit
and tighten the entire bracelet as needed.
Trim the ends and slide them under one
segment in the area where they rest (on
the inside
of the bracelet). Apply glue to hold
them in place. |
|
|
|
|
By
using any text or images on Free Macrame
Patterns, you are agreeing to our Terms
of Use
|
|
|
|
| Do
you have comments about the Bangle Bracelet? Contact me. |
|
|
|

|
|
|
| |