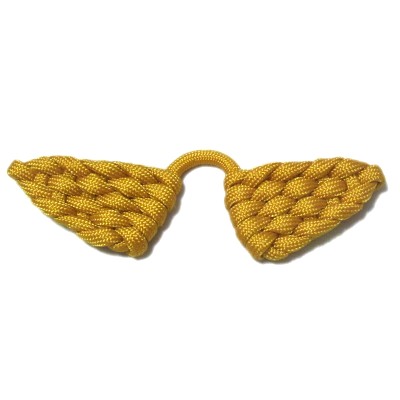
Description: Creating Angel
Wings just got easier. These unique wings are a
series of bights woven through the center of one
another. They are easy to make and can be
attached to Macrame angels and bird designs.
By adding more weaving (prior to step 5),
these wings can be made wider, which will change
the shape. Make sure you cut the cord longer if
you change the size.
Paracord was used in the instructions
shown. Please read Cord Preparation
to find out how to prepare it properly, if you
plan to use the material.
Head to the video
gallery to see the tutorials
for many unique decorative knots.
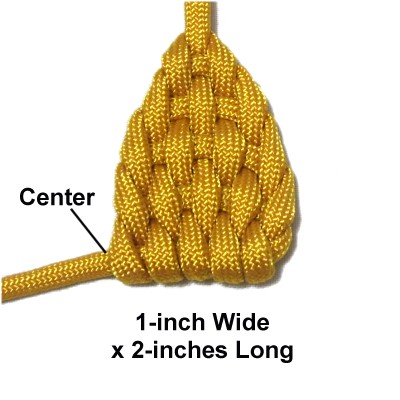
Preparation:
Cut one cord at least 65 inches long to make the
Angel Wings approximately 1-inch wide x 2-inches
long.
Cut the cord longer if you wish to increase the
size of the wings.
Prepare the material to prevent unraveling.
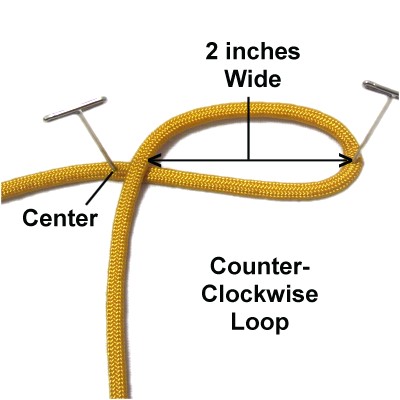
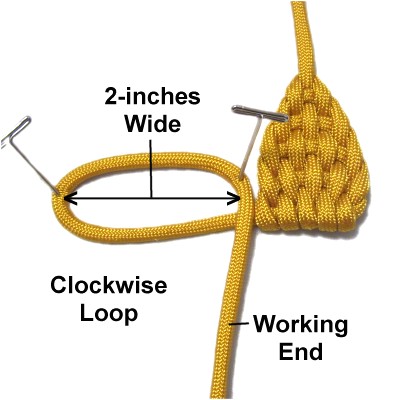
Step
1: Secure the center of the cord
to your board. Use the right
half of the cord to make a 2-inch wide counter-clockwise
loop.
Increase the width of this loop if you've
decided to make the wings larger. It
should be double the width you are aiming
for.
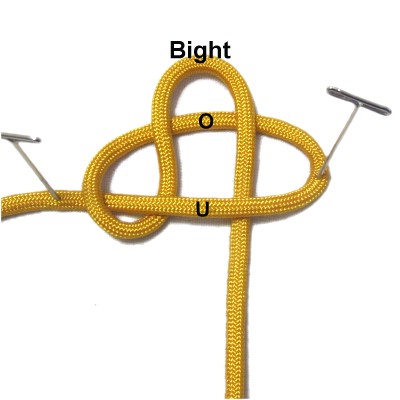
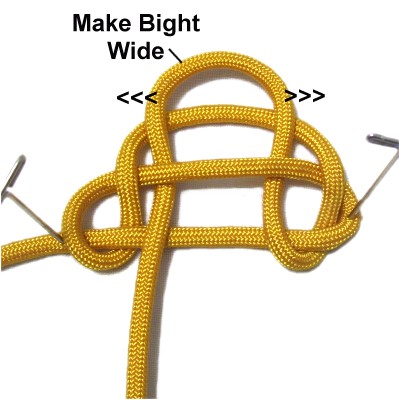
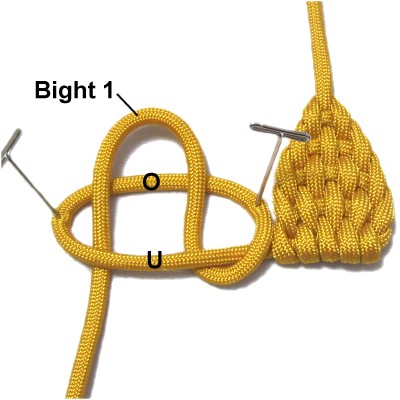
Form the first
bight by folding the working
end.
Push it through the loop, passing under
- over the two segments.
Move both
sides of bight 1 outward to make it wider,
so there is plenty of room for the
remaining weaving.
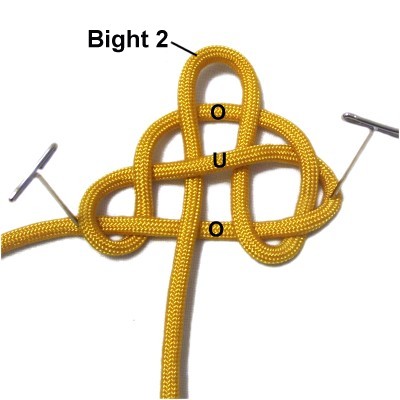
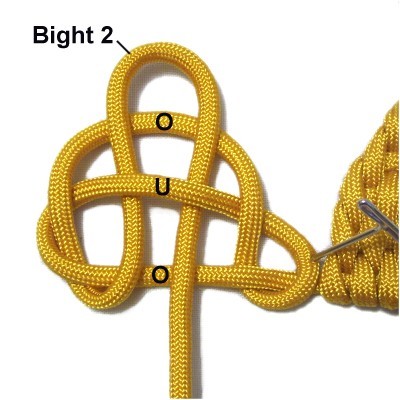
Step 2: Fold the
working end to make bight
2.
Weave it over
- under - over the three
horizontal segments as you bring it
through the center of the design.
Move both
sides of bight 2 outward, so there is room
for the next one to pass through it.
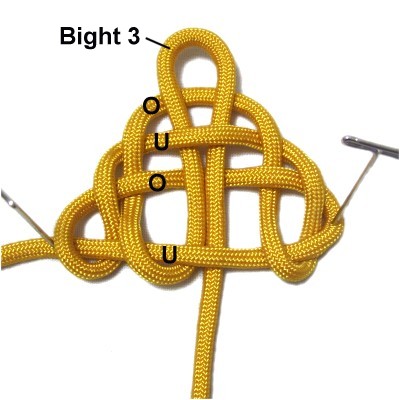
Step 3: Fold the
working end to make bight
3, and weave it through under
- over - under - over.
Move both sides of this bight outward
to make room for the next one.
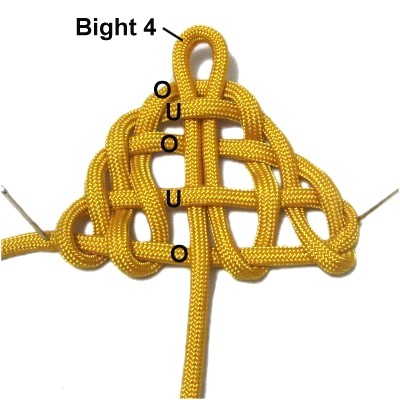
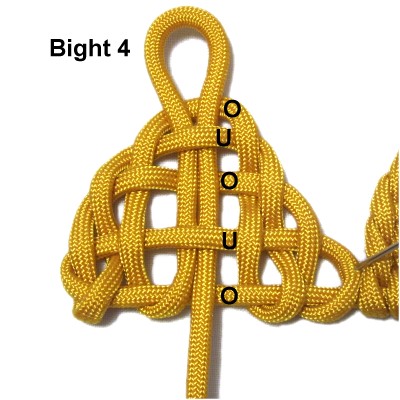
Fold the
working end to make bight
4, then weave it through over
- under - over - under - over.
Make it as wide as possible, since you
have one more row of weaving.
Designer's
Tip: This is where you can change the
size of the wings if you have the room (and enough
material). Just weave more bights through in the
same manner.
Make
sure the over - under sequence changes each
time.
Keep in mind you need at least 6 inches of
material for the final step below.
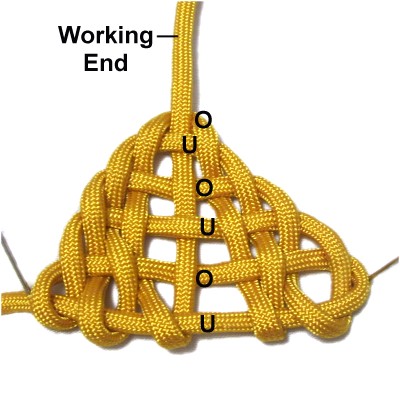
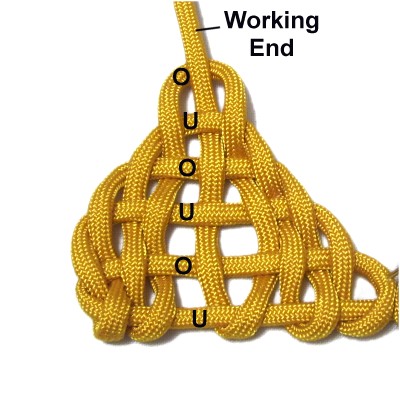
Weave the working end straight
through the center (no bight).
Weave under
- over - under - over - under - overthe six segments.
Step
4: Remove the slack
starting from the center
and working all the way through
the wing.
The wing should be approximately 1-inch
wide and 2-inches long when you are
finished.
Designer's
Tip:Make sure the edges
of the Angel Wings are well tightened and
symmetrical. There should be no gaps on the
inside surfaces.
They can be any shape, but most wing designs
should be pointed.
Step
5: Now it's time to make the
second wing.
Make a clockwise
loop with the left half of the cord.
The crossing point should be very close
to the center, and the loop should be
the same size as the one for the other
wing (step 1).
Fold the
working end to make bight
1, then pass it through the loop
under
- over.
Make the bight wider before moving on.
Step
6: Fold the working end to
make bight
2.
Weave it through the center over
- under - over. Make the bight wider before the
next step.
Fold the working
end to make bight
3.
Weave it through under
- over - under - over.
Create bight
4, then weave
it through the other segments over
- under - over - under - over.
Add more bights if you did so in
the other wing.
Step
7: Weave
the working
endthrough the center.
Pass under
- over - under - over - under - over the
six segments.
Tighten this wing so it's the same size as
the other. Make adjustments to both
wings as needed.
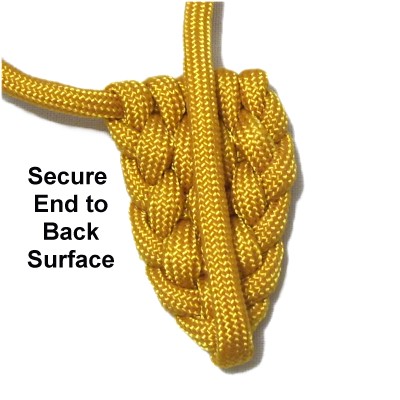
Step
8: To finish the Angel Wings,
bend the working ends to the BACK of the
wings and secure them with glue.
Cut off the excess material when it's dry.
When using Paracord, melt the tip with a
flame.
Fold the Angel
Wings so they face opposite directions.
The segment between the two wings can be
used to attach them to your Angel or Bird
design.
By
using any text or images on Free Macrame
Patterns, you are agreeing to ourTerms
of Use