Description:
These Alpine Knots are used in a variety
of sports and activities that require the use of
ropes. So they are not considered decorative
knots, but can be used as such.
The Alpine Loop
and the Alpine
Butterfly can be used as mounting knots
in a Macrame design. They are suitable for items
like curtains and wall hangings that require
strong, stable loops at the top.
They can also be used as clasps for jewelry items
and belts.
The Alpine Bend
does not have a loop. It is used to connect
two cords, and is actually a type of linked
Overhand knot.
Nets can be made using this interesting knot,
simply by connecting two cords at a time in an
alternating pattern.
Alpine Loop
Description:
The Alpine Loop has a stable loop at the top,
which makes it suitable for hanging heavy
items. You can also use the loop
as part of a clasp for something like a Paracord
bracelet or belt.
As you construct the knot, you are actually
looking at the back
of it. You will need to turn it over to see
the front. Keep that in mind when using it
in a Macrame project.
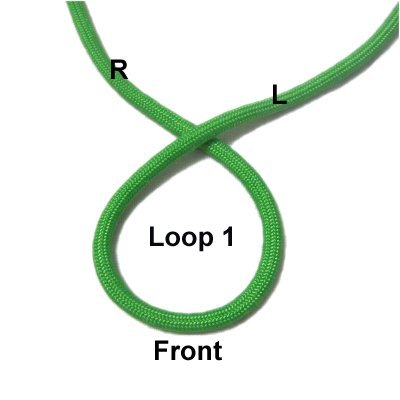
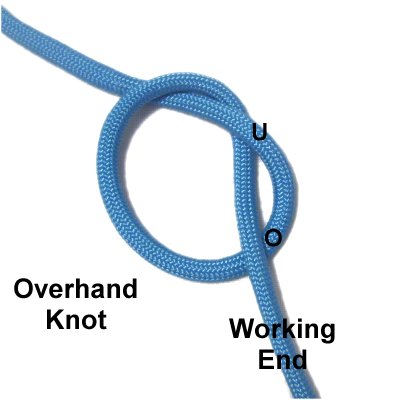
Step
1: Make a loop at the
center of a 36-inch cord, crossing left over
right.
The curved portion (crook) is considered
the front.
The back is the crossed area, which should
be secured if you are using a board.
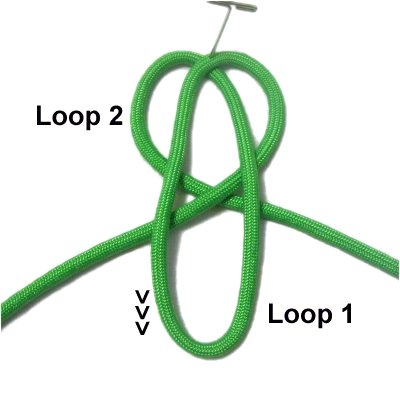
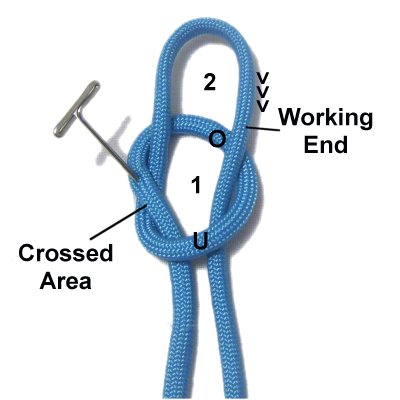
Step
2: Bring both halves of
the cord towards you, then cross left
over right to create a second
loop.
Step
3: Pull the front
of Loop
1towards you, passing over
the crossed area of Loop 2.
It needs to be long enough to fold in the
next step.
Adjust the size of Loop 2 if necessary.
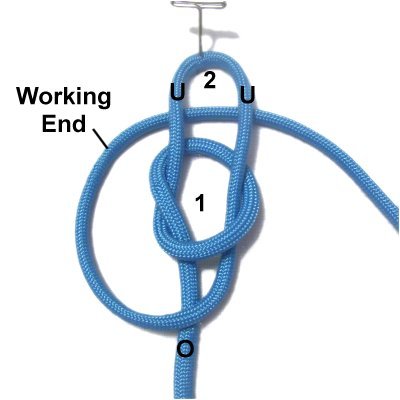
Step
4: Fold Loop
1under
the crossed area of Loop 2.
Step
5: Continue to pull Loop
1 towards the back of the knot,
passing over
the crossed area.
Step
6: Adjust the size of Loop
1, then tighten the rest of the
knot.
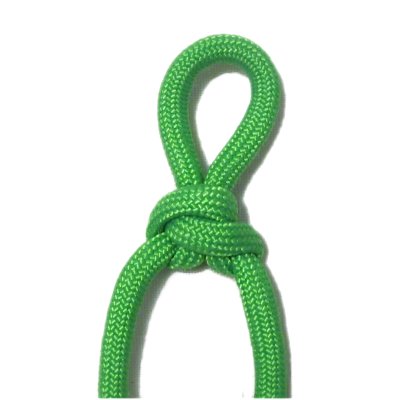
Turn it over to see the front of the knot,
which has two horizontal segments below
the loop.
Alpine Butterfly
Description:
The Alpine Butterfly is the most useful of all
the Alpine knots. From plant hangers to
jewelry, you can use it whenever you need a
stable loop.
What makes it interesting is the triangular
shaped design below the loop.
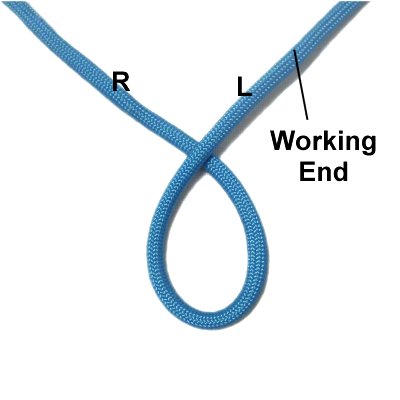
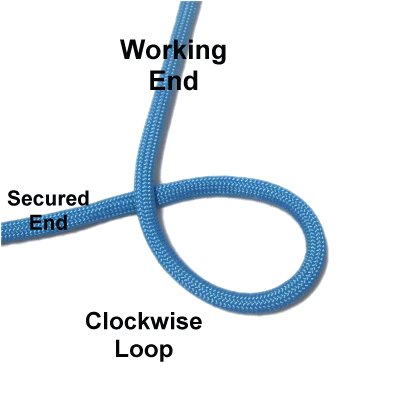
Step
1: Make a loop in the
center of a 36-inch cord.
Cross left
over right as shown.
The working end is the left half, which
is now on the right.
Step
2: To complete the Overhand knot,
bring the working end through the loopfrom
below, which is under
- over.
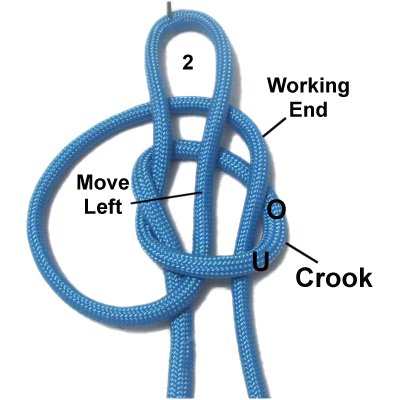
Step 3: Turn the
Overhand knot so the crossed area is on
the left.
Make a bight,
which is labeled 2 in this image.
To form a Slipknot, bring the working
end of the cord through the Overhand
knot over
- under (from the top).
Step 4: To start Loop
3, move the working end in a clockwise
direction.
Pass over
the other end of the cord.
Bring the working end to the bight (2),
passing under
both sides of it.
Step 5: Locate the
right side of the bight (2) where it
passes through the Overhand knot.
Move it to the left.
Move the working end through the
Overhand knot, to the right of the
segment that you moved. It should
be next to the crook
of the OH knot.
Step 6: Alpine knots
should always be tightened slowly and
carefully.
This variation has three loops, which
have to be tightened in
order.
First, pull on the bight
(2) to tighten the Overhand
knot.
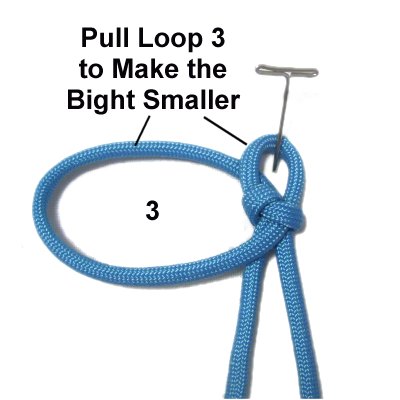
Step 7: Pull Loop
3 to make the bight smaller,
but don't tighten it all the way.
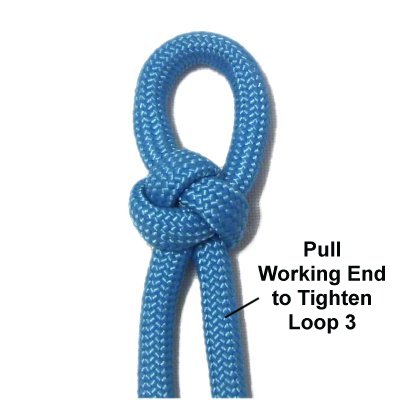
Step 8: Tighten Loop 3
by pulling on the working
end, which is on the right.
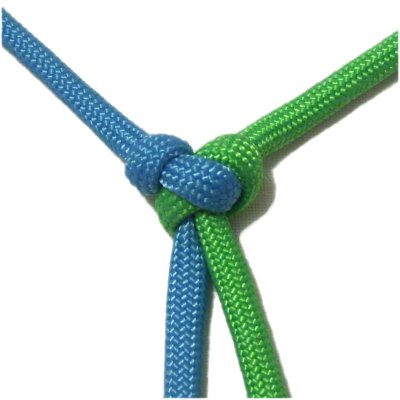
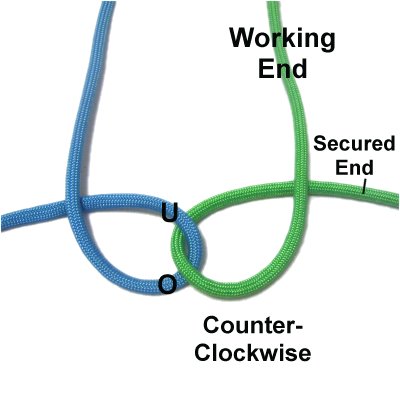
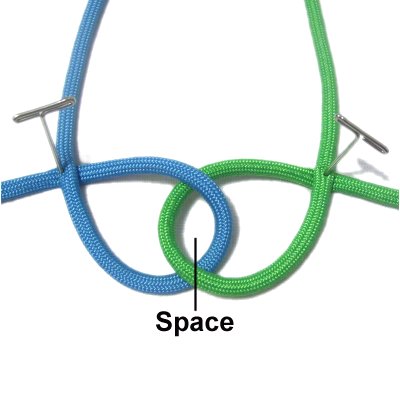
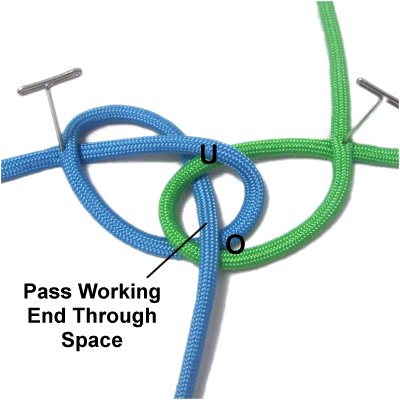
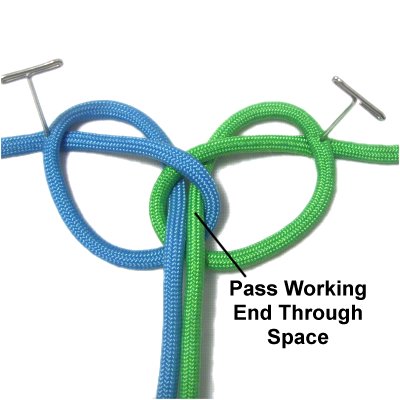
Alpine Bend
Description:
The Alpine
Bend is the most unique of the three
Alpine Knots. It's made with two cords
linked together.