The video gallery contains
tutorials for this and other interesting
knotting techniques and designs.
The best way to start
the Woven Wave design is to form a simple loop
using two cords.
When practicing,
the working cord should be at least 45 inches
long.
When making a project with this technique, use
this formula:
Working
cord:Finished
length x 5.
Holding
cord:Finished
length x 2.5.Add 4 inches
if you plan to make a button knot for a clasp.
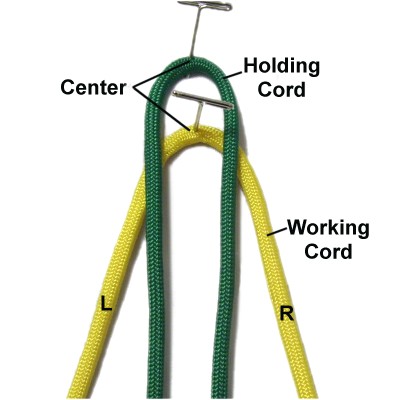
In the example shown, the working cord is yellow
and the holding cord is green.
Step
1: Fold both cords in
half and secure them at the center.
The working cord should rest under
the holding cord.
Important:
Measure the holding cordfrom
the center moving forward, until you reach the
finished length you plan to make.
Secure both halves of the holding cord at that
point, with
tension.
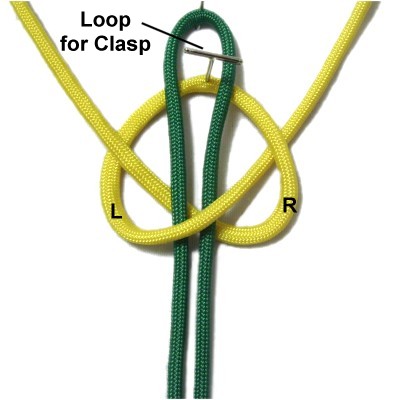
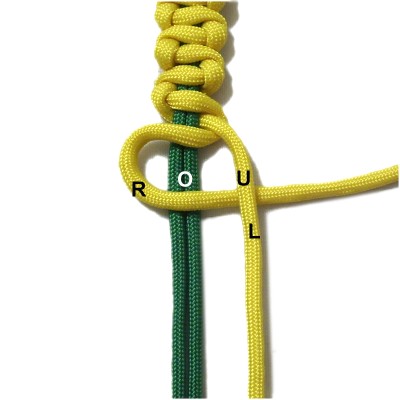
Mentally label each half of the working cord
(right or left).
Use working
cord A to tie a Half knot:
Pass the left
half over
the holding cord and under
the right half.
Pass the right
half under
the holding cord and over
the left half.
Step 1,
continued: Tighten the Half knot as
much as possible. The area between the
center of the holding cord and the Half Knot is
the loop you use if you need a clasp.
Adjust the placement of the Half knot so the loop
is the right size for what you plan to do at the
opposite end of the Woven Wave design (button
knot, bead, or button).
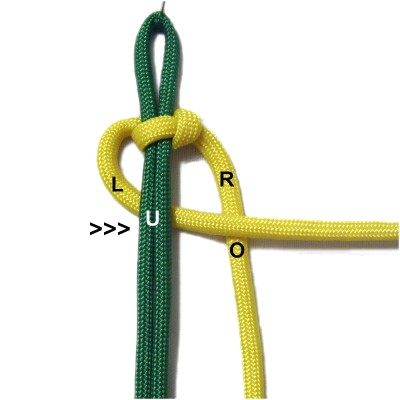
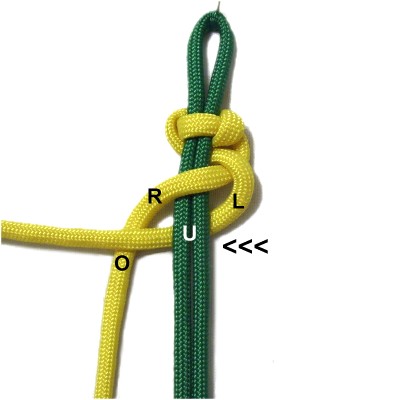
Step 2: Move the
left
half of the working cord to
the right, passing under
the holding cord and over
the right half of the working cord.
Designer's
Tip: As you make the Woven Wave, remember
this:
The left
half of the working cord ALWAYS goes under
the holding cord no matter which direction you are
weaving.
The right
half ALWAYS passes over
the holding cord.
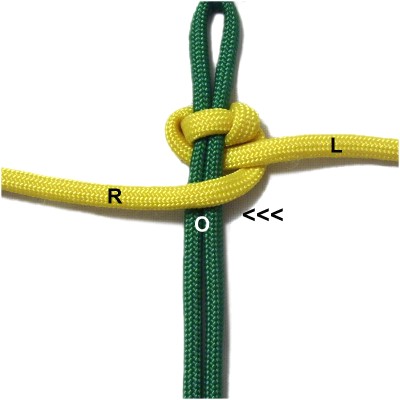
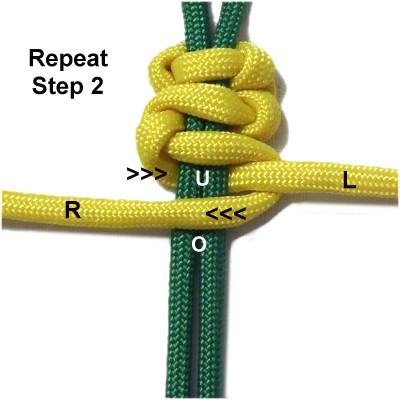
Move the righthalf
of the working cord to the left, passing
overthe holding cord.
Pull both parts of the working cord to
tighten.
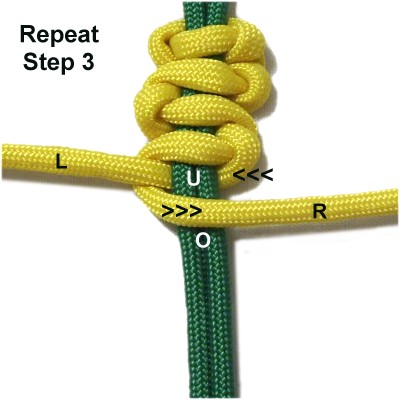
Step
3: Move the left
half of the working cord to the
left, passing under
the holding cord and over
the right half of the working cord.
Move the right
half of the working cord to the
right, passing over
the holding cord.
Pull both halves of the working cord to
tighten, then push the second knot close
to the first.
Step 4:Repeat
step 2.
Step 5: Repeat
step 3.
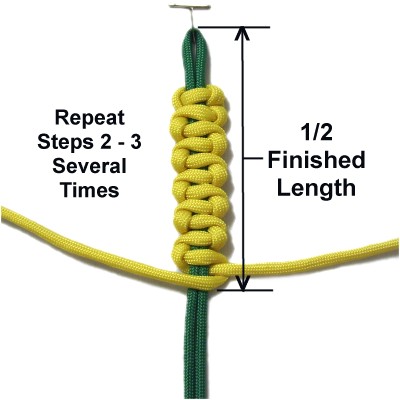
Step 6:Repeat
steps 2 and 3 several times,
pushing the knots close together.
Stop when the sennit is 1/2
the finished length you plan to
make. Include the loop when you
measure.
Step
7: Move the right
half of the working cord over
the holding cord and under
the left half.
You can do this either direction,
depending on where the two halves were
resting after you made the last knot.
Move the left
half of the working cord under
the holding cord and over
the right half.
Tighten the Half Knot firmly.
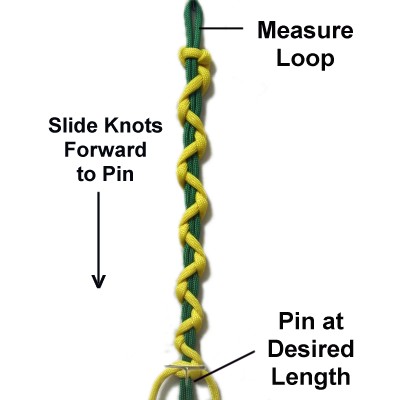
Step 8: Expand the
Woven Wave by sliding the knotstoward the front of the board (forward).
They should reach the pin you placed on
the holding cord to mark the desired
length. Remove or add knots as
needed.
Measure the loop to make sure it's
still the right size for your project.
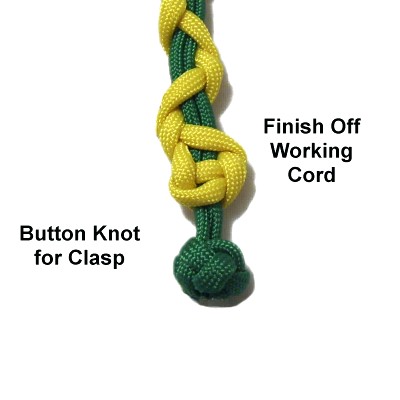
Step
9: Finish off the ends of
the working cordby securing them to the back of the
sennit.
You can now tie a button knot with the
holding cord, or attach a button or bead,
if you need a clasp.
By using any
text or images on Free Macrame Patterns, you are
agreeing to ourTerms of Use.