|
|
| |
|
|
|
Description:
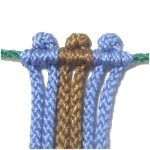
The Venetian Picot Mount is a vintage design that
was popular in Macrame projects from the early
1900's.
A picot is a knot or loop that stands above the
level of a holding cord, ring, or dowel (when
upright).
The purpose for this technique is to add
decoration along the top of an item like a curtain
or wall hanging.
|
|
| |
|
 |
| |
Basic Venetian Picot Design
|
|
|
|
|
Description:
This is the standard Venetian Picot Mount design
found in vintage Macrame books. You can use
it with material 2mm to 6mm thick.
Preparation:
To practice, you need one working cord and one
holding cord to practice this technique.
They should be at least 15 inches long. |
| |
|
| |
|
|
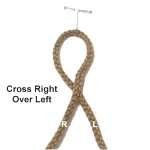
Step
1: Make a loop at the
center of the working cord, crossing right
over left.
|
|
| |
|
| |
 |
|
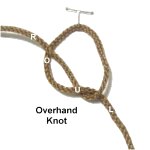
Step
2: Complete the Overhand
knot by moving the right half of the cord
under
- over the left half.
When using 4mm to 6mm material, tighten
firmly. For finer material (2mm - 3mm),
tighten more loosely so it's not too
small.
|
|
| |
|
| |
|
|
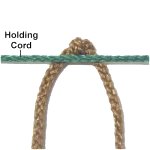
Step
3: Secure the holding
cord horizontally on your board.
Place the Overhand knot next to it,
with the cords underneath it.
|
|
| |
|
|
|
|
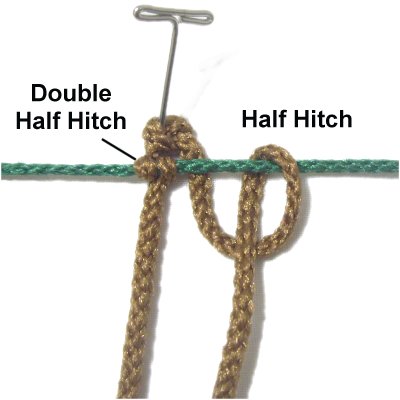
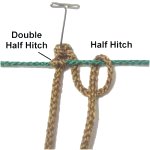
Step
4: Attach both halves of
the working cord to the holding cord
with Double Half Hitches (DHH).
Make sure the Overhand knot rests against
the holding cord when you are through.
|
|
| |
|
|
|
|
Step
5: Repeat
steps 1 - 4 if you wish
to practice mounting additional cords. |
|
|
|
| |
| |
| |
Triple Knot Picot Mount
|
| |
 |
|
|
Description:
The Venetian Picot Mount can be made with more
than one knot. The most common technique is
this Triple Knot design.
The advantage to using this variation is that the
picot will be larger and more visible. This
design is more suitable for 2mm to 3mm material.
The most important part is to make sure the three
knots are close together without any extra space
between them.
Preparation:
To practice, you need one working cord and one
holding cord. Make sure the working cord is
at least 18 inches long. |
|
|
|

|
|
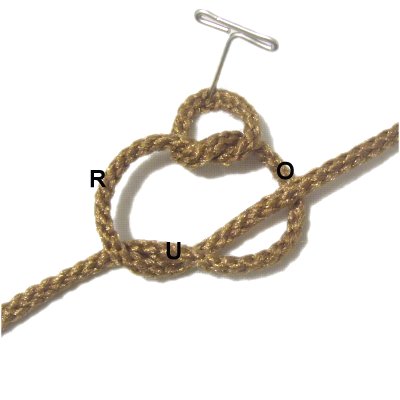
Step
1: Repeat
steps 1 and 2 from the basic
design, to make the first Overhand knot at
the center of the working cord.
Use the left
half of the cord to make another
Overhand knot, rotating counter-clockwise.
The crossed area should be on the left. |
|
|
|
|
|
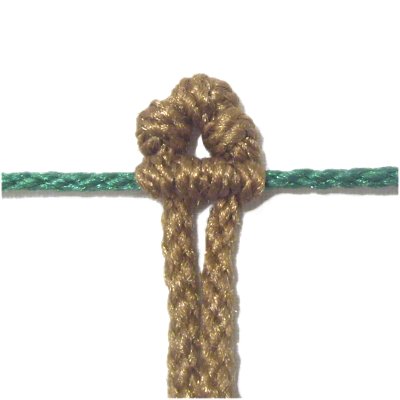
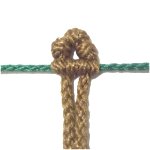
Step
2: Tighten the knot
gradually, pushing it towards the knot at
the center.
When you finish, the two knots should be
TOUCHING, with little or no space between
them. |
|
|
|

|
|
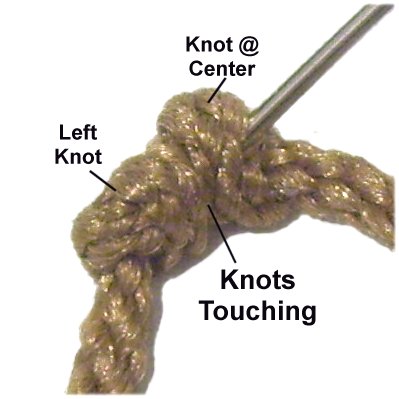
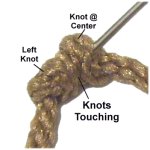
Step
3: Use the right half of
the cord to make the third Overhand knot.
Rotate clockwise,
so the crossed area is on the right.
Tighten gradually, so that when you
finish, this knot will be touching the one
at the center.
|
|
|
|
|
|
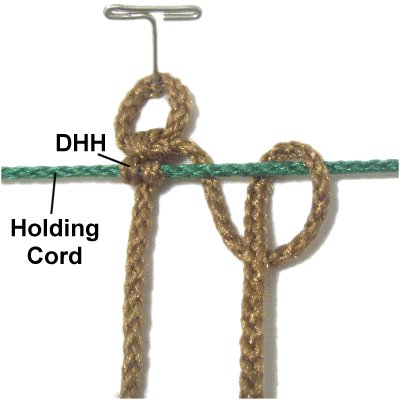
Step
4: Arrange the holding cord
horizontally. Place the triple knot
design next to it with the cords
underneath.
Attach both halves of the working cord to
the holding cord with DHH. Make sure
knots 2 and 3 are touching
the holding cord when you are finished (no
gap). |
|
|
|
|
| |
|
Venetian Picot Loop Mount
|
| |
|
|
|
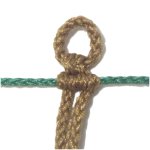
Description:
This variation of the Venetian Picot Mount has a
loop above the knot, which can be any
size. In general, the loop should be
no more than 1-inch tall, but that really depends
on what you are making.
Preparation:
To practice, you need one working cord and one
holding cord, at least 15 inches long.
|
|
|
| |
|
|
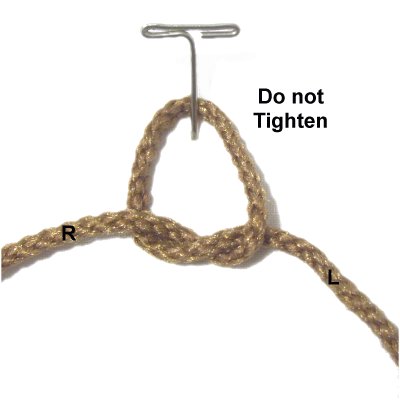
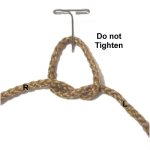
Step
1: Tie an Overhand knot at
the center of the cord. Make sure
you cross right over left, then bring the
right half through the loop.
Do not completely tighten the knot. Adjust
the size instead, and secure it to your
board. |
|
|
|
|
|
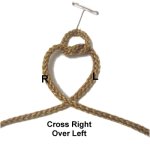
Step
2: Start another Overhand
knot, crossing right over left.
Keep in mind that the two halves have
switched places, so the right half is now
on the left.
|
|
|
|

|
|
Step
3: Pass the right
half under
- over the left half to complete
the Overhand knot.
Tighten this knot completely,
without altering the first knot. |
|
|
|

|
|
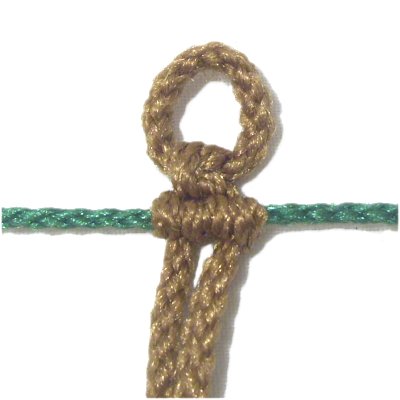
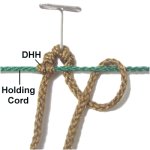
Step
4: Arrange the holding cord
horizontally. Place the knot and
loop next to it with the cords underneath.
To complete this variation of the Venetian
Picot Mount, attach both halves of the
working cord to the holding cord with DHH.
|
|
|
| |
| |
| |
|
|
| By using any
text or images on Free Macrame Patterns, you are
agreeing to our Terms of Use |
|
|
|
| Have
any comments about the Venetian Picot Mount? Contact
Me. |
|
|
|
|
|
|