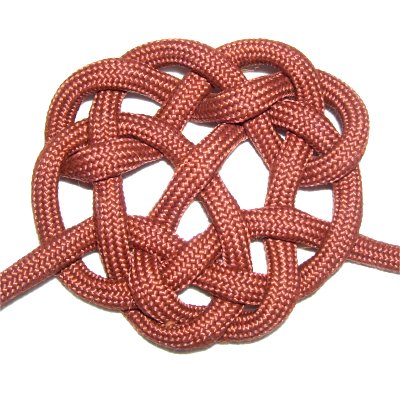
Tree of Life
Description: The Tree of Life
is a popular historical symbol that represents
strength and wisdom. It also refers to the
connection of all forms of life.
Health, longevity, and eternal life are often
associated with this unique design.
You can use this decorative knot as a pendant,
or a focal point for a Macrame bracelet.
By making it large, and using a second cord to
double it, you can create a nice set of coasters
or a table decoration.
In the example shown, nylon Paracord was
used. It needs to be melted with a flame
at the tips, to seal in the fibers forming the
core.
I found this knot in Decorative
Fusion Knots
Written
by JD Lenzen
Click on the link or image to see his
website.
The video
gallery contains other
innovative Fusion knots, which are a
combination of different knotting
elements and techniques.
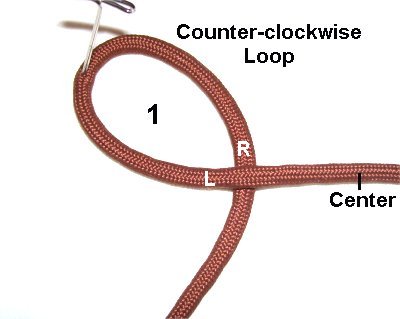
Step 1: Make a
counter-clockwise loop
near the center of a 45-inch cord.
The left portion should be horizontal ,
and pass over
the right to make the crossing point.
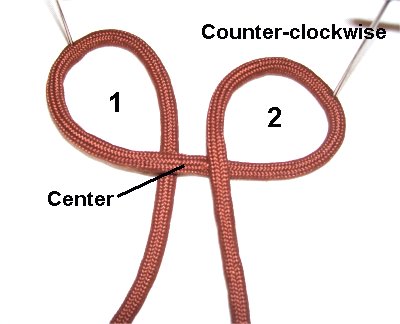
Step
2: Create a second counter-clockwise
loop, positioning it to the right
of the first.
Step
3: Cross the left end over the
right, below
the two loops.
Step 4: Turn
the knot around , so
the two ends are at the top .
Secure the crossing points of the two
loops as well as the ends.
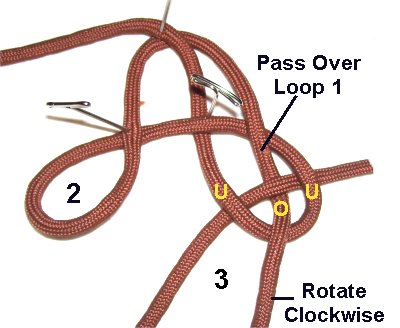
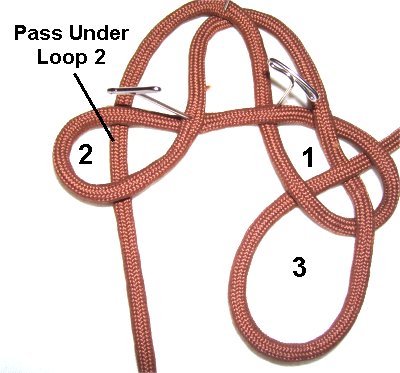
Step 5: Bring the end
now on the right
straight down, passing over
Loop 1.
Rotate it clockwise ,
to form the third loop.
Weave it through Loop
1 , under
- over - under the three
segments.
Step 6: Bring the end
on the left
straight down, passing under
Loop 2.
Make Loop
3 slightly larger than the
other two loops, since you will now be
creating the lower portion of the Tree
of Life.
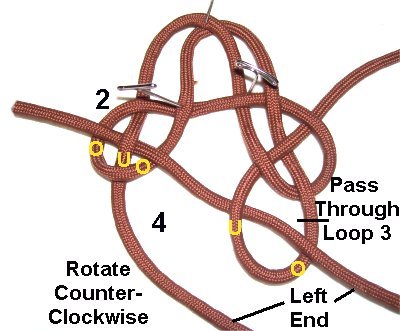
Step 7: Bring the left
end to the right ,
and pass it through
Loop
3 over
- under (from the top).
Bring it back to the left ,
to Loop
2 .
Weave
it over
- under - over the three
segments, to make Loop
4 .
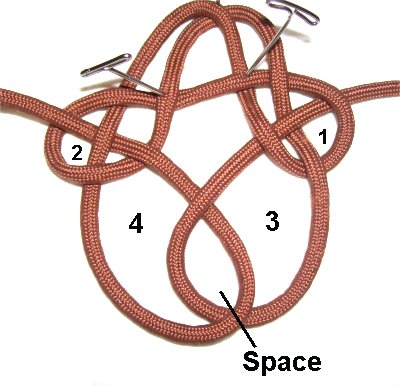
Push Loops
3 and 4 towards the center,
creating
a third space.
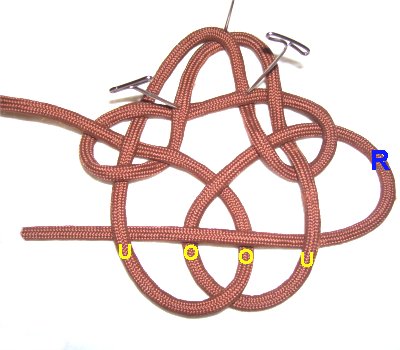
Step 8: Pass the right end
through Loops 3 and 4, moving
horizontally (right to left).
Weave it under
- over - over - under the
four segments.
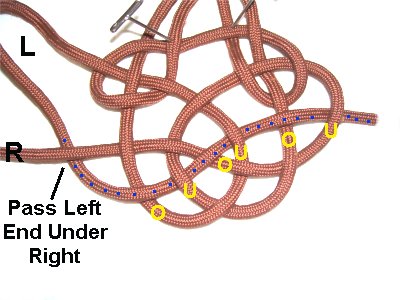
Step 9: Pass the left
end under
the right end.
Weave over
- under - over - under - over - under
the six segments (loops 4 and 3).
The left cord is marked with small
blue dots so you can see it
better.
Step 10: Stretch
the
knot
Start at one end and remove the slack
as you go through the entire knot. The
ends will be at the bottom of the Tree
of Life when you are done.
By using any
text or images on Free Macrame Patterns, you are
agreeing to our Terms of Use
Have
any comments about the Tree of Life? Contact
Me.