The video gallerycontains tutorials for many
interesting knotting techniques and
designs.
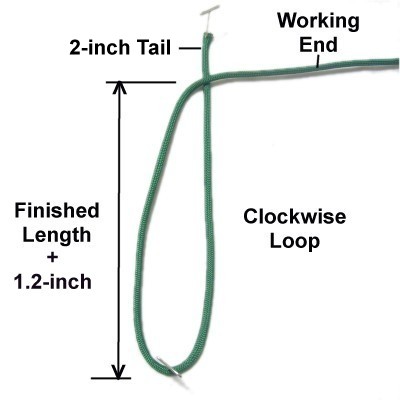
Preparation: To practice, you
need one cord at least 60 inches long. Secure one
end to your board vertically.
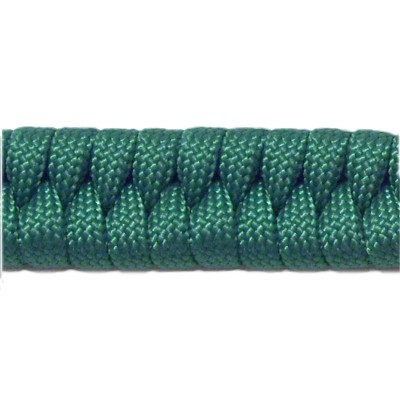
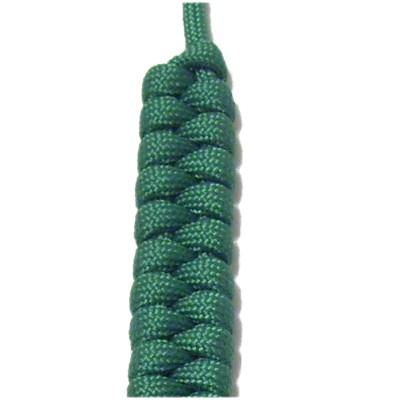
When making something with the Switchback Strap,
the length of the cord should be at
least 15 x the finished length of the
item you are making.
Step
1: Make a clockwise
loop 5 inches long, so the crossing
point is at least 2 inches from the
secured end of the cord (tail).
When using this technique for a
project, the loop should be the finished
length+ 1/2-inch.
Read
the information below
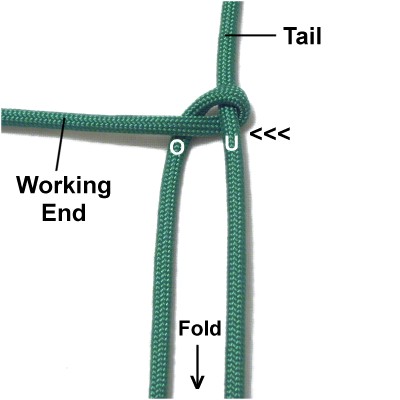
Important:
Adjust the crossing point of the loop to make sure
there is enough material in the tail for whatyou are
planning to do with it. You only need
4 - 6 inches to use it as a clasp for a bracelet,
but a belt will require more length.
Keep in mind that you will pull the secured end to
tighten the strap, which will make that segment
longer.
The reason you add 1/2-inch to the loop is to take
into account the compression of the strap when
it's tightened (it will shorten).
Step 2: Move the
working end to the left,
passing under
- over the two sides of the
loop.
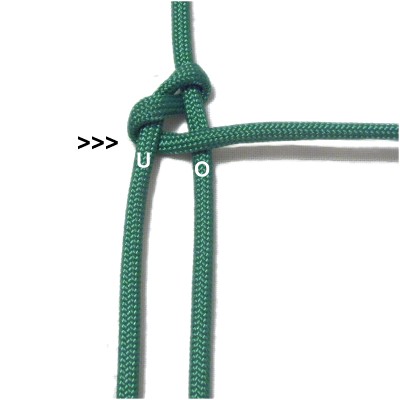
Securing the loop at the fold (with
tension) helps make the strap look
neater, so do that now if it's not
already secured.
Step 3: Move the
working end to the right,
passing under
- over the two sides of the
loop.
Step
4:Repeat
steps 2 and 3 several times.
Slide the knots close together as you
progress.
The most challenging part of the
Switchback Strap is to keep it the same
width all the way to the end, so keep
the loop flat and increase the tension
as needed.
Step
5: Continue until the working
end is close to the folded area of the
loop.
Pull the secured
end to tighten the strap.
By using any
text or images on Free Macrame Patterns, you are
agreeing to ourTerms of Use