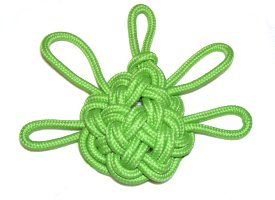
Description: This Sea Turtle
Pendant is a Micro-Macrame decoration suitable
for a casual necklace. It can
also be used as an ornament, or to decorate
packages and other items.
At the bottom of the page, are photos that show
you how to use this turtle knot in a necklace
design.
In the example shown, 450 size Paracord was
used, which is approximately 3mm thick. The
finished size of the shell was 1.5 inches wide.
By using 2mm cord, you can easily make this
tiny turtle a smaller size.
A tutorial for this unique design can
be found on the websiteFusion
Knots.
Go to the Video
gallery to find the Sea Turtle
knot.
You can purchase several great books
featuring a variety of combination knots
and techniques.
Supplies Needed:
Cord Material (60 inches)
Project Board and Pins
Fine tip pliers or tweezers
The Head
(Slipknot)
Cut
one cord, 60 inches long. Prepare
the ends to prevent unraveling.
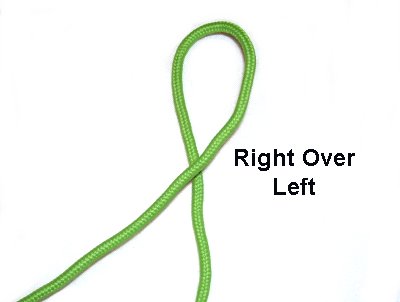
Step 1:
Create a Slipknot for the head
of the Sea Turtle Pendant:
Make a loop in the center
of the cord.
Cross the right half over the left.
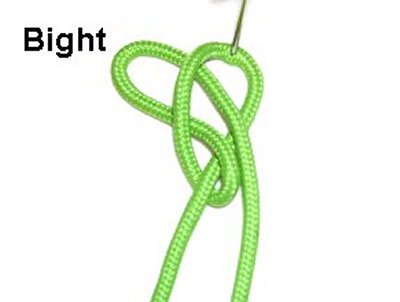
Make a bight with the end
on the right.
Pass it through the loop as shown.
Pull on the bight and the
ends to tighten.
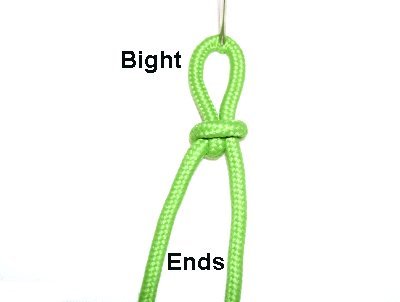
Josephine Knot
Base
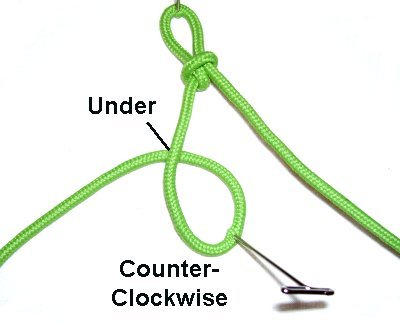
<
Use the
left end to make a counter-clockwise
loop, passing under
the portion coming from the Slipknot.
Pass the right
end over
the loop and under the left end. >
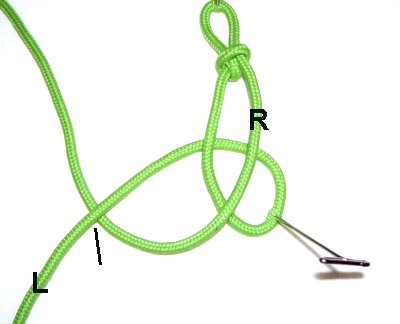
<
Still using the right end,
rotate in a clockwise
direction. Weave it through 4 segments over,
under, over, under.
Tighten the knot. >
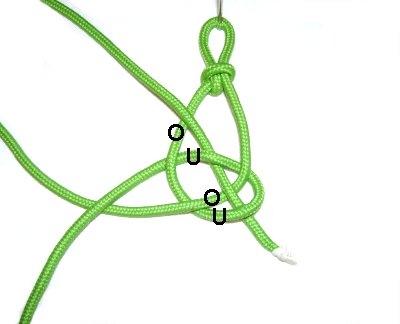
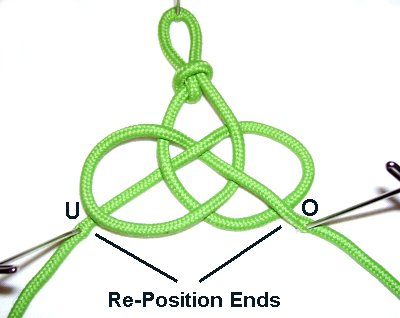
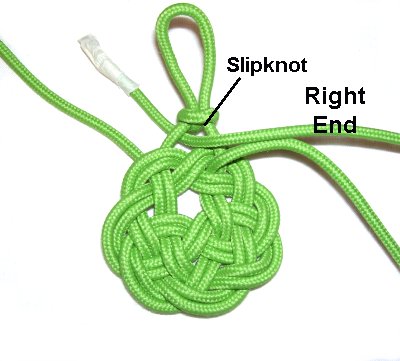
Important:Look at the rightimage above.
The
two ends exit the knot in a specific way:
The left end exits the knot from OVER the
left loop.
The right end exits the knot from UNDER the
right loop.
In the next step, you will re-arrange
the ends. Refer to the photo as needed
to help you see the change.
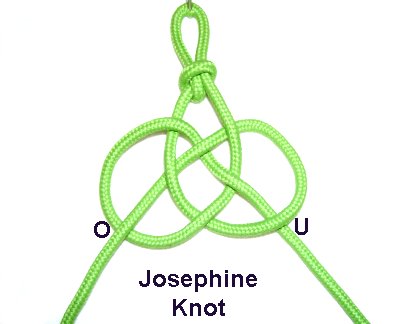
Creating The Shell
Step
2: Re-position the ends so the
left
end passes underthe bottom of the left loop.
The right
end should pass over
the bottom of the right loop.
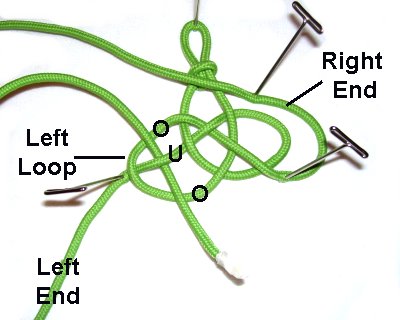
Step
3: Bring the rightend up to the Slipknot at the
top. Move it across to the left
side of the Sea Turtle Pendant design,
rotating counter-clockwise.
Bring it down to the left
loop of the Josephine knot.
Weave it over
- under - overthe
three segments.
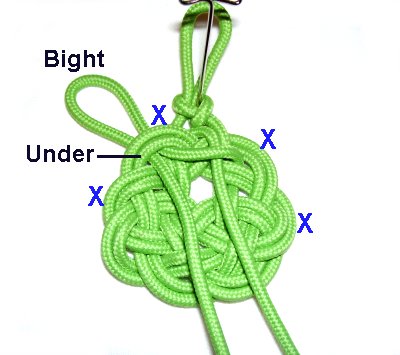
Design
Tip: Notice there is plenty of
space on the right side of the Sea Turtle Pendant
shell design.
You should arrange the cord the same way, and
avoid tightening anything at this point.
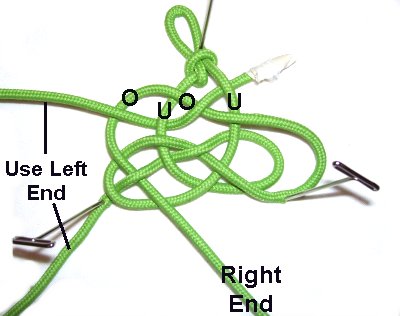
Step
4: Bring the leftend to the top and weave it
through the segments over
- under - over - under, moving
left to
right.
This
takes place in the area
between the loop at the top (head) and
the Josephine knot.
Bring the same end (left) down to the
lower right area of the Sea Turtle
Pendant.
Weave over
- under - over - under the four
segments, which includes the right loop
of the Josephine knot.
It
helps if you spread the loops out
before you do the weaving.
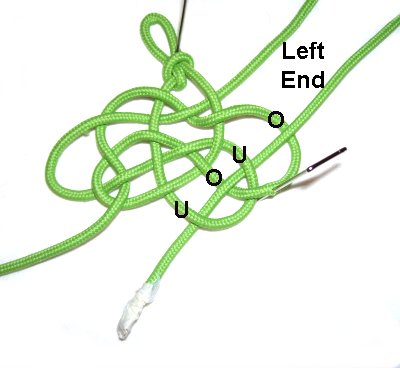
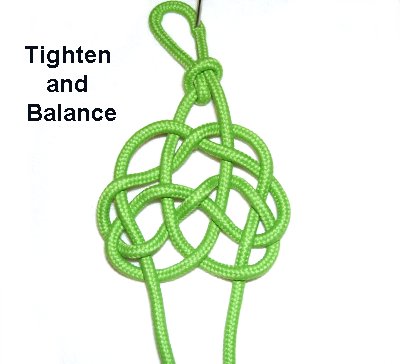
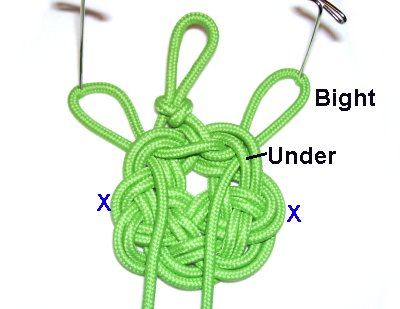
Step
5: Tighten and balance
the knot, so it's as round as you can
make it. Leave enough room so you can
double it.
Make sure the head of the Sea Turtle is
still small. The distance between the
Slipknot and the shell should be reduced
to as little as possible.
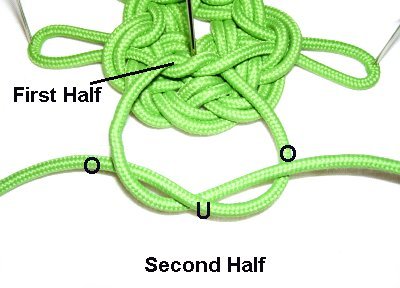
Double the Shell
Design
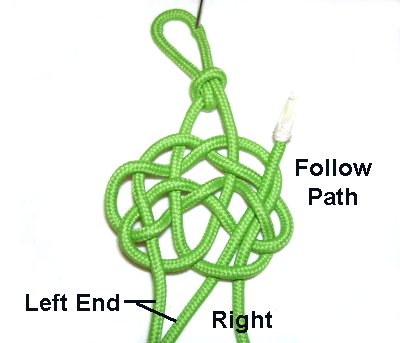
Step
6: Move the left
end to the place where the right end
comes out of the knot.
Use it to follow the path
of the righthalf of the
cord, until you get to
the top of the shell.
Pause temporarily to start this
process with the other end.
Use the right
end to follow
the path of the left
half of the cord, to the top of
the shell.
Now you can continue, using each end fill
in the rest of the shell.
Make sure you keep everything flat, and
work slowly. The ends should be at the top
when you finish.
Use your pliers or tweezers if you find
your fingers can't do the job.
Creating the Limbs
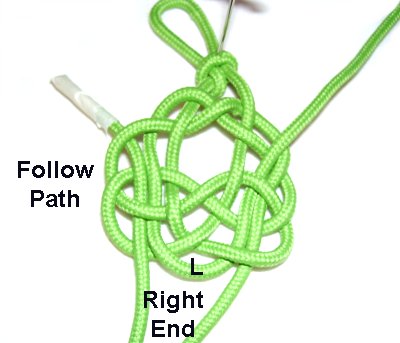
Step
7: Pass the right
end through the space just below
the Slipknot (head).
Turn over the Sea Turtle Pendant, so
you are working at the back
of it.
Cross the end that's now on the right
over
the left.
The X
shows the areas that bights will be
passed through in the following steps
(for the limbs).
Step
8: Use the end that's now
on the left
to make a bight.
Pass it under
the two loops at the edge, in the left
upper area of the shell.
Adjust the bight so it's slightly
larger than the head.
Use the other end and make a bight.
Pass it under
the two loops at the edge, in the right upper
areaof the shell.
Adjust it so it's the same size as the
first limb.
Repeat this
process lower down.
Make sure you pass the bights through the
loops on the edges, just
below the areas where the first
limbs are.
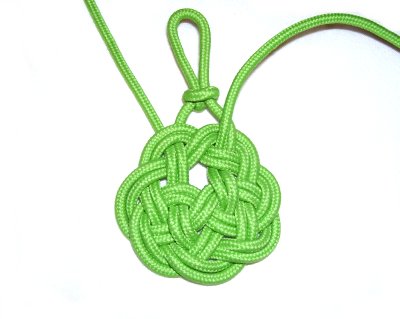
Finishing the Sea
Turtle Pendant
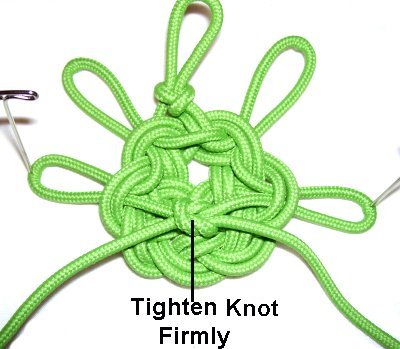
Step 9:
Secure the lower
limbs to your board.
Pass the right end over,
under, over the left end, to
make an Overhand knot.
Tighten the knot and secure it.
Tie another knot, using the same
end, which is now on the left.
Pass it over,
under, over the other end.
Tighten the knot firmly.
Apply glue under
the knot so it sticks to the
back of the shell.
Put a weight on it, or use a clip, to
hold the knot to the shell while the
glue dries.
Cut off the excess material. For
Paracord, melt the ends with a flame to
prevent unraveling.
There is a small opening in the shell, between
the front and back limbs. You can add a cord
there, to create a necklace or make a loop for
hanging:
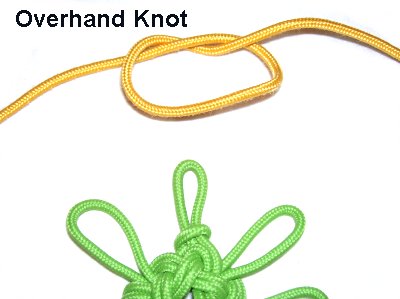
Tie an Overhand Knot in the center of a new
cord. Pass both ends through the opening, so the
knot rests in the back
of the shell.
The images below show you another way to add a
cord when making a necklace with the Sea Turtle
Pendant:
Tie an
Overhand knot in the center of a new cord.
The crossing point should be at the top,
as shown.
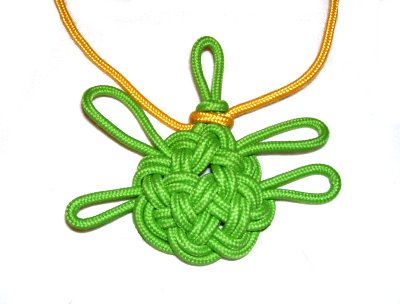
Slip it over the head of the turtle, so
the crossing point is in the back.
Tighten it securely.
Now you can use the two ends to make
the necklace.
By
using any text or images on Free Macrame
Patterns, you are agreeing to ourTerms
of Use