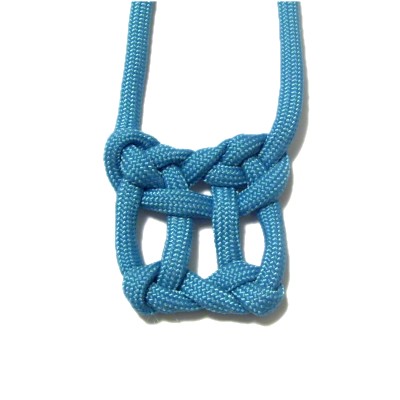
Pagoda Knot
Description: The Pagoda Knot
is based on the sacred architectural designs
commonly seen in Asian temples and places of
worship. These structures are often used to
enshrine sacred relics.
The knot has two loops at the top that are
curved upward to represent the pointed corners
frequently seen on these unique buildings.
This decorative knot makes a great
Micro-Macrame pendant, since the cords exit the
knot at the top. You would make the
pendant first, then use the remaining material
for the necklace design.
This knot is in Decorative
Fusion Knots.
Click on the link or image to visit the
website.
In the video gallery you will find
tutorials for many unique types of
combination knots.
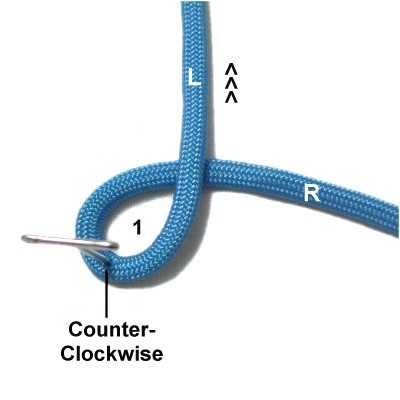
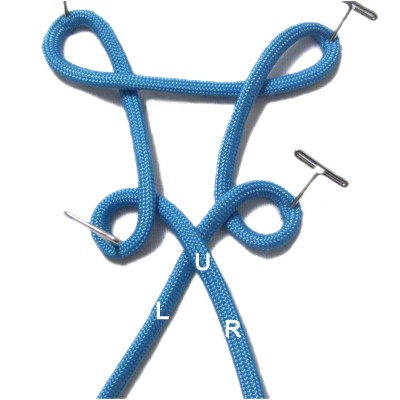
Step 1:
You need one 36-inch cord to practice the Pagoda
Knot.
counter-clockwise
loop with the left
half of the cord. Mentally
label it loop
1.
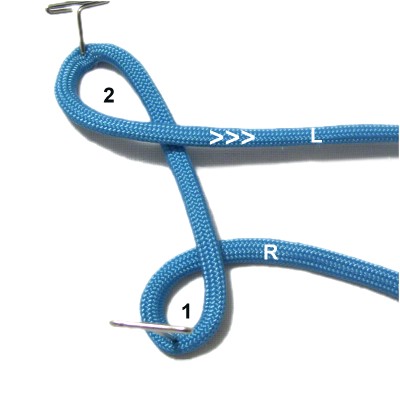
Step
2: Move the left half either
diagonally or vertically toward the back
of your board. loop
2. It should be larger
than the other loop.
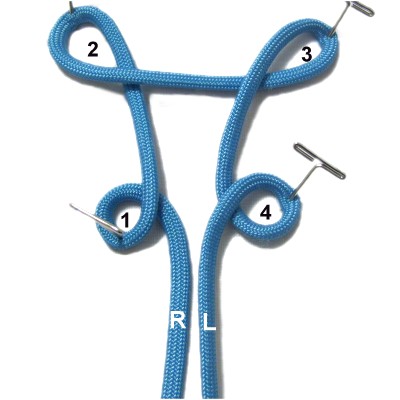
Step
3: Make the next
counter-clockwise loop with the left half,
positioning it to the right
of loop 2. Mentally label it loop 3.
Step 4: Make another
counter-clockwise
loop to the right
of loop 1.
It should be the same size as loop
1.
You can arrange loops 1 and 4 closer
together than the other two loops
(optional).
Move the left
half of the cord under
the right half, so they cross.
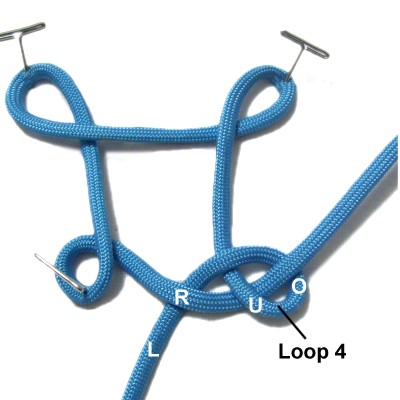
Step
5: Pass the right half
loop
4 under
- over (from below).
Pass the left
half loop
1 over
- under (from the top).slightly ,
so the loops grip the cords running
through them.
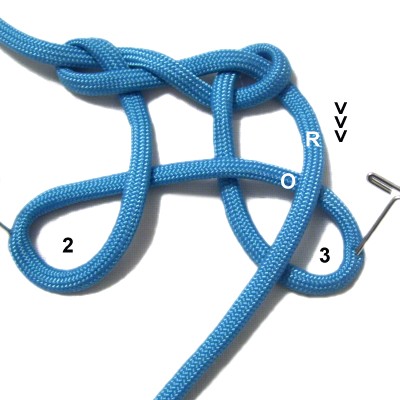
Step
6: Flip the knot upside
down , arranged so that loops
2 and 3 are heading toward the
front of the board.
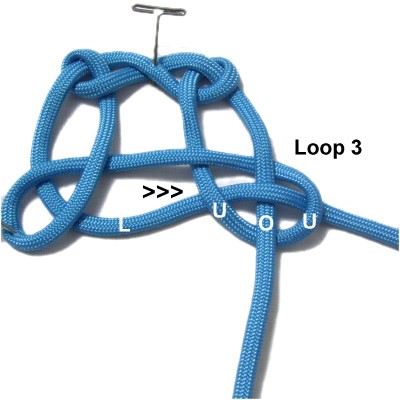
Step 7: Move the right
half of the cord forward, so it
passes over
loop 3.
Bring the left
half of the cord forward, then
pass it under
loop 2.
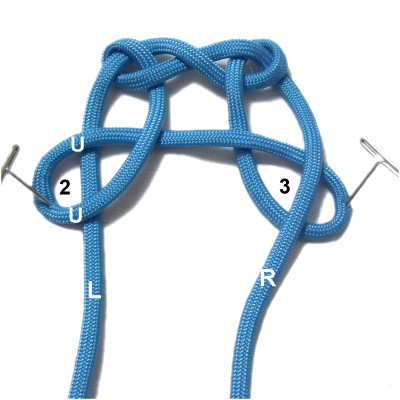
Step
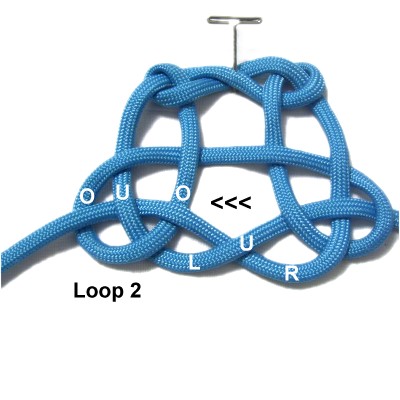
8: Move the left
half to the right, passing it
through loop
3 under
- over - under .
Move the right
half under
the left half of the cord in the center
of the Pagoda knot.
Move it left, passing
over
- under - over loop
2.
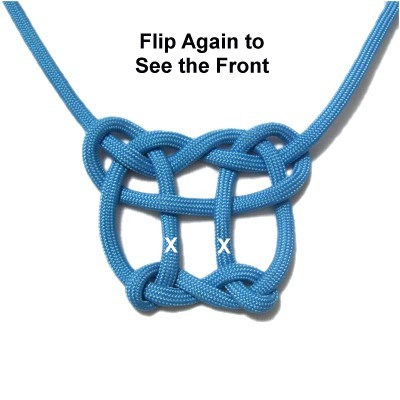
Step 9: Flip the knot
again, so you are looking at the front
of it.
Tighten the Pagoda Knot
gradually. It helps if you start
with loops 2 and 3, pulling on the vertical
segments marked with an X in this image.
By
using any text or images on Free Macrame
Patterns, you are agreeing to our Terms
of Use
Have
any comments about the Pagoda Knot? Contact
Me.