|
|
| |

|
|
|
Description:
The Matthew Walker knot features four cords linked
together with Overhand knots. When finished,
the design looks like a button knot. The
cords rest diagonally in both the front and back
of the knot.
You can use any number of cords to make this knot,
and it can also be tied with the separate strands
making up one cord.
This is considered a finishing knot, since it's
usually tied near the ends of the
cords. You can cut off the excess
material after the knot is tightened
completely.
Thanks goes to Paracord Guild,
which has a YouTube video that helped me learn how
to tie this knot properly. |
| |
| |
|
|
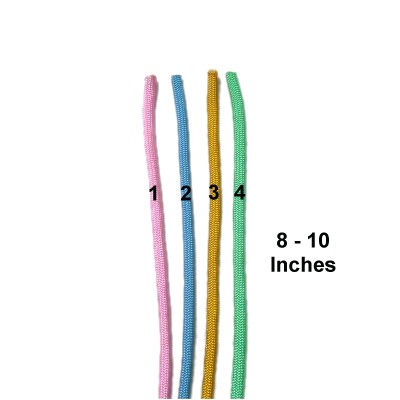
Preparation:
To practice, you need four cords at least 18
inches long. Using four colors is optional,
but helps when you are first learning this
technique.
Try to arrange your board upright if you plan to
use one, to make it easier to arrange the cords
properly. |
|
| |

|
|
Step
1: Arrange the cords on
your board vertically, securing them 8 to
10 inches from one end.
You can make the Matthew Walker Knot while
holding the cords in hand if you prefer
not to use a board.
Mentally number the cords 1 - 4 (left to
right). |
|
| |
| |
|
|
|
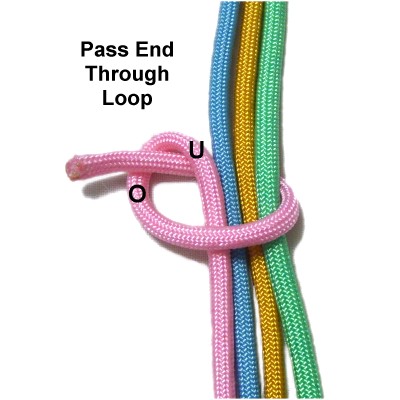
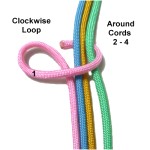
Make a clockwise
loop with cord
1.
Bring it around cords 2 - 4 (over -
under), heading left. |
|
| |
| |

|
|
Complete the
Overhand knot by passing the end through
the loop under
- over (from below).
You can tighten the knot slightly,
but leave room for the other cords to pass
through the loop.
|
|
| |
| |
|
|
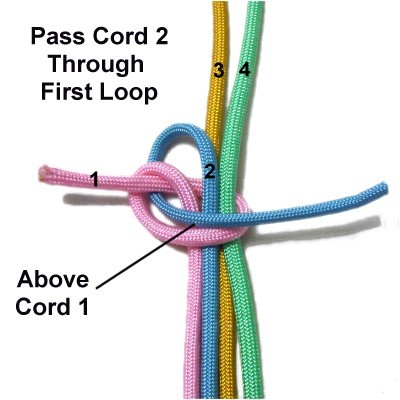
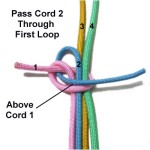
Step
2: Pass cord
2 through the first loop, then
bring it to the right to make a clockwise
loop.
Make sure cord 2 stays above
cord 1.
|
|
| |
|
|
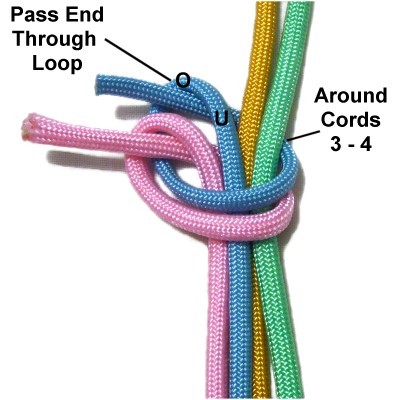
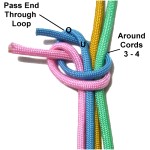
Bring cord 2
around cords 3 and 4 heading left.
Complete the Overhand knot by passing the
end through it's
own loop under
- over (from below).
|
|
| |
|
| |

|
|
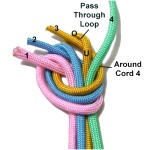
Step
3: Bring cord
3 through the loops made with
cords 1 and 2.
Move it to the right to make a clockwise
loop.
Make sure it stays above cord 2.
|
|
| |
|
| |
|
|
Bring the end
of cord 3 around cord 4 heading left.
Complete the Overhand knot by passing it
through it's own loop under
- over.
|
|
| |
|
| |
|
|
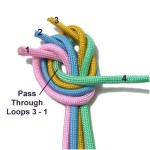
Step
4: Bring cord
4 through the loops made with
the other three cords (3 - 1).
Move it right to make the clockwise
loop.
|
|
| |
|
|
|
|
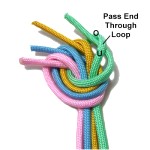
Complete the Overhand knot by passing
the end of cord 4 through it's own loop
under
- over.
|
|
| |
|
|
|
|
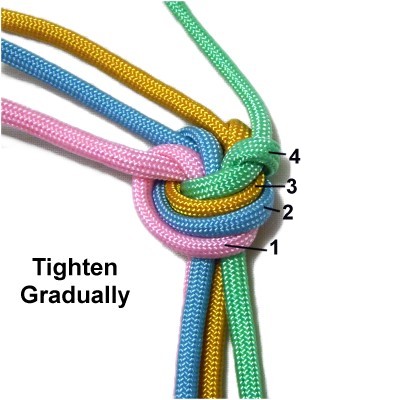
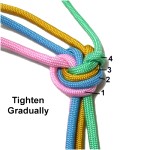
Step
5: Tighten the Matthew
Walker Knot slowly and gradually by
pulling on the ENDS coming out of the
loops.
You need to move two segments, so don't
tighten too much. The cords
should remain in the same order.
|
|
|
|
|
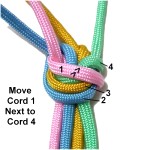
Step
6: Slide cord
1 over
cords 2 and 3, so it rests against cord 4.
|
|
| |
|
| |
|
|
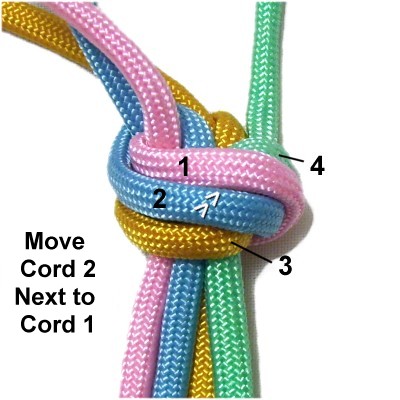
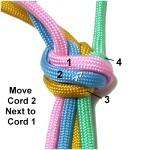
Step
7: Slide cord
2 over
cord 3, so it rests against cord 1.
The new arrangement is 4 - 1 - 2 - 3 (top
to bottom).
|
|
| |

|
|
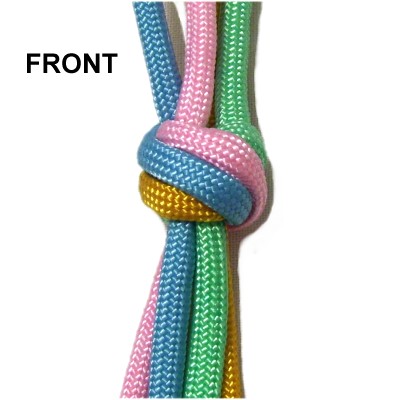
Step
8: Tighten all four cords
again, keeping them in order.
Remove all the slack this time, so the
knot is FIRM.
This image shows the front of the knot,
which is what you've seen as you
constructed it.
|
|
| |
|
| |
|
|
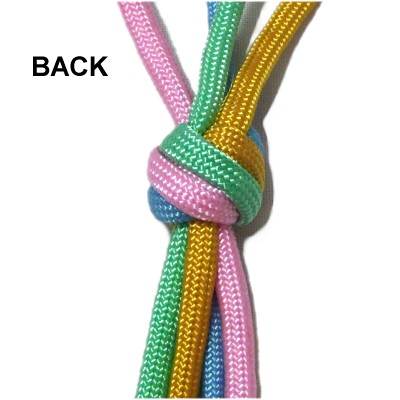
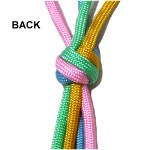
The back of
the Matthew Walker Knot looks like the
front, but the colors are in a different
order.
You can now cut off the excess material at
the top of the knot (optional).
|
|
| |
| |
|
|
| By using any
text or images on Free Macrame Patterns, you are
agreeing to our Terms of Use |
|
|
|
| Have
any comments about the Matthew Walker Knot? Contact
Me. |
|
|
|

|
|
|