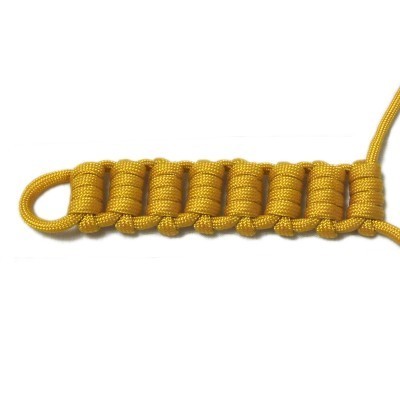
Ladder Strap
Description: The Ladder Strap
is a very unique decorative knot, suitable for
many Macrame projects. It can be used as
an interesting key chain, or for a bracelet,
belt, or dog collar.
This knot can be made with two separate cords,
if you want to use it in a Macrame design, such
as a plant hanger.
You should make it with one cord if you need a
loop at one end, as shown in the example.
The Ladder Strap is on the Fusion
Knots
Visit this site by clicking on the
image or link. There are video
instructions in the knot gallery.
To learn new and exciting knots to
experiment with, I highly recommend all
the books.
Preparation:
Cut one 60-inch cord, if you are practicing.15
x the finished length you plan to make.
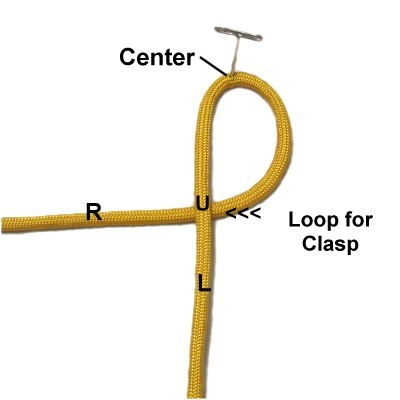
Step
1: Secure the cord to your board
at the center. The left
half should be vertical.right
half to the left to form a loop,
passing under
the left half of the cord.This loop is optional if you are using
two cords.
Make a bight by moving the right
half over
the left half.
Bring it forward slightly, then move it
back to the left, passing under
the left half. Secure the bight.
Designer's
Tip: The Ladder Strap is easier to
tie while holding the cord, so securing it to a
board is optional.
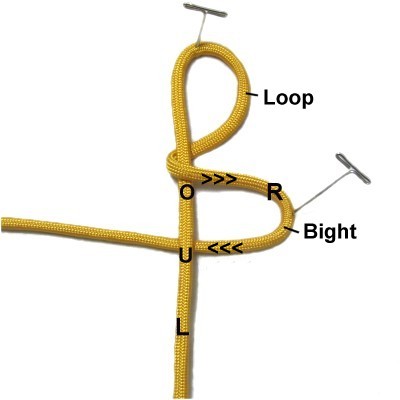
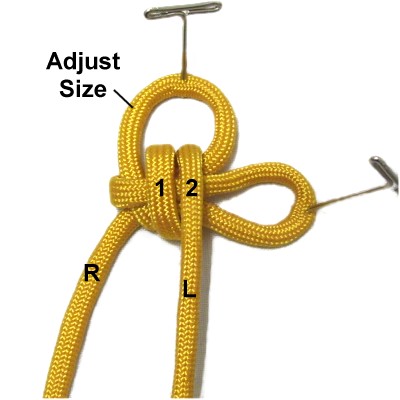
Step 2: Move the left
half backward, passing under
the bight and out through the
loop (vertically).
Move it forward, passing over
all three segments (see next image).
Adjust the size of the loop before
moving on to the next step.
Wrap the left
half of the cord around the three
segments again, to the right of the first
wrap.
You can wrap
the left half again, placing it to the
right of the others (optional).
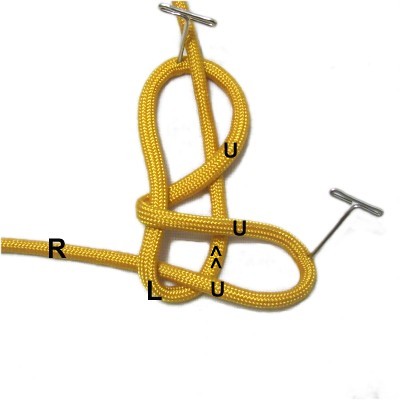
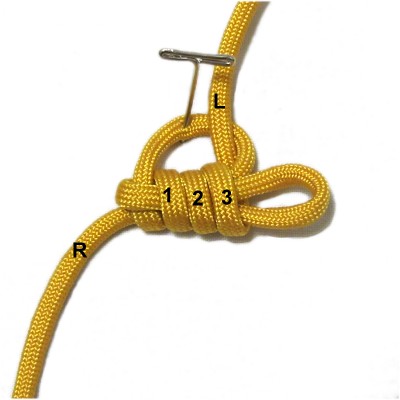
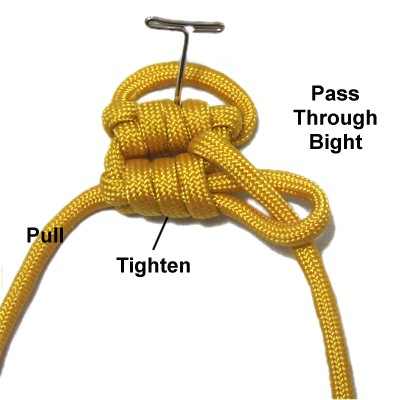
Step 3: Bring the left
half of the cord through the bight from
the top (over
- under ).
Adjust the size of the first loop if
necessary.
Tighten the wraps if they are loose.
Step 4: Tighten
the first knot by pulling on the right
half of the cord.
The bight will tighten around the left
half.
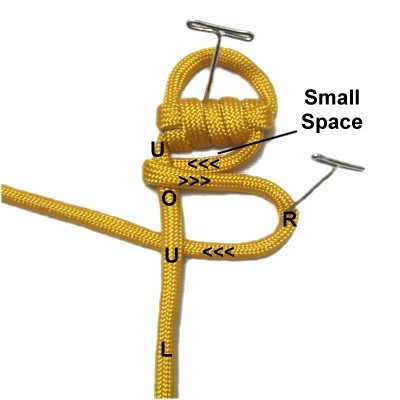
Step 5: Mentally
re-label the two halves where they
are resting now.
Repeat
Step 1 , creating the
horizontal bight.
Important:
There should be only a small amount
of space between previous knot and
this one.
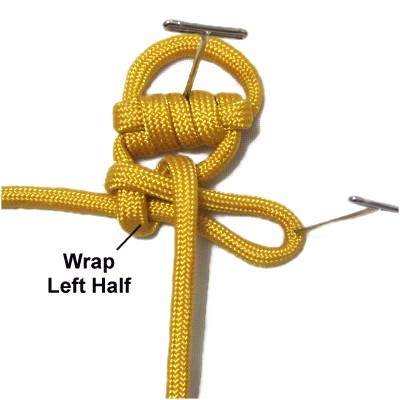
Step 6: Repeat
step 2.
Step 7: Repeat
steps 3 and 4.
Make
sure the wraps are firmly tightened
and the two knots are close
together.
Step
8: Repeat
steps 1 - 4 several more times,
until the Ladder Strap is the size you
want.
By using any text
or images on Free Macrame Patterns, you are
agreeing to our Terms of Use
Have
any comments about the Ladder Strap? Contact
Me.