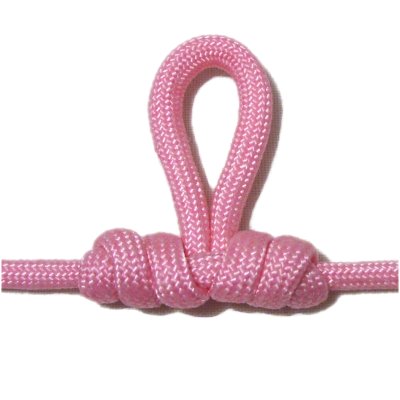
Description:
TheDrop
Loop is a unique way to make a stable
loop for a Macrame project.
What's nice about this loop design is that the
ends are horizontal
when you finish. You can use them as holding
cords, and mount other cords onto them as you
start your project.
By making the loop small, this technique can also
be used to make picots along the upper edges of
items like curtains and wall hangings. The
ends can be brought down vertically if necessary.
To practice the Drop Loop, you need one cord 36
inches long.
Paracord was used in the example shown. It
needs to be melted at the tips to prevent
unraveling.
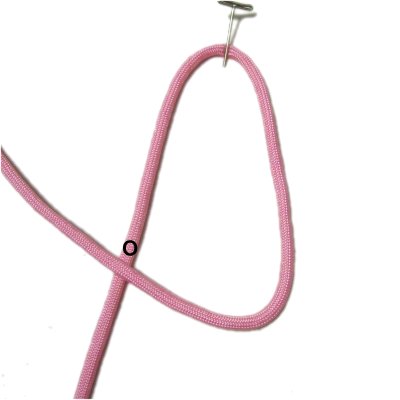
Step
1: Secure the center
of the cord to your board.
Move the right
half to the left, passing over
the left half of the cord.
It should be arranged diagonally as shown
in this image.
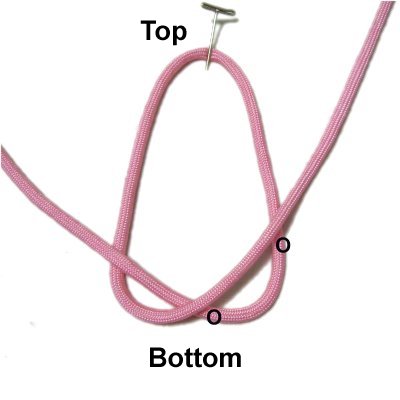
Step
2: Move the left
half of the cordover
the right half at two points -- in bottom
center area, and on the right.
The loop should be at
least 4 inches long, from the top
down to the crossed area at the bottom.
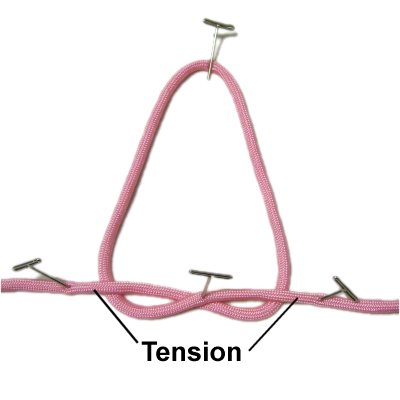
Step
3: Widen the bottom of the
loop so the area is around 3 inches wide.
Secure the crossed area.
Arrange the two ends horizontally, and
secure them so they have tension.
Step
4: Pull the top
of the loop towards the front of
your board (forward).
It should pass over
the crossed area at the bottom of the
loop.
Step
5: Temporarily remove the
pin at the crossed area. Make sure
you holdthe
cords, so they remain
crossed.
To complete the first
pair of small loops, move the top of the
large loop under
the crossed area, heading towards the back
of your board (backward).
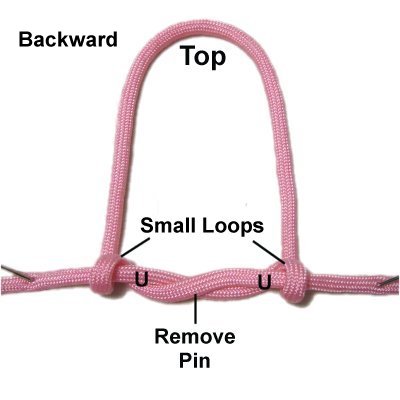
Step
6: Tighten the small loops
you just made.
Start the second pair by moving the top of
the Drop Loop forward,
passing over
the crossed area.
It should rest between
the first set of small loops (arrows).
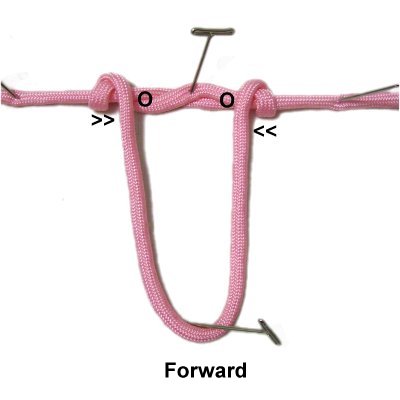
Step
7: Complete the second
pair of small loops by moving the top of
the large loop backward, passing under
the crossed area.
Step
8: Tighten the small loops
if necessary.
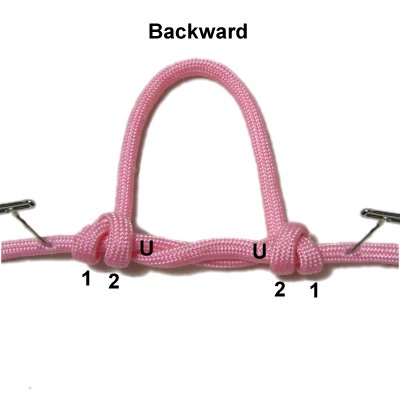
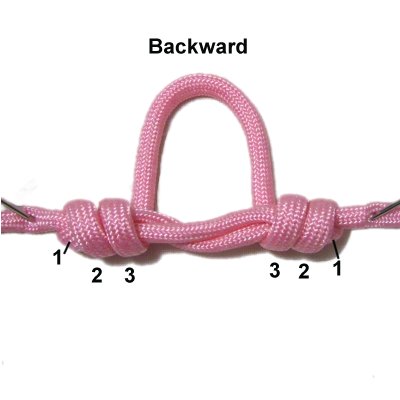
Start the third set by moving the large
loop forward, over
the crossed area.
It should rest between the other loops
(arrows).
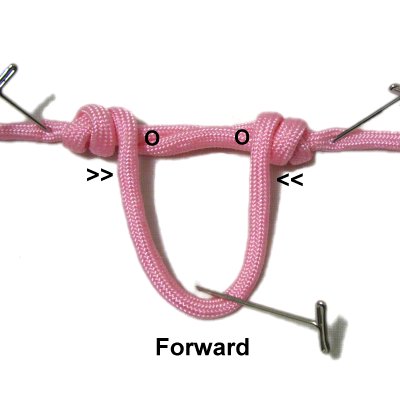
Step
9: Complete the third set of
small loops by moving the top of the large
loop under
the crossed area, heading backward.
The first set of loops may be partially
hidden at this point, and the crossed area
may have straightened. Don't worry
if this occurs, it's fine.
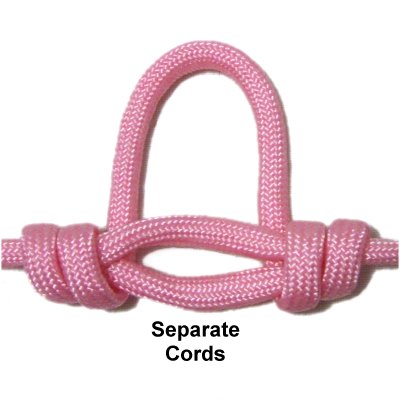
Step
10: Create a space by
separating the cords in the area where
they were crossed.
Step
11: Pass the top of the
large loop through the space from the
top.
It should pass over
the first segment and
under the segment closest to you.
Step
12: Tighten the Drop Loop
by pushing the small loops towards each
other.
Pull on the ends as well as the loop,
until all areas are firm and neat.
By
using any text or images on Free Macrame
Patterns, you are agreeing to ourTerms
of Use