|
|
| |

|
|
Description:
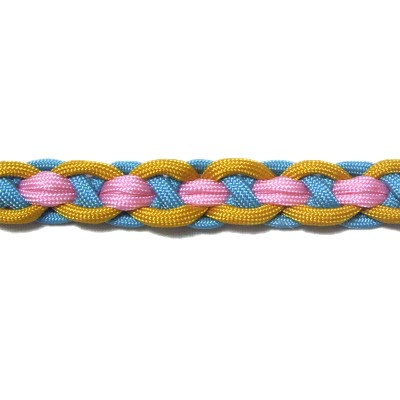
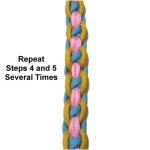
The Cross Braid features a series of loops that
cross over and under a holding cord. When
using three colors, it will look like links with
crossed elements inside.
This design has a loop at the top, so it can be
used as a bracelet or belt. You just add a
button knot or bead at the opposite end.
|
|
| |
|
| |
To practice, you need
3 cords, each at least 36 inches long. Using
three colors is very helpful.
When using the Cross Braid in a project, the cords
should be 4
x the finished size you wish to make.
|
| |
| |
| |
|
|
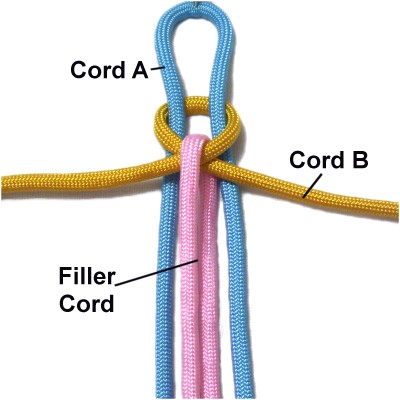
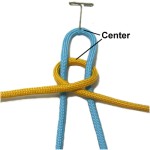
Step 1: Fold working
cord A in half and secure it
vertically (blue cord in image).
Place working
cord B around it, then make a
loop, crossing right over left.
Make sure the centers of both cords
line up, so they are balanced.
|
|
| |
| |

|
|
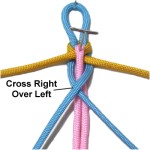
Step 2: Add the filler
cord by folding it around the
crossing point of the loop made by Cord
B, arranged vertically.
Arrange the two halves side-by-side, and
secure them near the front of your board. |
|
| |
|
Step 2,
continued: Tighten Cord B
and secure it at the crossing point.
Adjust Cord
A so it measures 1-inch from the fold to
cord B. That will be the loop you can use as
a clasp. |
|
|
| |
|
|
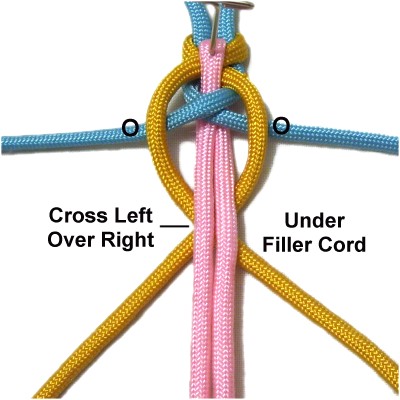
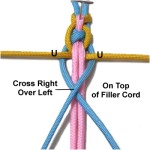
Step
3: Cross the two halves of
Cord
A right
over left, resting on
top of the filler cord.
Arrange them horizontally
after tightening the loop (see next
image). |
|
| |
|
| |

|
|
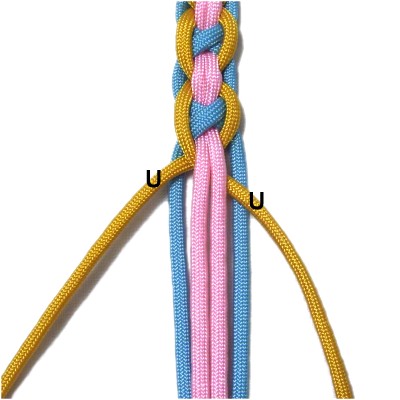
Step 4: Move the two
halves of Cord
B over
Cord A on both sides.
Bring them under
the filler cord, and cross left
over right to complete the
loop.
Arrange them horizontally, and tighten
the loop.
|
|
| |
|
|
Designer's
Tip: The concept for making the
Cross Braid has three elements:
- When using Cord B, you begin by passing over
Cord A. When using Cord A, you start by
passing under
Cord B.
- The loops made with Cord A rest on
top of the fillers. The loops made
with Cord B rest under
them.
- Cord B crosses left
over right, and Cord A crosses right
over left, to complete each loop.
|
|
|
| |
|
|
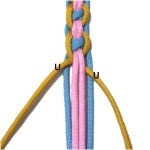
Step 5: Move
the two halves of Cord
A under
Cord B on both sides.
Make the loop by crossing right
over left, and arrange it on
top of the filler
cord.
Tighten the loop and arrange the two
halves horizontally. |
|
| |
|
| |
|
|
Step
6: Repeat
steps 4 and 5 several times.
The best place to stop is on Step
4.
This is optional, if you prefer to end
the braid with a different type of
finishing knot, which is what you will
be doing next.
|
|
| |
|
|
|
|
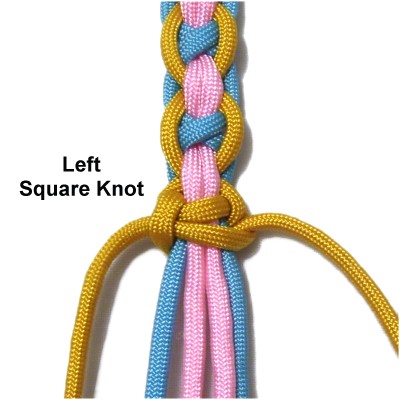
Step 7:
Move the two halves of Cord
A under
Cord B, but do not cross
them.
Keep them straight, resting beside the
filler cord.
|
|
| |
|
|

|
|
Step
8: Tie a LEFT SK with Cord
B, around the filler cord and the
two halves of Cord A.
The working cords can now be finished off
in the back of the Cross Braid.
Use the filler
cord to make a button knot, or to
attach a bead for the clasp.
|
|
|
|
|
|
| By using any
text or images on Free Macrame Patterns, you are
agreeing to our Terms of Use |
|
|
|
| Have
any comments about the Cross
Braid? Contact
Me. |
|
|
|

|
|
|
|