Be sure to visit his website, by
clicking on the link or image. The video
gallery contains tutorials for
a variety of very unique and appealing
knots.
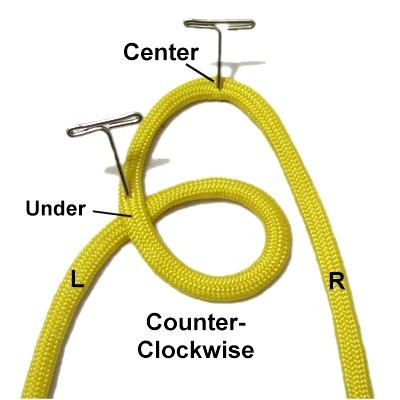
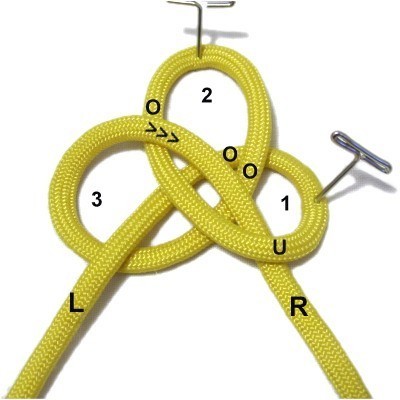
Step
1: Fold a 36-inch cord in half
and secure it to your board at the center.
Use the left half to make a counter-clockwise
loop, passing under
to make the crossing point.
Mentally label it loop 1.
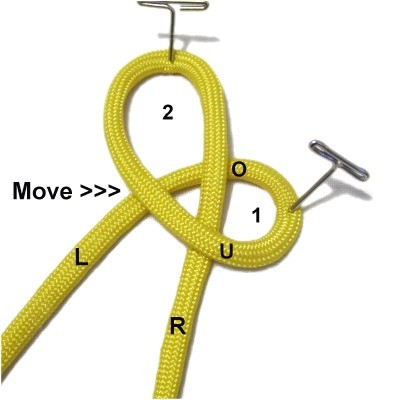
Step 2: Move loop
1 to the right and secure it at
the crook.
Move the right
half of the cord through loop
1, passing it over
- under the two segments.
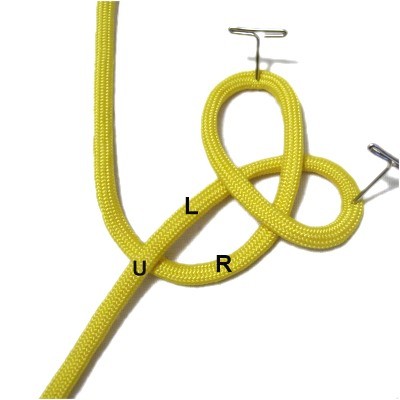
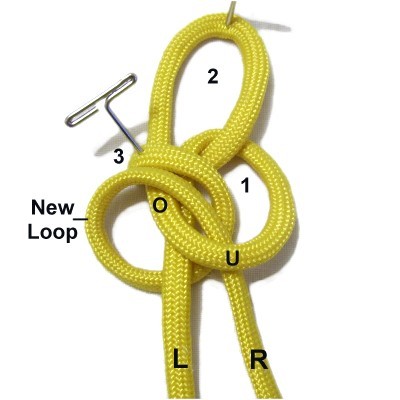
Step 3: Move the right
half of the cord under
the left half, as you curve it to the
left.
Step
4: Create the third loop by
moving the right
half of the cord clockwise,
passing over
the three segments in the center area.
Bring it through loop 1, passing under
the segment in front (closest to you).
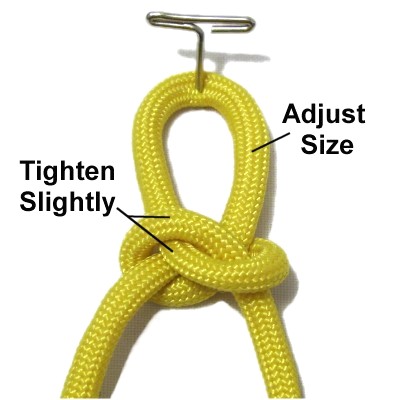
Tighten
this portion of the
Clasped Hands Knotslightly,by pulling on the ends.
Adjust the size of loop
2, so it's close to the size
you want to end up with.
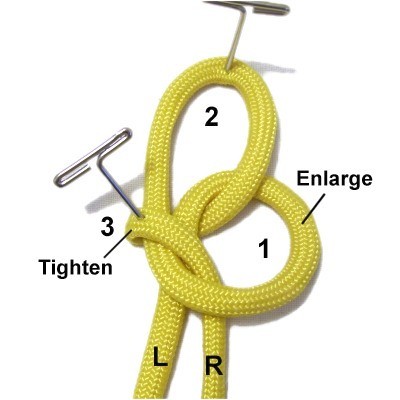
Tighten loop
3 a bit more, then secure it.
Loosen and enlarge loop
1.
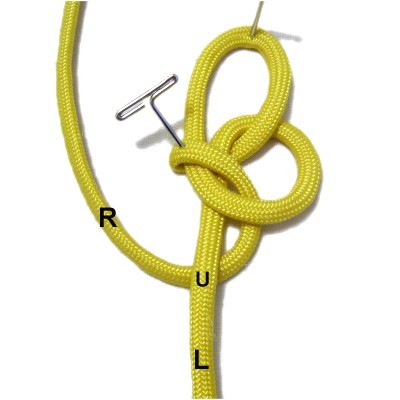
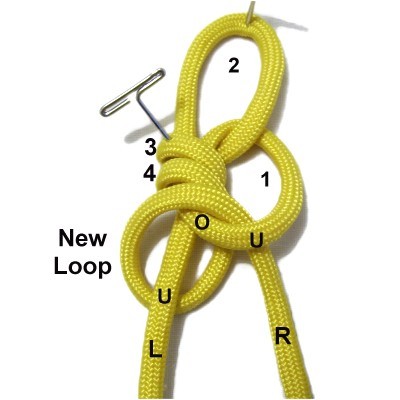
Step
5: Move the right half of
the cord under
the left half, heading left.
Step 6: Make a new
loop (4) by passing the right
half of the cord through loop
1over
- under, rotating clockwise.
This loop should rest in front of loop
3, which is secured.
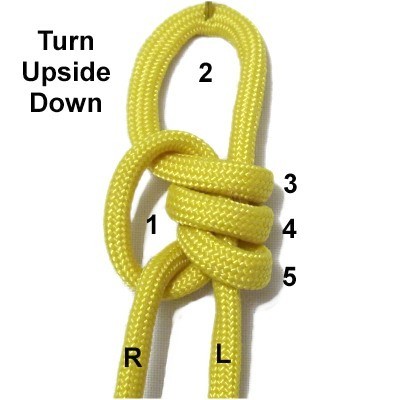
Step 7:Repeat
Steps 5 and 6 to make one
more clockwise
loop (5).
It
should rest in front of loops 3 and
4.
Turn the first
half of the Clasped Hands Knot upside
down. Mentally label
all the loops you have made in the
previous steps, as shown in this image.
You will use the left half of the cord in
the following steps, which is now on the
right.
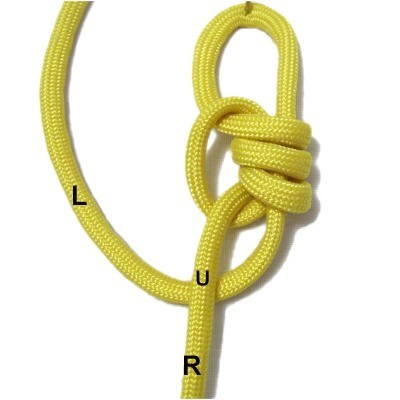
Step
8: Pass the left half of the cord
under
the right half, as you move it to the
left.
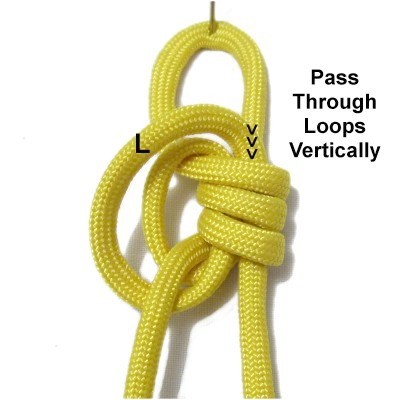
Step 9: Moving clockwise,
bring the left half of the cord to the
right. Pass it through all three loops
vertically. You may need to use
pliers or tweezers.
This creates another loop on the left,
which should rest in front of loop 1.
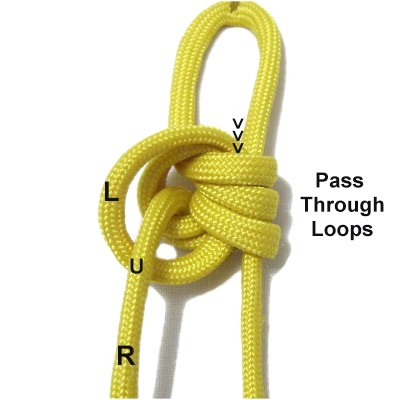
Step
10:Repeat
steps 8 and 9 to make another
loop.
It should rest in front of the two loops
on the left side of the knot.
Step 11:
Tighten the Clasped Hands Knot by pulling
on the ends
more than loop 2, so it does not
become too large.
Adjust the coils as needed so the knot
looks neat.
By
using any text or images on Free Macrame
Patterns, you are agreeing to ourTerms
of Use