|
|
| |
 |
| |
| |
|
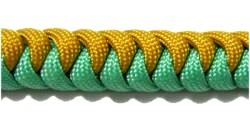
Description: The Chinese Snake
Knot symbolizes good fortune. In ancient
Chinese culture the snake is considered the
guardian of treasure and riches. It's also
a symbol of wisdom and strength.
This beautiful and unique decorative knot can
be used to make a purse handle, a choker-style
necklace, a belt or a bracelet. You
can make it with heavy rope and connect the ends
if you want a wreath.
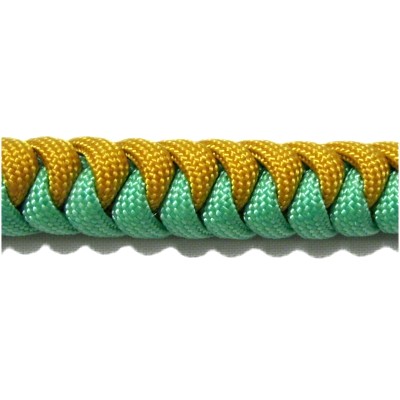
The sennit is not flat, especially if you make
it with thick material like the Paracord shown
in the example.
|
| |
| |
|
| |
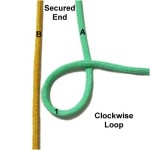
Step
1: You need two cords of different
colors to practice, which should be at least 36
inches long.
Secure one end of both cords to your project
board, arranged vertically. |
|
|
| |
|
|
Mentally label the cords A and B as
shown.
Make a clockwise
loop with cord A,
which is on the right.
|
|
| |
|
| |
|
|
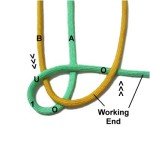
Start the second loop by moving cord
B through the first loop under
- over.
Pass it over
the working end of cord A, heading
towards the back of the board
(backward).
|
|
| |
|
| |
|
|
Rotate
cord
B counter-clockwise,
moving it under
the secured end of cord A.
Pass it through loop
1 under
- over - over.
|
|
| |
|
| |
|
|
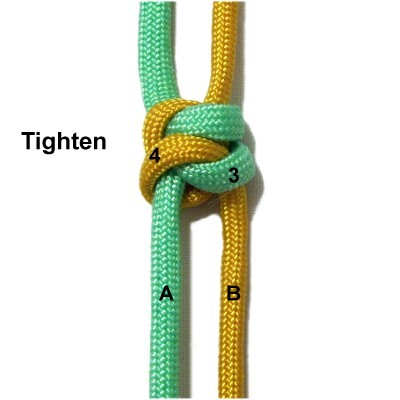
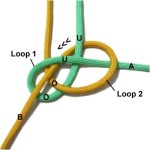
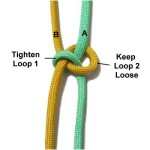
Step
2: Tighten loop
1
by pulling on the working end of cord
A.
Loop
2 should remain a little loose,
but tighten it most of the way.
|
|
| |
|
|
Designer's
Tip: Work with the material so that
the loops FOLD neatly without twists or
kinks.
This is important if you are using Paracord or
other material that is flat rather than
round. |
|
|
| |
|
|
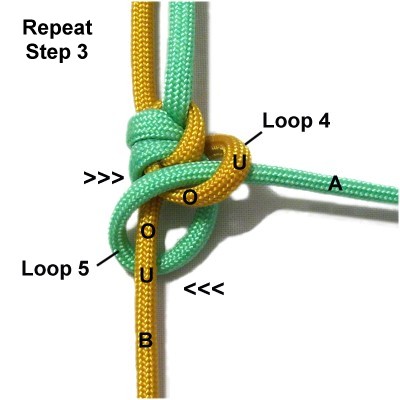
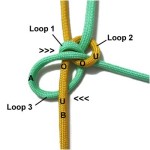
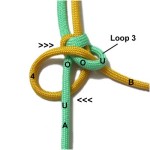
Step
3: Make loop
3 by moving cord
A under cord
B, heading left.
Fold it to the right, passing it over
the working end of cord B, then through
loop
2 over
- under.
|
|
| |
|
| |
|
|
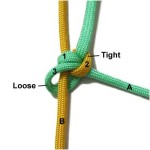
Tighten both
loops, sliding loop 3 forward so it
rests against loop 1 without
overlapping.
Pull loop
3 to loosen it slightly.
|
|
| |
|
|
|
|
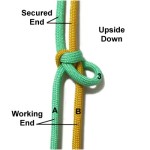
Turn the
Chinese Snake Knot upside
down, so cord
B is
on the right.
The working end of the cords should stay
in the same place, heading toward you.
|
|
|
| |
|
|
Step 4: To make
loop 4, move cord
B to the left, passing it under
the working end of cord A.
Move it to the right, passing it over
cord A and through loop
3 over
- under.
|
|
| |
|
| |

|
|
Tighten loops 3
and 4 by pulling on the working ends.
Tightening both loops
helps to make sure the Chinese
Snake Knot is balanced.
|
|
| |
|
| |
|
|
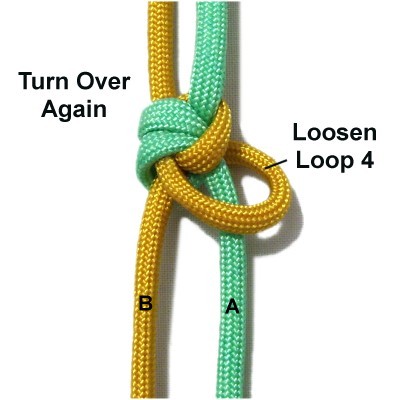
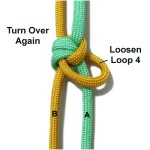
Step 5: Turn
the Chinese Snake Knot over again, so cord
A is on the right.
Pull loop
4 to loosen it slightly.
|
|
| |