|
|
| |
|
|
|
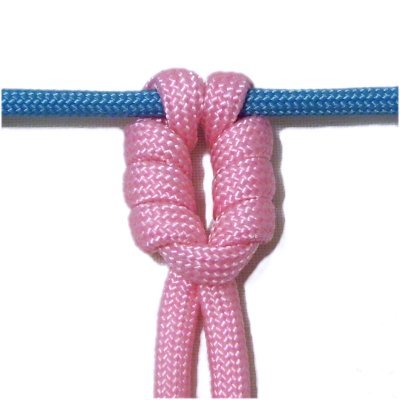
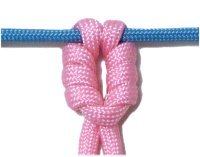
Description:
The Cats Paw Hitch is a unique way to attach cords
to a holding cord, ring, or dowel. The best
time to use it is during the mounting process, at
the beginning of a Macrame project.
You can make it shorter or longer, simply by
changing the number of loops you make in the
directions below.
The Mini Cats Paw is a variation, which is also
described on this page. It can be use
anywhere a Larks Head knot is called for in a
Macrame pattern.
|
| |
| |
| |
| |
Preparation:
Secure a holding cord to your board
horizontally. Make sure it is stretched, so
it has tension.
When practicing, the working cord should be at
least 18 inches long. Try to use 4mm size
material if you can. |
| |
| |
|
|
|
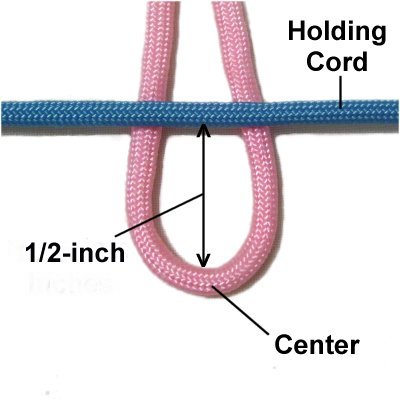
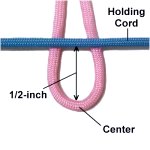
Step
1: Fold the working cord in
half and place it under
the holding cord, arranged vertically.
The center point should be 1/2 inches from
the holding cord if you are using 4mm size
material.
(See information below if you are using
other sizes) |
|
| |
| |
Designer's
Tip:
When using 6mm
size cord material, the center of the
working cord should be 1-inch from the holding
cord.
For 2mm size
material, it should be 1/4-inch.
For other sizes, multiply the diameter of the
material x 3, then convert that result to inches
(25mm = 1-inch).
|
| |
| |

|
|
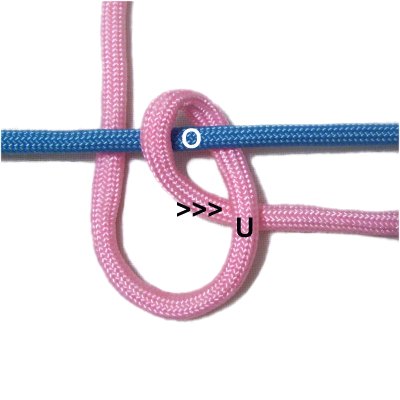
Step
2: Bring the right
half of the working cord forward,
passing over
the holding cord.
Bring it under
the right side of the folded area, heading
left to right.
|
|
| |
| |
| |
|
|
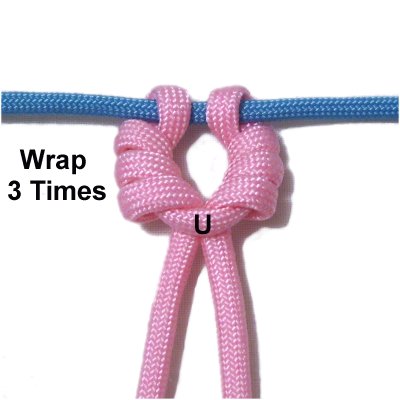
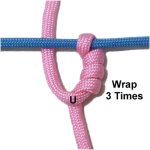
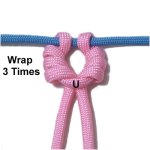
Step
3: Wrap the right
half of the working cord around
the right side of the folded area three
times.
Wrap snugly without overlapping.
Bring the cord under
the center area when you are through.
|
|
| |
|
|
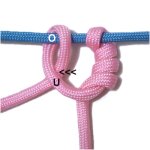
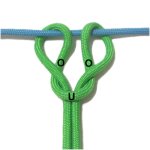
Designer's
Tip: Your goal is to get the last
wrap as close as possible to the center of the
cord. Otherwise the Cats Paw Hitch will be
harder to tighten.
In the image above, the "U" is written at the
center. You can see clearly there is no
extra space, since the cord passes right under it.
Adjust the other half of the cord to eliminate any
extra space you might have. |
|
|
| |
|
|
Step
4: Bring the left
half of the cord down, passing over
the holding cord.
Move it under
the left side of the folded area, heading
right to left.
|
|
| |
|
| |
|
|
Step
5: Wrap the left
half of the working cord around
the left side of the folded area three
times.
Make sure the coils don't overlap.
Bring the cord under
the center area when you are through.
|
|
| |
|
|
|
|
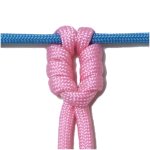
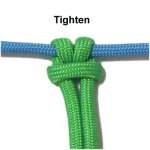
Step
6: Tighten and adjust
the Cats Paw Hitch until it looks like
this image.
The loops around the holding cord
should be close together.
The remaining material can now be used
to make other knots.
|
|
| |
|
|
|

|
|
Mini Cats Paw
|
|
 |
| |
|
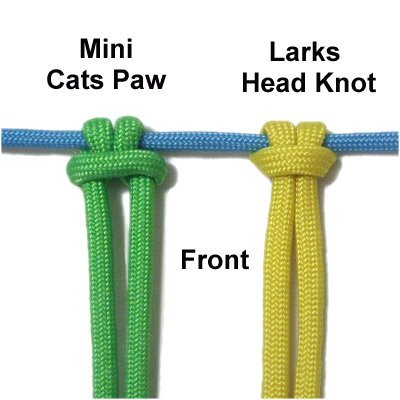
Description:
This decorative knot is related to the Cats Paw
Hitch. The difference is that no wrapping
occurs.
I've named it the Mini Cats Paw, since I have
never been able to determine it's official
name. Contact me
if you know it's real name. |
| |
| |

|
|
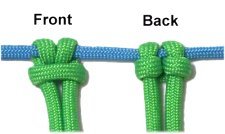
This technique
can be used as a substitute for a Larks
Head knot.
The front resembles the Larks Head, but
the horizontal segment (head) is wider. |
|
|
|
| |

|
|
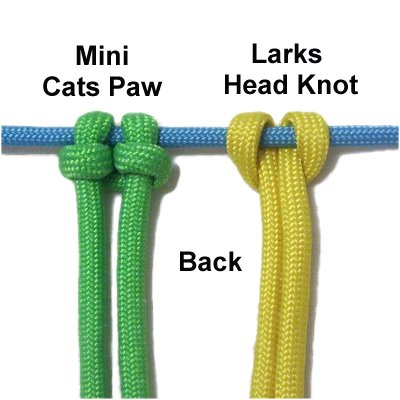
The back of
the Mini Cats Paw is very different than
the back of a Larks Head knot (reverse
LH).
Keep that in mind if you plan to use it in
a Macrame project. |
|
|
|
|
|
Preparation:
Secure one holding cord to your board
horizontally. Stretch it so it has tension.
To practice, you also need one working cord at
least 12 inches long.
|
|
|
|

|
|
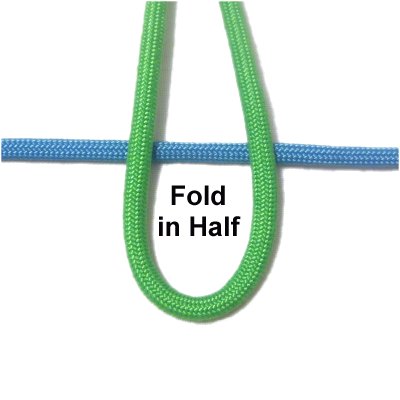
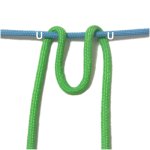
Step
1: Fold the working cord in
half and place it on top of the holding
cord vertically. |
|
|
|
|
|
Step
2: Move both halves of the
working cord under
the holding cord. |
|
|
|
|
|
Step
3: Move both halves inside
the folded area, passing over
the right and left segments.
Bring them under
the center fold.
|
|
| |
|
|
|
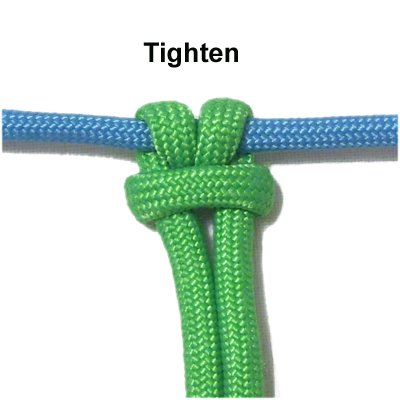
Step
4: Tighten the knot by
pulling on both halves of the cord gradually.
|
|
|
| |
| |
|
|
| By using any
text or images on Free Macrame Patterns, you are
agreeing to our Terms of Use |
|
|
|
| Have
any comments about the Cats Paw Hitch? Contact
Me. |
|
|
|
|
|
|
|